A Cylindrical Profile Measurement Model for Large-Scale High-Speed Rotary Equipment
A technology for measuring models and cylinders, applied in measuring devices, complex mathematical operations, instruments, etc., can solve problems such as offset errors affecting the sensor probe, influence, and the axis of the sensor ball support rod cannot be guaranteed, so as to improve ultra-precision measurement. Accuracy, the effect of avoiding principle flaws
- Summary
- Abstract
- Description
- Claims
- Application Information
AI Technical Summary
Problems solved by technology
Method used
Image
Examples
Embodiment 1
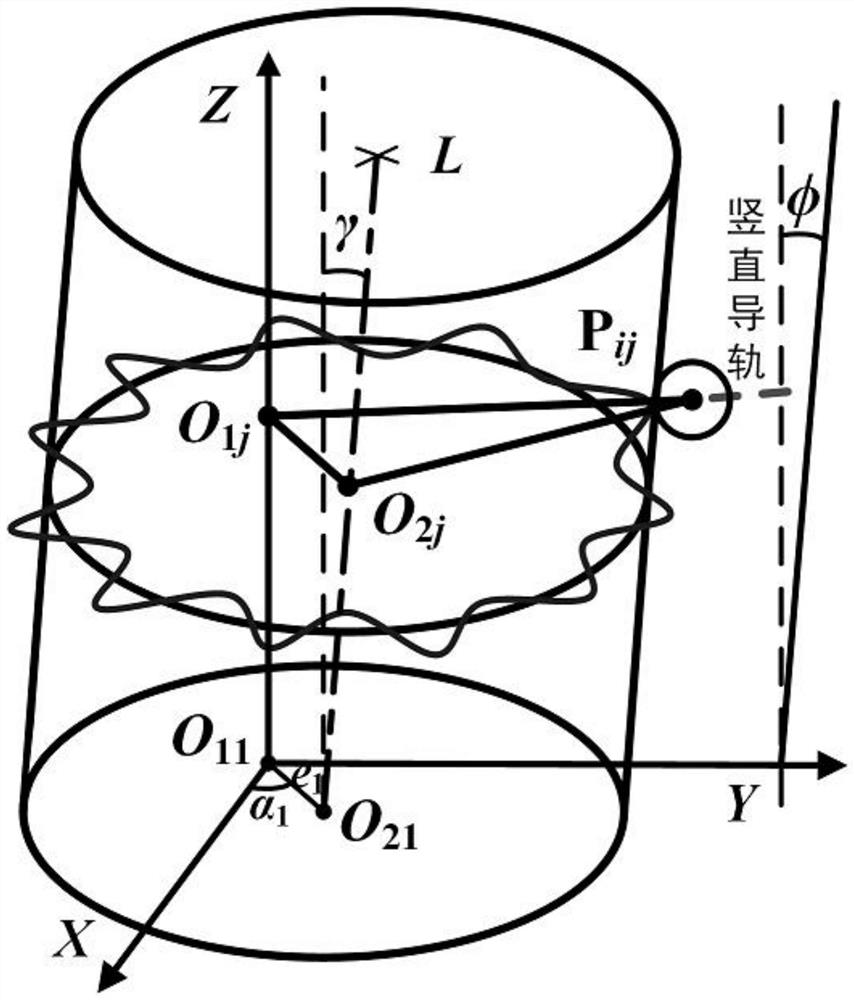
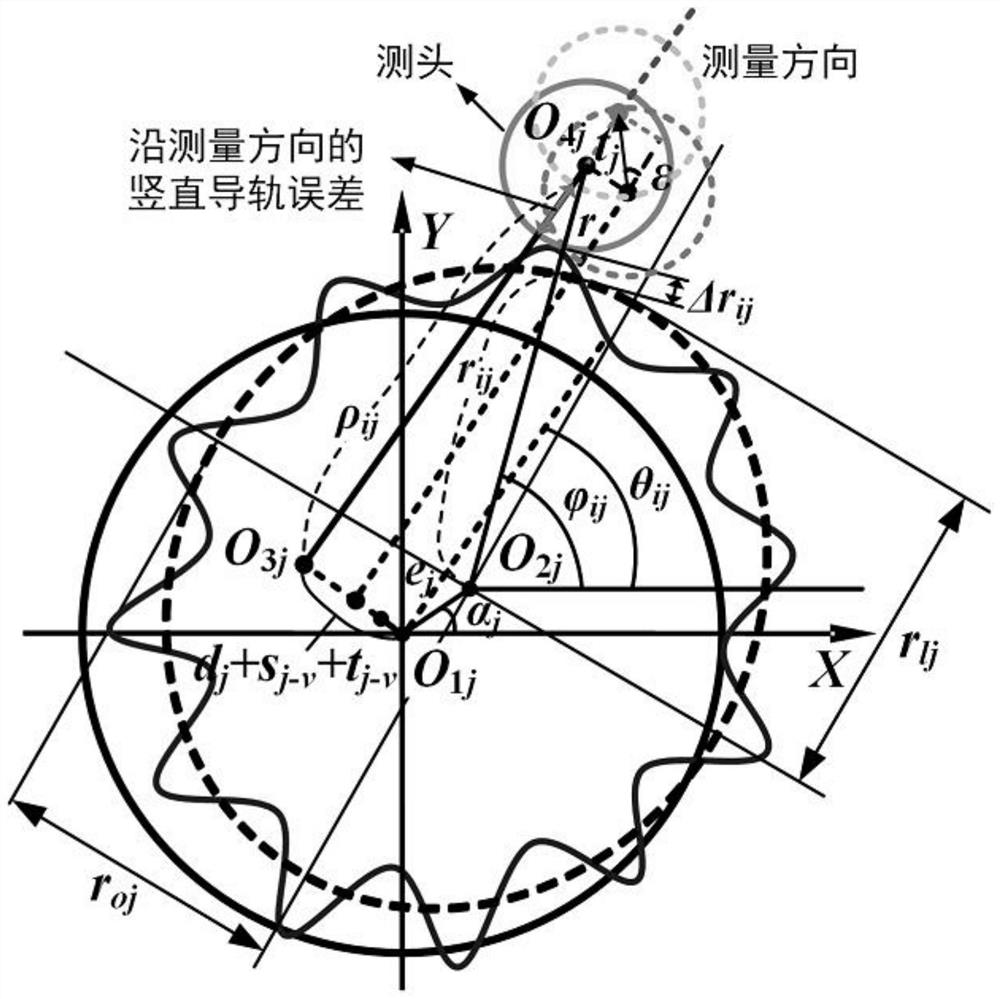
[0030] A cylindrical profile measurement model for large-scale high-speed rotary equipment based on multiple offset errors. The measurement model includes seven offset error components, which are the eccentric error (α, e), which is the difference between the center of the base surface of the test piece and the center of rotation of the turntable. Deviation, geometric axis tilt error γ, sensor head offset error d j (j=1,2,...,p, p is the number of sampling sections), the sensor ball radius r, the sensor head rod tilt error The tilt error w of the axis of the horizontal guide rail and the tilt error φ of the axis of the vertical guide rail, the measurement model at different height sections of the cylindrical profile is:
[0031]
[0032] In the formula, ρ ij —The jth section i on the cylindrical profile of the tested piece, i=1, 2,...,n, n is the number of sampling points of each section, from the measuring point to the instantaneous measurement center O 3j distance; Δr ...
Embodiment 2
[0046] Such as figure 1 , figure 2 Shown is the seven-offset error cylinder profile measurement model proposed by the present invention, which improves the cylinder profile measurement model by introducing a new error source on the basis of the two-parameter cylinder profile measurement model. The geometric center of the base surface of the tested piece O 21 Impossible and turntable center of rotation O 11 The overall eccentricity error (α, e) is introduced due to complete coincidence; when there is an angle γ between the geometric axis of the test piece and the rotary axis of the turntable, it will not only bring about the secondary eccentricity of the sections at different heights, but also make each section ellipse; the sensor The measuring line does not pass through the measuring center of gyration O 1j The probe offset error caused by d j It will also affect the measurement results, causing the sensor to measure not relative to the measurement center of rotation O 1...
PUM
 Abstract
Description
Claims
Application Information


