Process for repairing worn discharging head of rotor scale
A technology of discharge head and material head, which is applied in the direction of manufacturing tools, metal processing equipment, welding equipment, etc., can solve the problems of easy perforation, serious parts erosion, and affect the comprehensive production capacity of equipment, so as to save procurement costs and solve the problem of using Effect of short life and improved wear resistance
- Summary
- Abstract
- Description
- Claims
- Application Information
AI Technical Summary
Problems solved by technology
Method used
Image
Examples
Embodiment 1
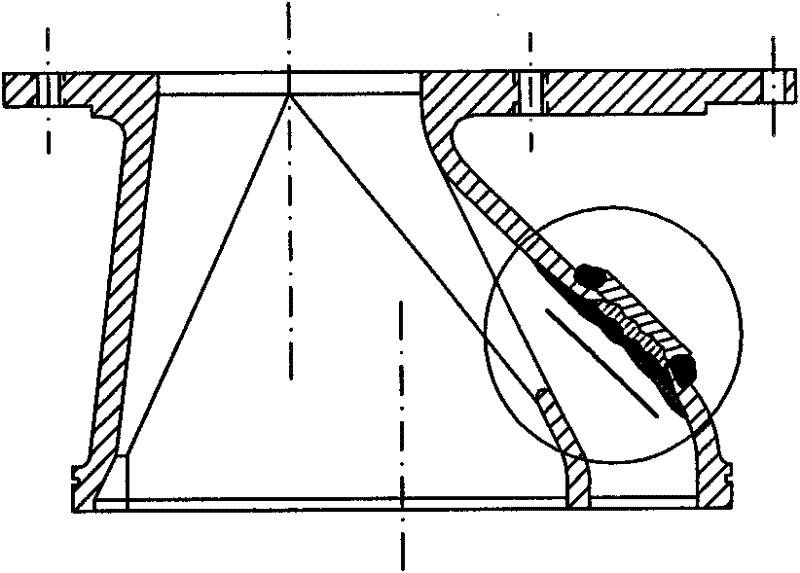
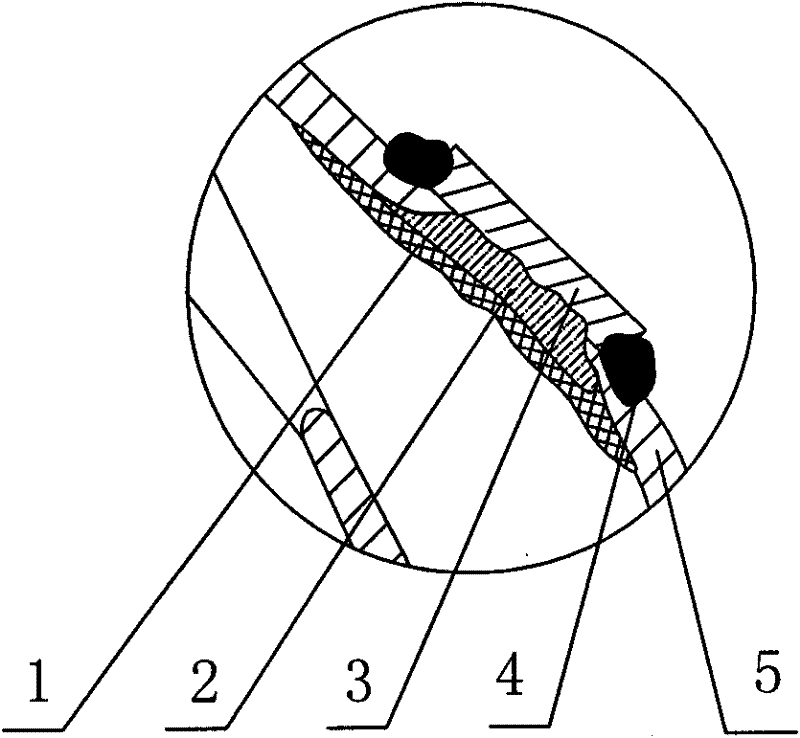
[0020] Refer to attached Figure 1~2 :
[0021] For the discharge head 5 that has been ground and perforated after a period of use, firstly weld a 6mm thick steel plate 3 on the outside of the perforated part of the discharge head 5 when repairing. Solder fixed. Then use J422 welding rod to repair the inner side of the worn part of the discharge head 5 layer by layer until the thickness of the repair welding layer 2 is close to the thickness of the original discharge head or 3mm lower than the original thickness, and the progress of the layer-by-layer welding repair process Don't be too fast. After each layer is welded, the temperature should be reduced to no dark red, and the coating should be cleaned before the next layer can be repaired, so that there is no need to grind the weld during welding. Finally, a layer of high manganese alloy wear-resistant surfacing layer 1 is surfacing on the repair welding layer 2. The thickness of the wear-resistant surfacing layer 1 is 3 to...
Embodiment 2
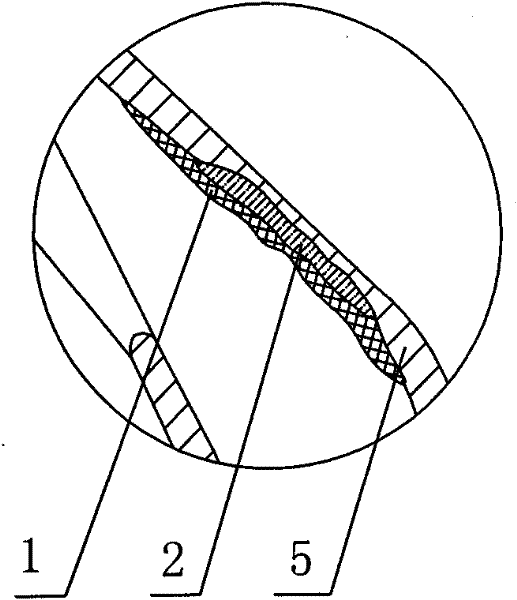
[0023] Refer to attached image 3 :
[0024] For the discharge head with severe wear and depth greater than 4mm but without grinding and perforation, use J422 welding rod to repair the inner side of the worn part of the discharge head layer by layer until the thickness of the repair welding layer 2 is close to the thickness of the original discharge head or lower. Due to the original thickness of 3mm, the progress of welding repair layer by layer should not be too fast. After each layer is welded, the temperature should be reduced to no dark red, and the coating should be cleaned before the next layer can be repaired, so that there is no need to grind the weld during welding; finally A layer of high manganese alloy wear-resistant surfacing layer 1 is surfacing on the repairing welding layer 2. The thickness of the wear-resistant surfacing layer 1 is 3-5mm. The welding rod used is D256. The surfacing layer should be as uniform as possible. A small amount of cracks is normal Af...
Embodiment 3
[0026] Refer to attached Figure 4 :
[0027] For a wear depth less than 4mm or a brand-new discharge head, a wear-resistant surfacing layer 1 is welded on the inner side of the easily worn part. The wear-resistant surfacing layer 1 is a layer of high manganese alloy surfacing layer. The thickness of the wear-resistant surfacing layer 1 3~5mm, the welding rod used is D256, the surfacing layer should be as uniform as possible, and a small amount of cracks is normal and does not affect the use.
PUM
| Property | Measurement | Unit |
|---|---|---|
| thickness | aaaaa | aaaaa |
Abstract
Description
Claims
Application Information


