Hydraulic ring geological crack measuring device
A measuring device and geology technology, applied in the direction of measuring device, mechanical measuring device, using mechanical device, etc., can solve the problems of difficult measurement, large width, large bending degree, etc., and achieve the effect of maintaining a safe distance
- Summary
- Abstract
- Description
- Claims
- Application Information
AI Technical Summary
Problems solved by technology
Method used
Image
Examples
Embodiment 1
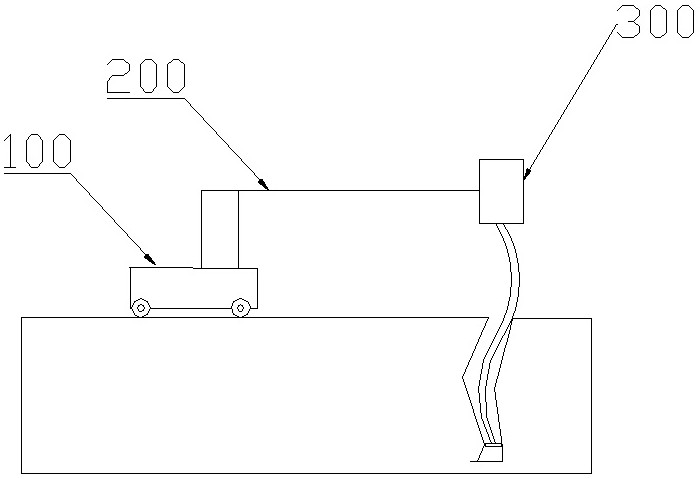
[0057] In the prior art, the staff needs to approach the cracks at close range to measure during manual hand-held measurement, which is prone to danger during the measurement, and then the staff can keep a safe distance from the cracks by remotely controlling the movement of the car body and the contraction of the scissors.
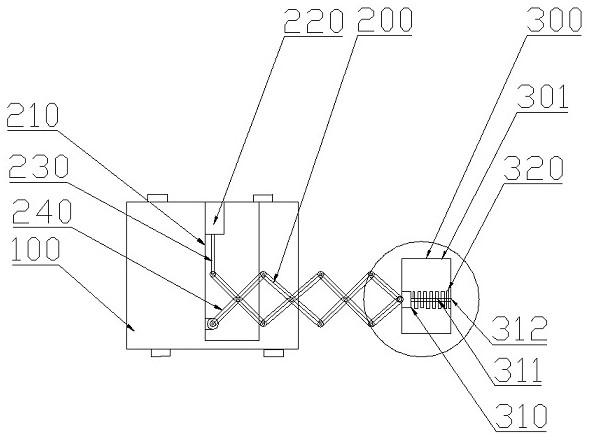
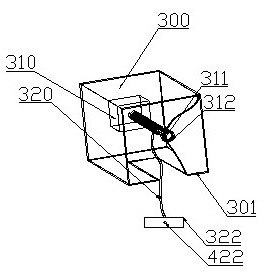
[0058] like Figure 1 to Figure 4 As shown, a hydraulic annulus geological fracture measurement device of the present application includes the whole equipment including a car body 100, a telescopic assembly 200 and an extension assembly 300;
[0059]The car body 100, as a mobile carrying device, can be moved to the detection position by remote control;
[0060] The telescopic assembly 200 is used to drive the extension assembly 300 to move, and the telescopic assembly 200 is fixed on the vehicle body;
[0061] The telescopic assembly 200 includes a support assembly 210, an air pump 220, a telescopic rod 230, and scissors 240;
[0062] The support assemb...
Embodiment 2
[0080] In actual use, the measuring probe 422 is located at the bottom of the soft capsule body 320, and when inserted into the crack, when the cross section of the soft capsule body 320 is circular, it is easy to twist with the angle of the surface of the crack, so that the detection end is at the bottom of the crack. The position state is not easy to control, and the detection results are relatively random.
[0081] Therefore, the soft capsule body 320 is further improved by adding a connecting band 321, a rectangular parallelepiped block 322, a groove 3223, a hemispherical airbag 330, a rectangular parallelepiped airbag 331, and a rotary probe 324;
[0082] like Figure 5 to Figure 9 As shown, the connecting belt 321 is a rectangular soft belt, which is used as a positioning basis to reduce the randomness of the overturning of the detection end;
[0083] The cuboid block 322 fixes the surface of the connecting band 321, and there are multiple cuboid blocks 322 arranged in ...
Embodiment 3
[0093] There are many ways to measure. In the actual practical process of laser measurement, the cuboid block will be slightly twisted. Since the laser measurement device is set on the side of the cuboid block, the laser measurement method is point-to-point ray measurement. When using laser measurement, there will be When the measured value is too large (such as Figure 9 ) Therefore, the method of laser measurement is added at the same time, and the method of inflating and stretching the bellows airbag, and then pulling the tape measure is used as a measurement reference.
[0094] The measurement probe 422 is further improved by adding a storage cavity 4222, a bellows air bag 4223, a tape measure 430, a buckle assembly 431, a one-way valve 440, a first telescopic rod 441, and a button switch 442;
[0095] like Figure 10 to Figure 12 As shown, the storage cavity 4222 is used to store components when they reach the specified position, so that the internal components will not ...
PUM
 Abstract
Description
Claims
Application Information


