Method for measuring J integration of cracks on basis of digital-image correlation
A technology of digital image, measurement method, applied in the direction of testing material strength by applying stable tension/compression
- Summary
- Abstract
- Description
- Claims
- Application Information
AI Technical Summary
Problems solved by technology
Method used
Image
Examples
Embodiment Construction
[0032] The specific implementation manners of the present invention will be described in detail below in conjunction with the accompanying drawings.
[0033] The present invention needs to obtain material constants before calculating the J integral containing crack defects. Select 304 stainless steel to prepare standard specimens for tensile experiments, and perform uniaxial tension on the standard tensile specimens to obtain the stress-strain curves and material constants of the specimen materials, including: elastic modulus E = 195.1GPa, Poisson Ratio μ=0.267, yield stress σ 0 =279MPa, yield strain ε 0 = 0.00143.
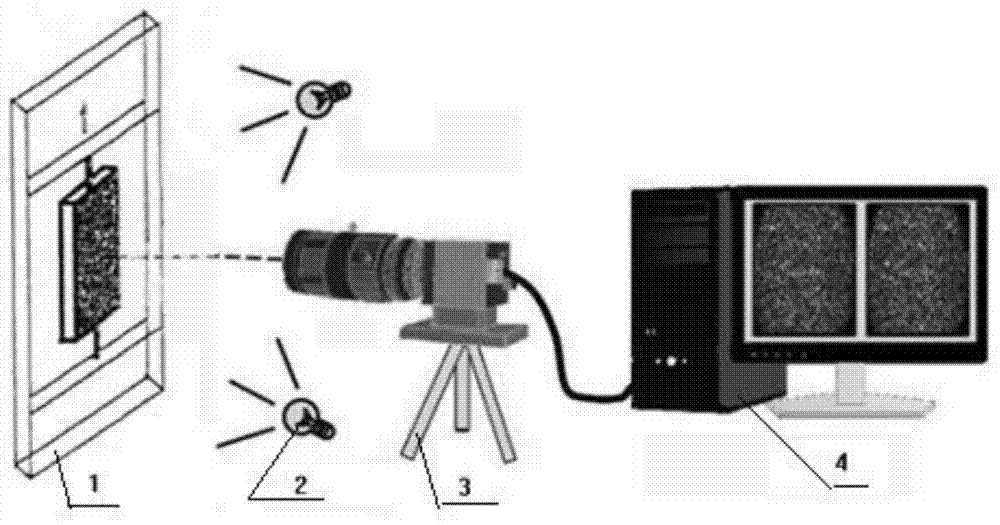
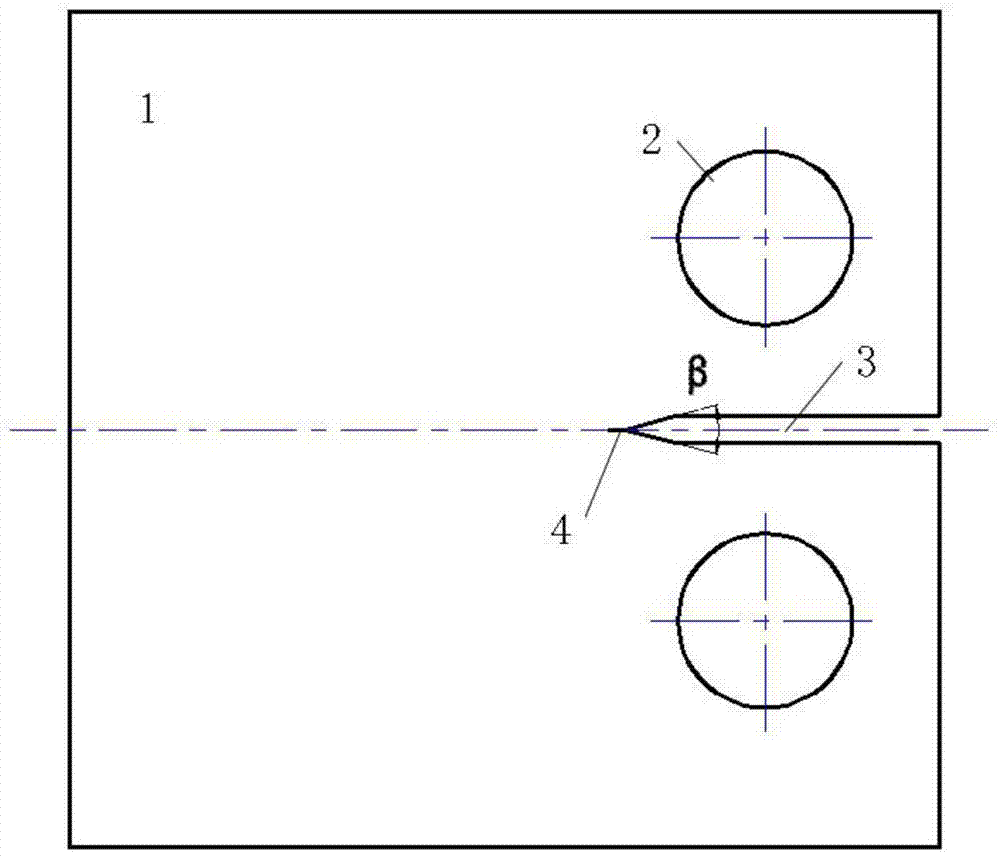
[0034] Build an experimental system such as figure 1 As shown, the compact tensile standard specimen 1 is prepared, and a 2mm crack is prefabricated, such as figure 2 shown. Before the tensile test, it is necessary to use black and white matte paint to prepare black and white speckles on the surface of the specimen. First, spray a layer of white matte paint ...
PUM
| Property | Measurement | Unit |
|---|---|---|
| elastic modulus | aaaaa | aaaaa |
| yield stress | aaaaa | aaaaa |
Abstract
Description
Claims
Application Information


