A special measuring tool for measuring keyway symmetry of shaft parts
A technology for shaft parts and symmetry, which is applied in the field of special measuring tools for the measurement of keyway symmetry of shaft parts, which can solve the problems of affecting efficiency, trouble, and high labor costs.
- Summary
- Abstract
- Description
- Claims
- Application Information
AI Technical Summary
Problems solved by technology
Method used
Image
Examples
Embodiment 1
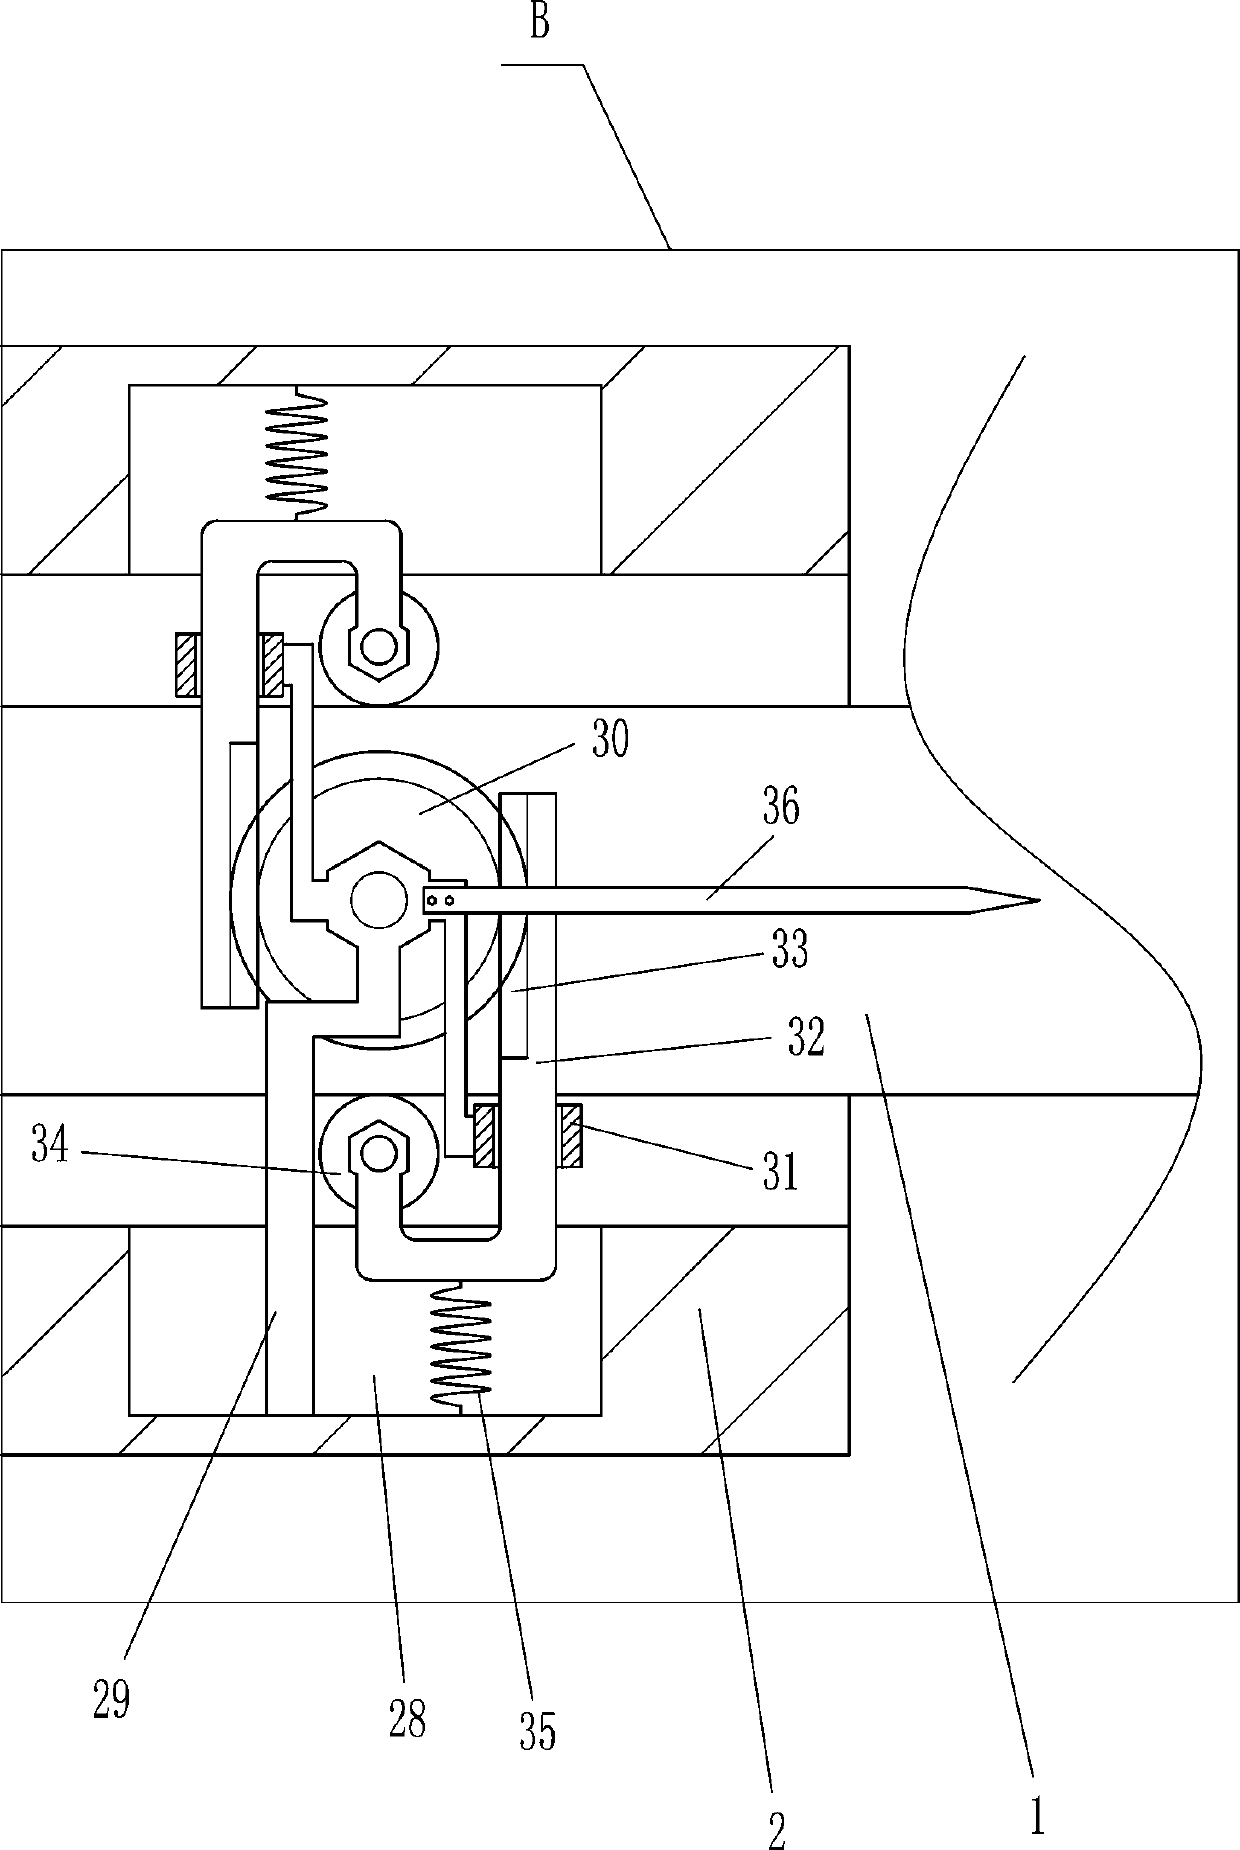
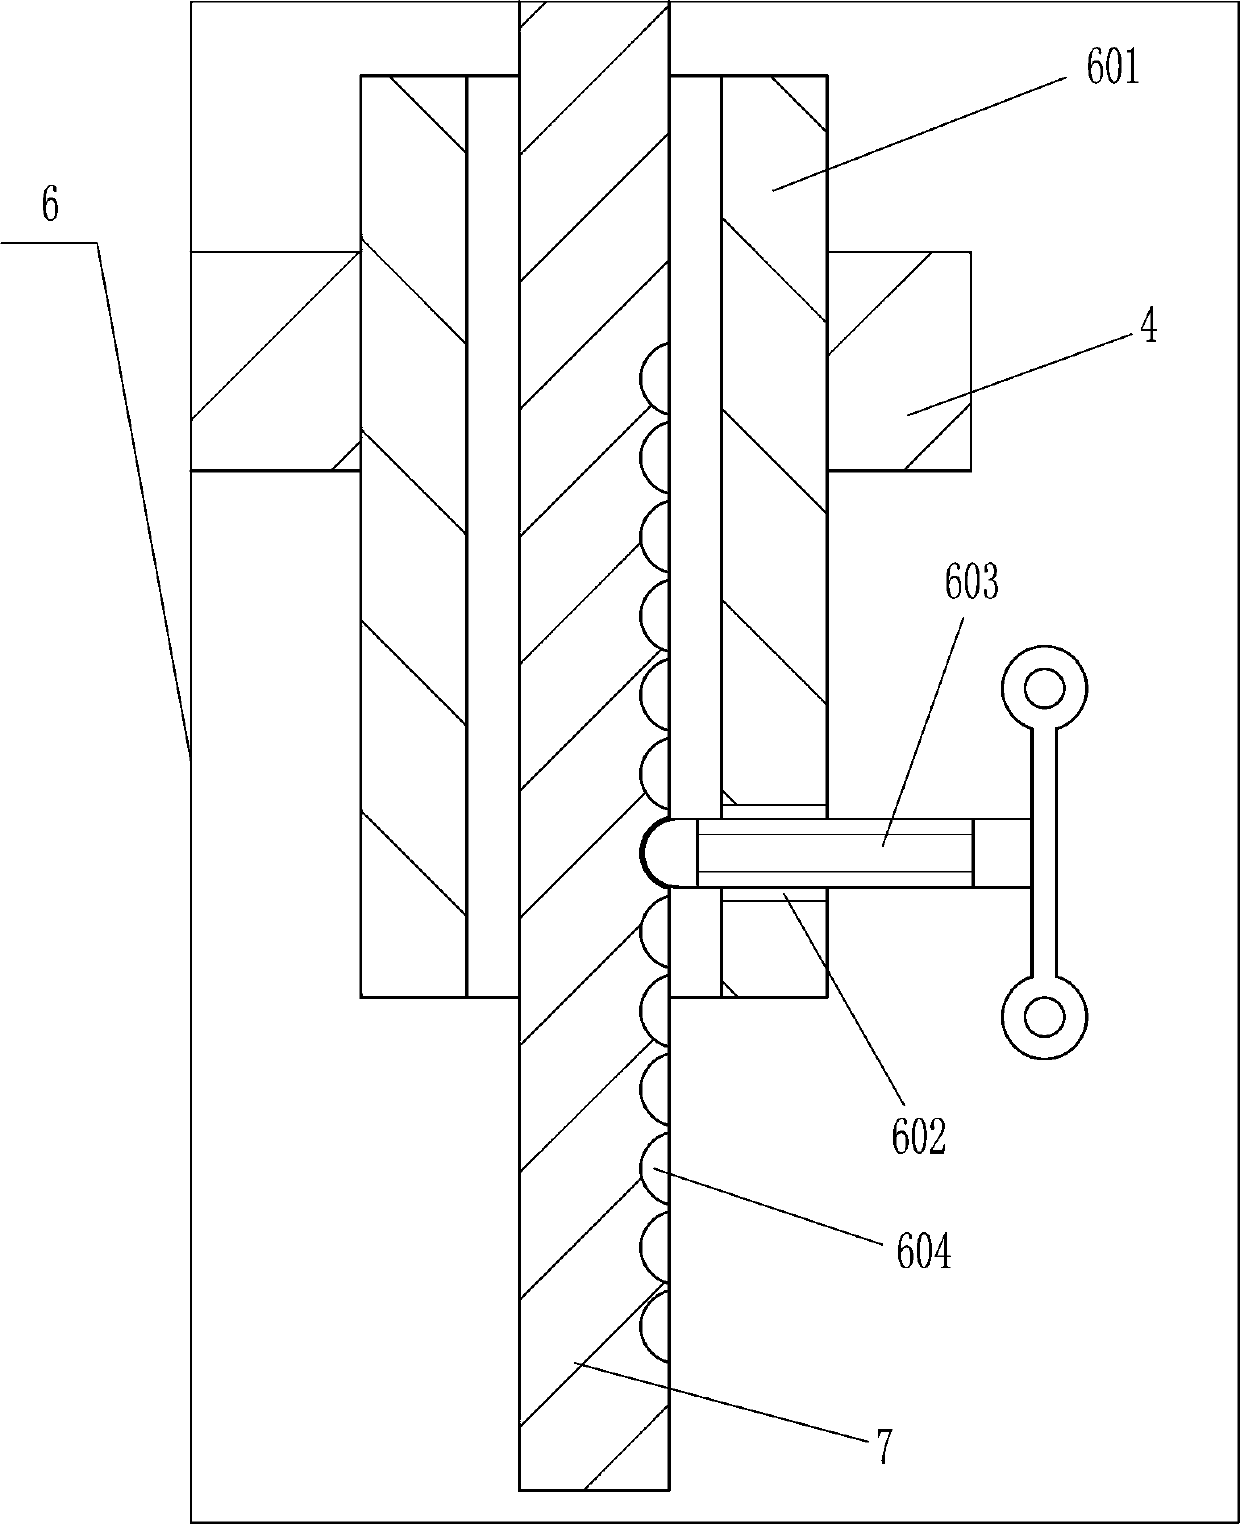
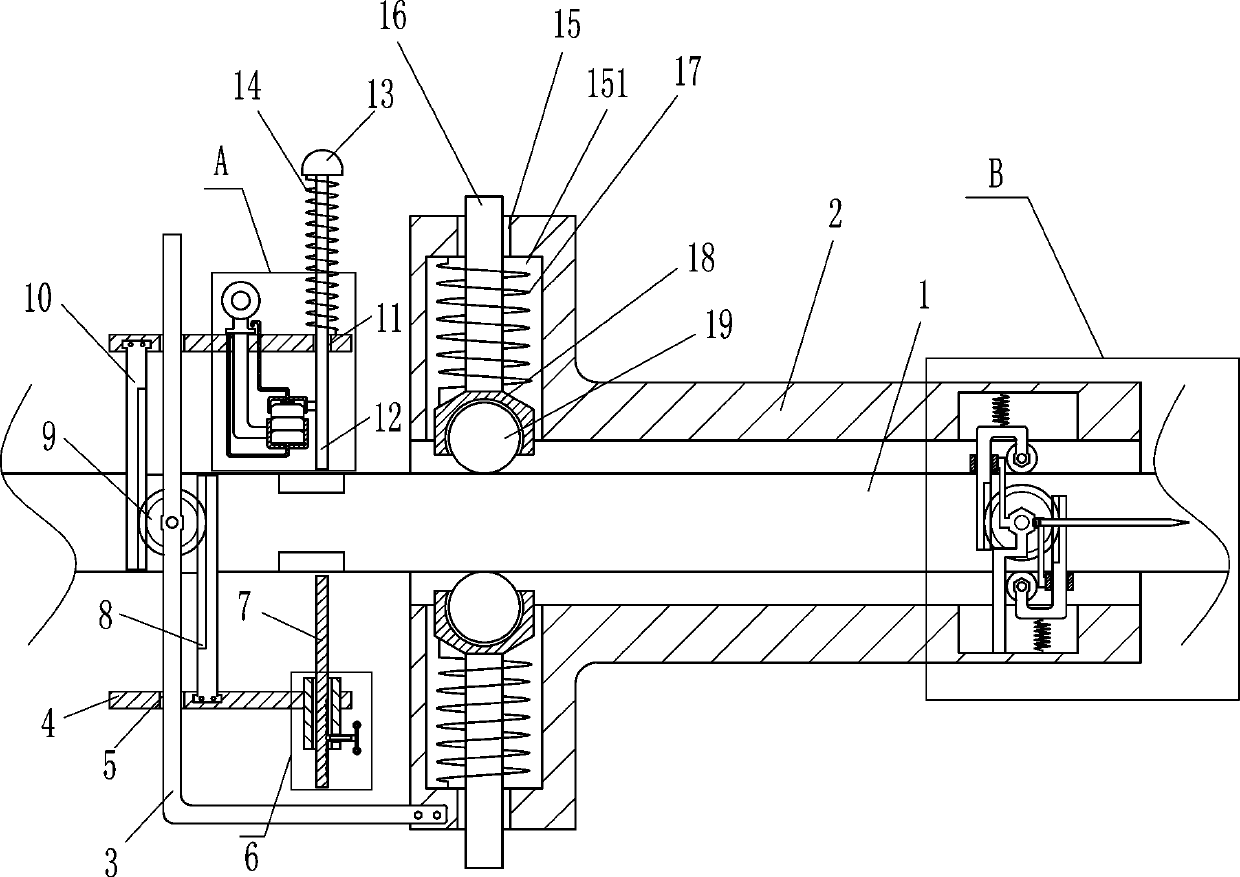
[0017] A special measuring tool for measuring keyway symmetry of shaft parts, such as Figure 1-2 As shown, it includes a hollow handle 2, a first pole 3, a support plate 4, an adjustment device 6, a first measuring rod 7, a first rack 8, a first gear 9, a second rack 10, and a second measuring rod 12. The pressing block 13 and the first spring 14, the first support rod 3 is fixedly connected to the lower part of the front side of the hollow handle 2 on the left side, the hollow handle 2 is connected to the first support rod 3 by welding, and the rear of the first support rod 3 The upper part of the side is rotatably provided with a first gear 9, and the hollow handle 2 is provided with support plates 4 on the upper and lower sides on the left side. The left part of the support plate 4 has a first guide hole 5, and the first support rod 3 is located in the first guide hole. 5, the left side of the front side of the lower support plate 4 is fixedly connected with the first rack...
Embodiment 2
[0019] A special measuring tool for measuring keyway symmetry of shaft parts, such as Figure 1-2 As shown, it includes a hollow handle 2, a first pole 3, a support plate 4, an adjustment device 6, a first measuring rod 7, a first rack 8, a first gear 9, a second rack 10, and a second measuring rod 12. The pressing block 13 and the first spring 14, the lower part of the left side of the front side of the hollow handle 2 is fixedly connected with the first support rod 3, the upper part of the rear side of the first support rod 3 is rotatably provided with the first gear 9, the hollow handle 2 left The upper and lower sides of the side are provided with support plates 4, the left part of the support plate 4 has a first guide hole 5, the first support rod 3 is located in the first guide hole 5, and the left side of the front side of the lower support plate 4 is fixed with a first guide hole 5. Rack 8, the first rack 8 is located on the right side of the first gear 9 and meshes wi...
Embodiment 3
[0022] A special measuring tool for measuring keyway symmetry of shaft parts, such as Figure 1-2 As shown, it includes a hollow handle 2, a first pole 3, a support plate 4, an adjustment device 6, a first measuring rod 7, a first rack 8, a first gear 9, a second rack 10, and a second measuring rod 12. The pressing block 13 and the first spring 14, the lower part of the left side of the front side of the hollow handle 2 is fixedly connected with the first support rod 3, the upper part of the rear side of the first support rod 3 is rotatably provided with the first gear 9, the hollow handle 2 left The upper and lower sides of the side are provided with support plates 4, the left part of the support plate 4 has a first guide hole 5, the first support rod 3 is located in the first guide hole 5, and the left side of the front side of the lower support plate 4 is fixed with a first guide hole 5. Rack 8, the first rack 8 is located on the right side of the first gear 9 and meshes wi...
PUM
 Abstract
Description
Claims
Application Information


