Method for measuring reversely-spraying hole of rocket chamber shell and special devices
A measurement method and anti-spray hole technology, applied in the direction of measuring devices, mechanical measuring devices, mechanical devices, etc., can solve the problems of expensive detection equipment, strict detection environment requirements, low detection efficiency, etc., and meet strict environmental temperature and humidity requirements , high price and high detection accuracy
- Summary
- Abstract
- Description
- Claims
- Application Information
AI Technical Summary
Problems solved by technology
Method used
Image
Examples
Embodiment 1
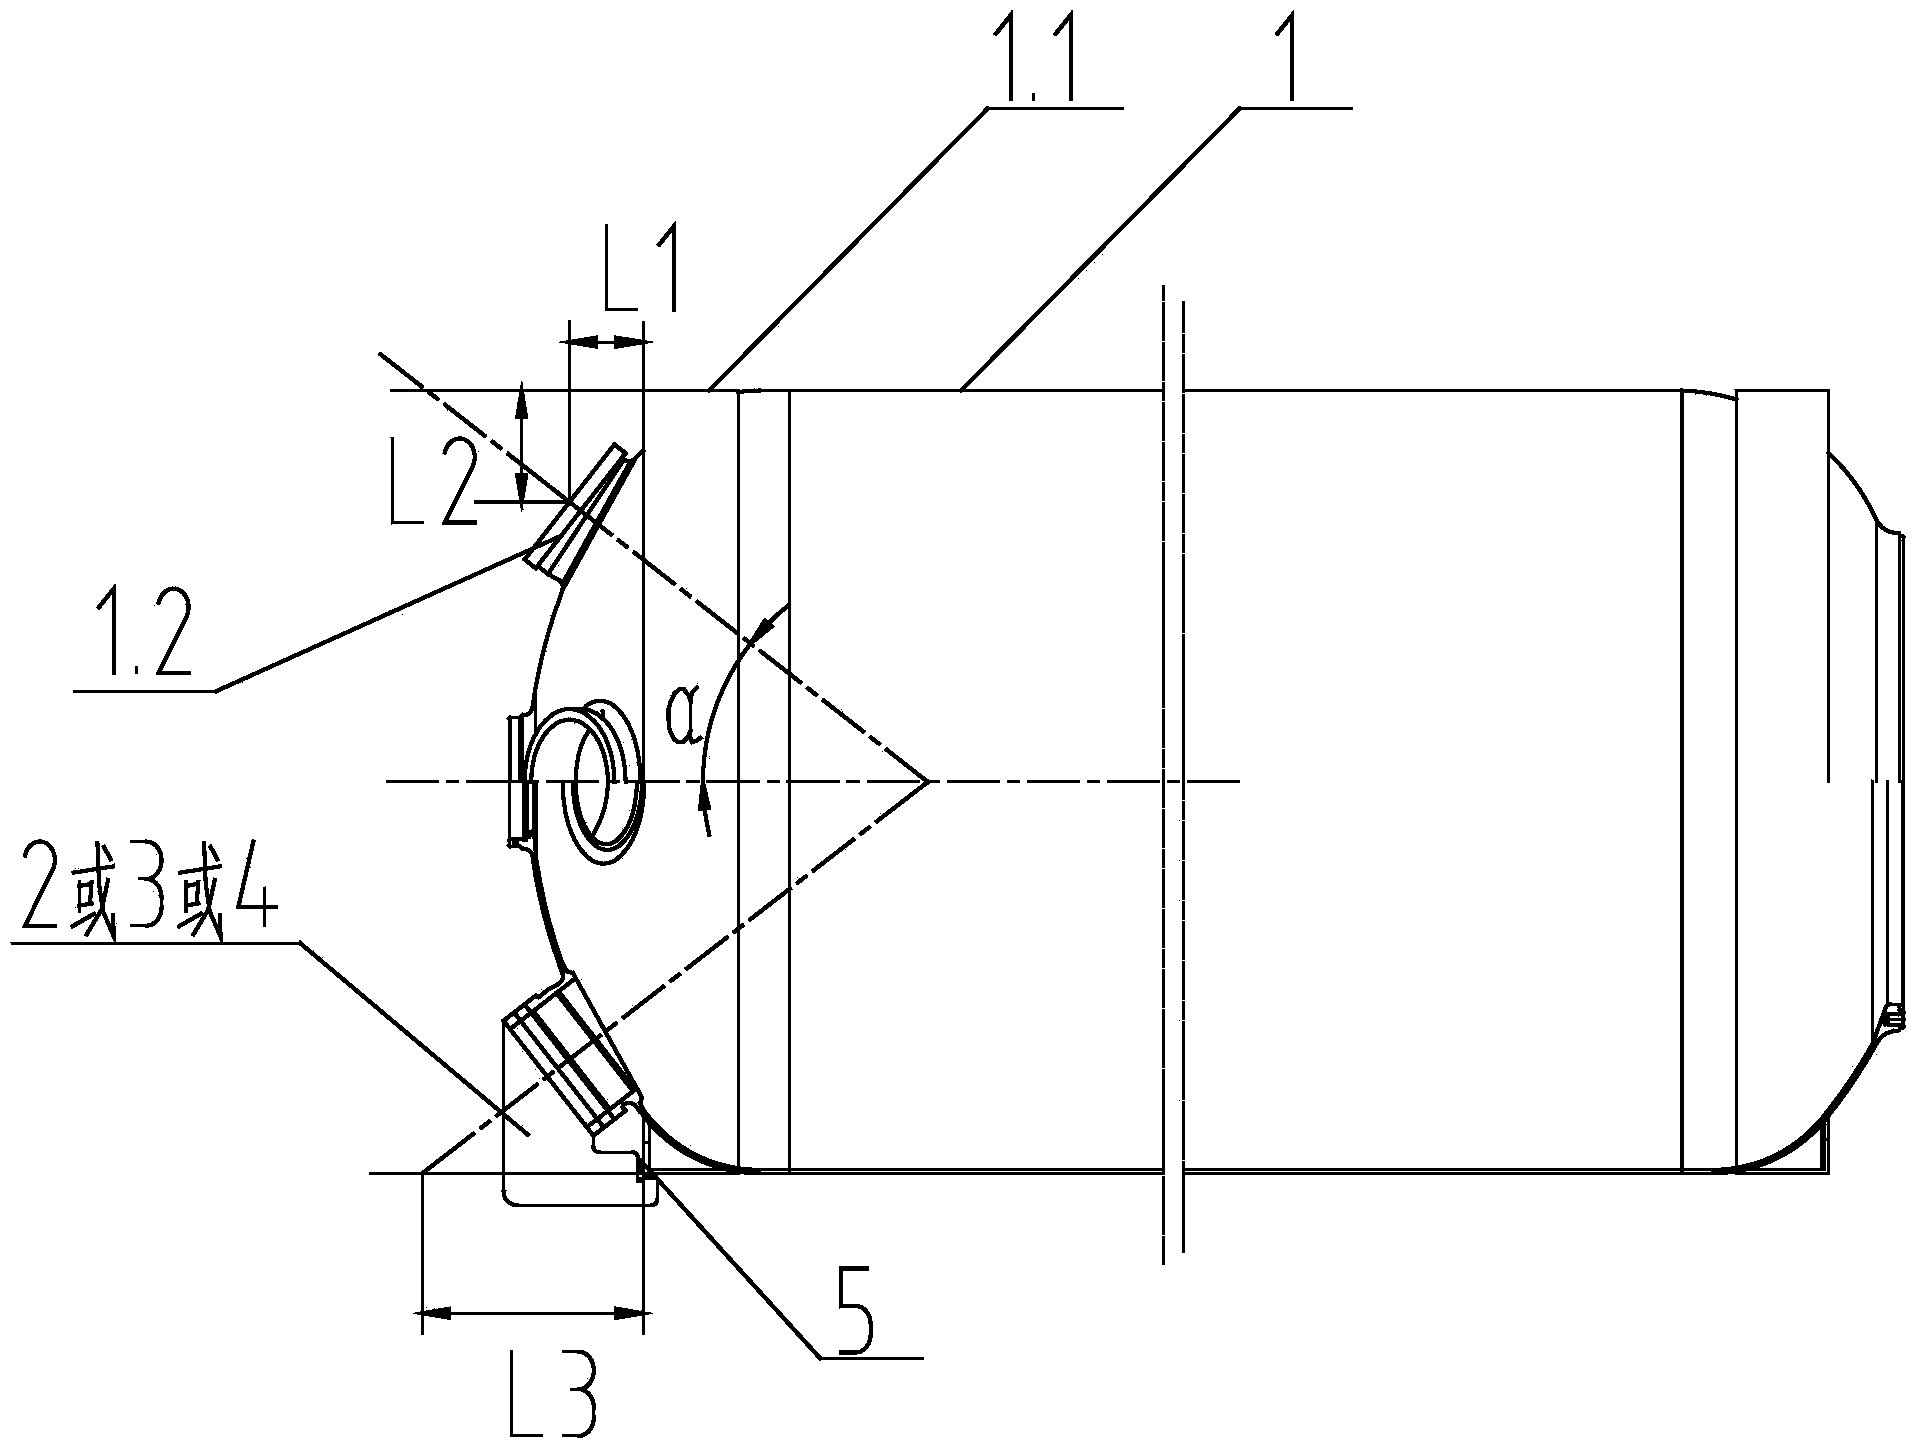
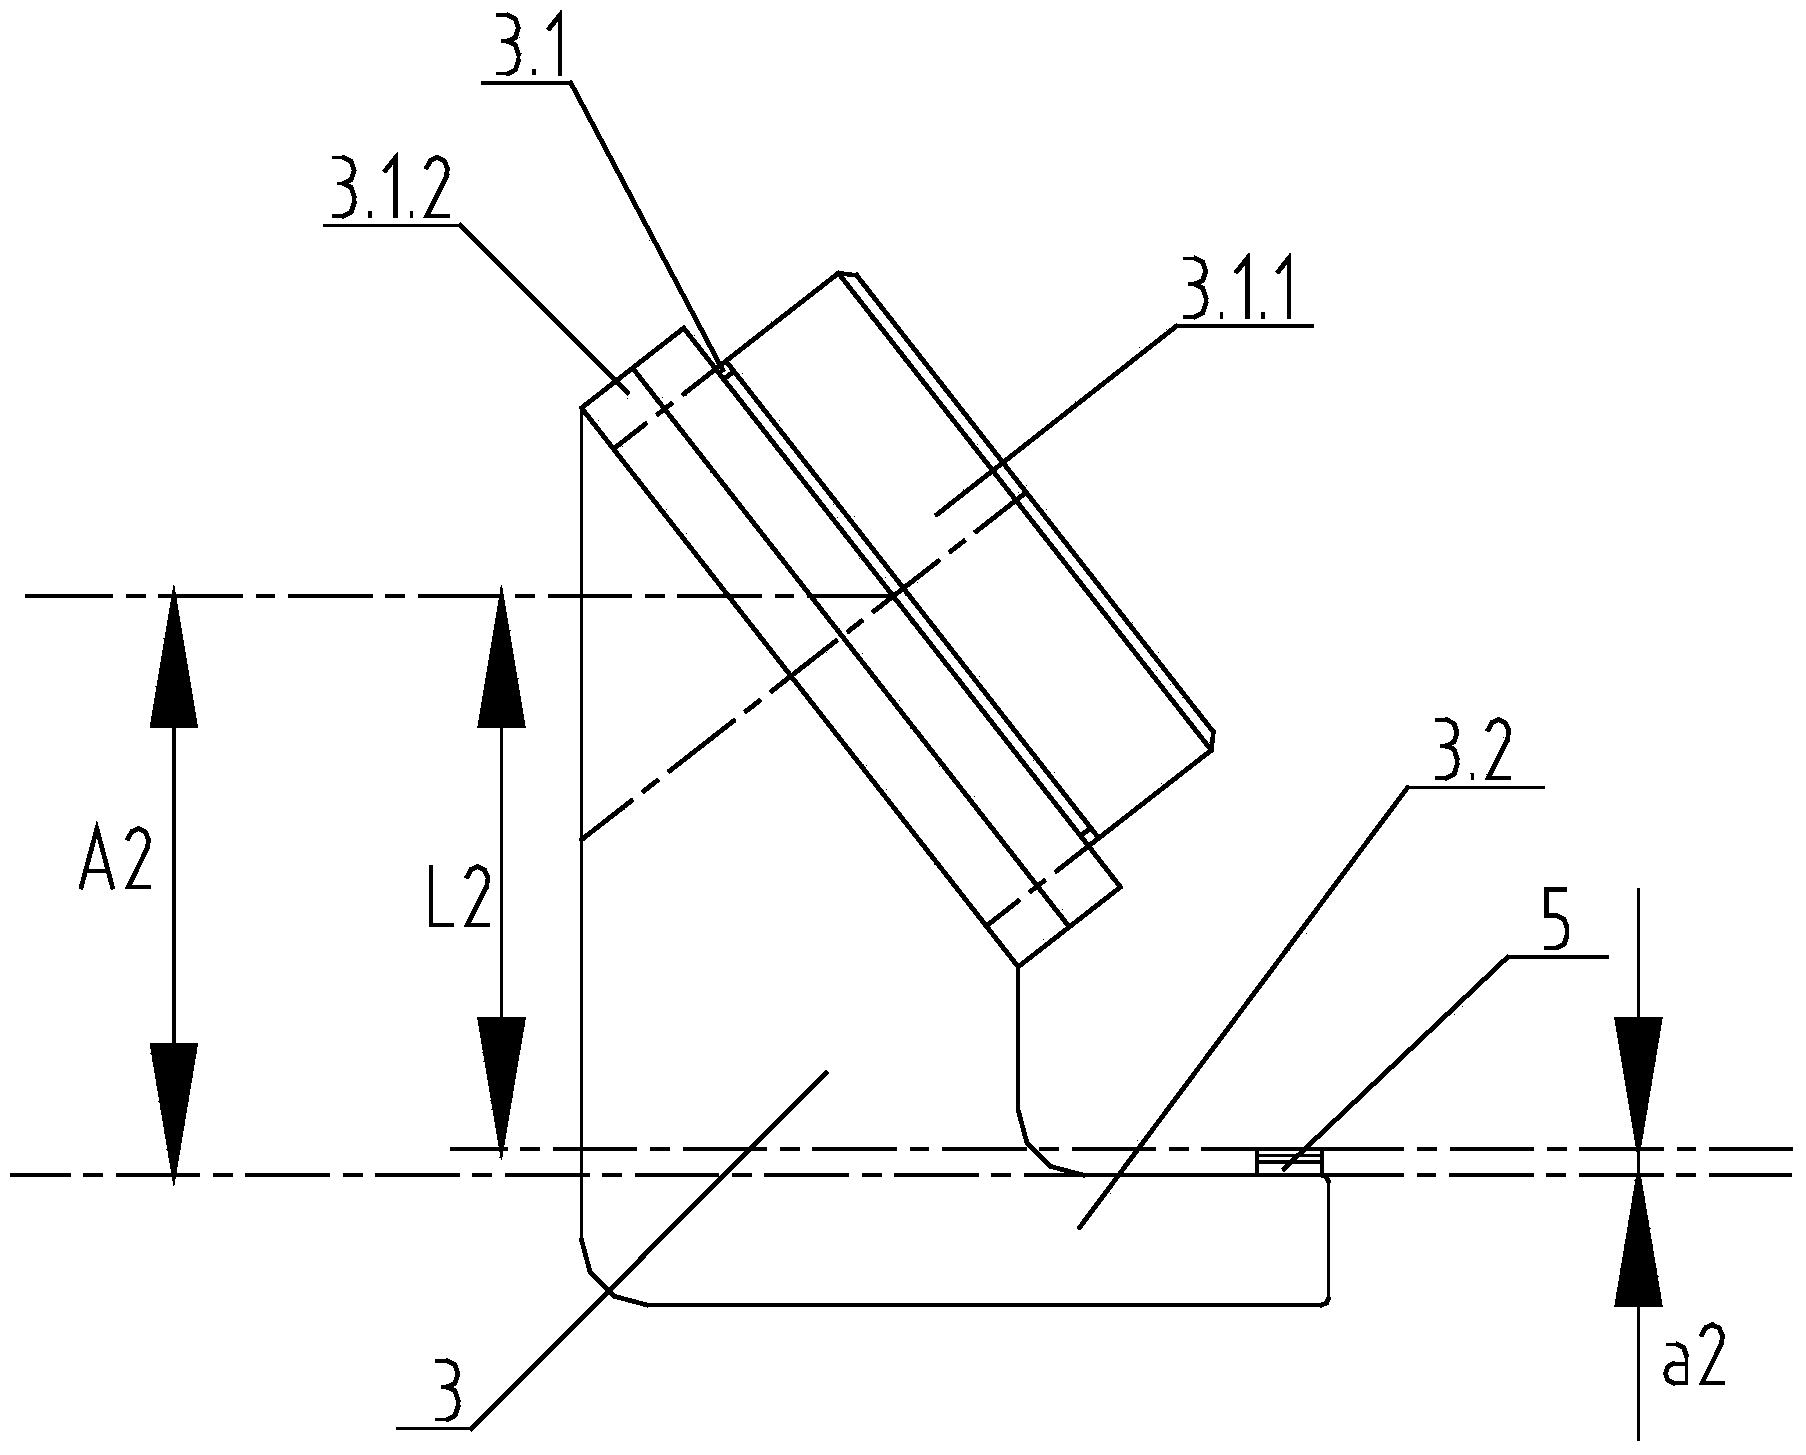
[0032] For an aircraft Φ880mm×5000mm rocket combustion chamber shell 1, the theoretical requirements for the spatial position, size and angle of the anti-injection hole 1.2: L1=82.8±0.5mm, L2=125.25±0.5mm, L3=243.13mm, anti-injection angle α=38°±5′. Such as figure 1 As shown, the measurement process is as follows:
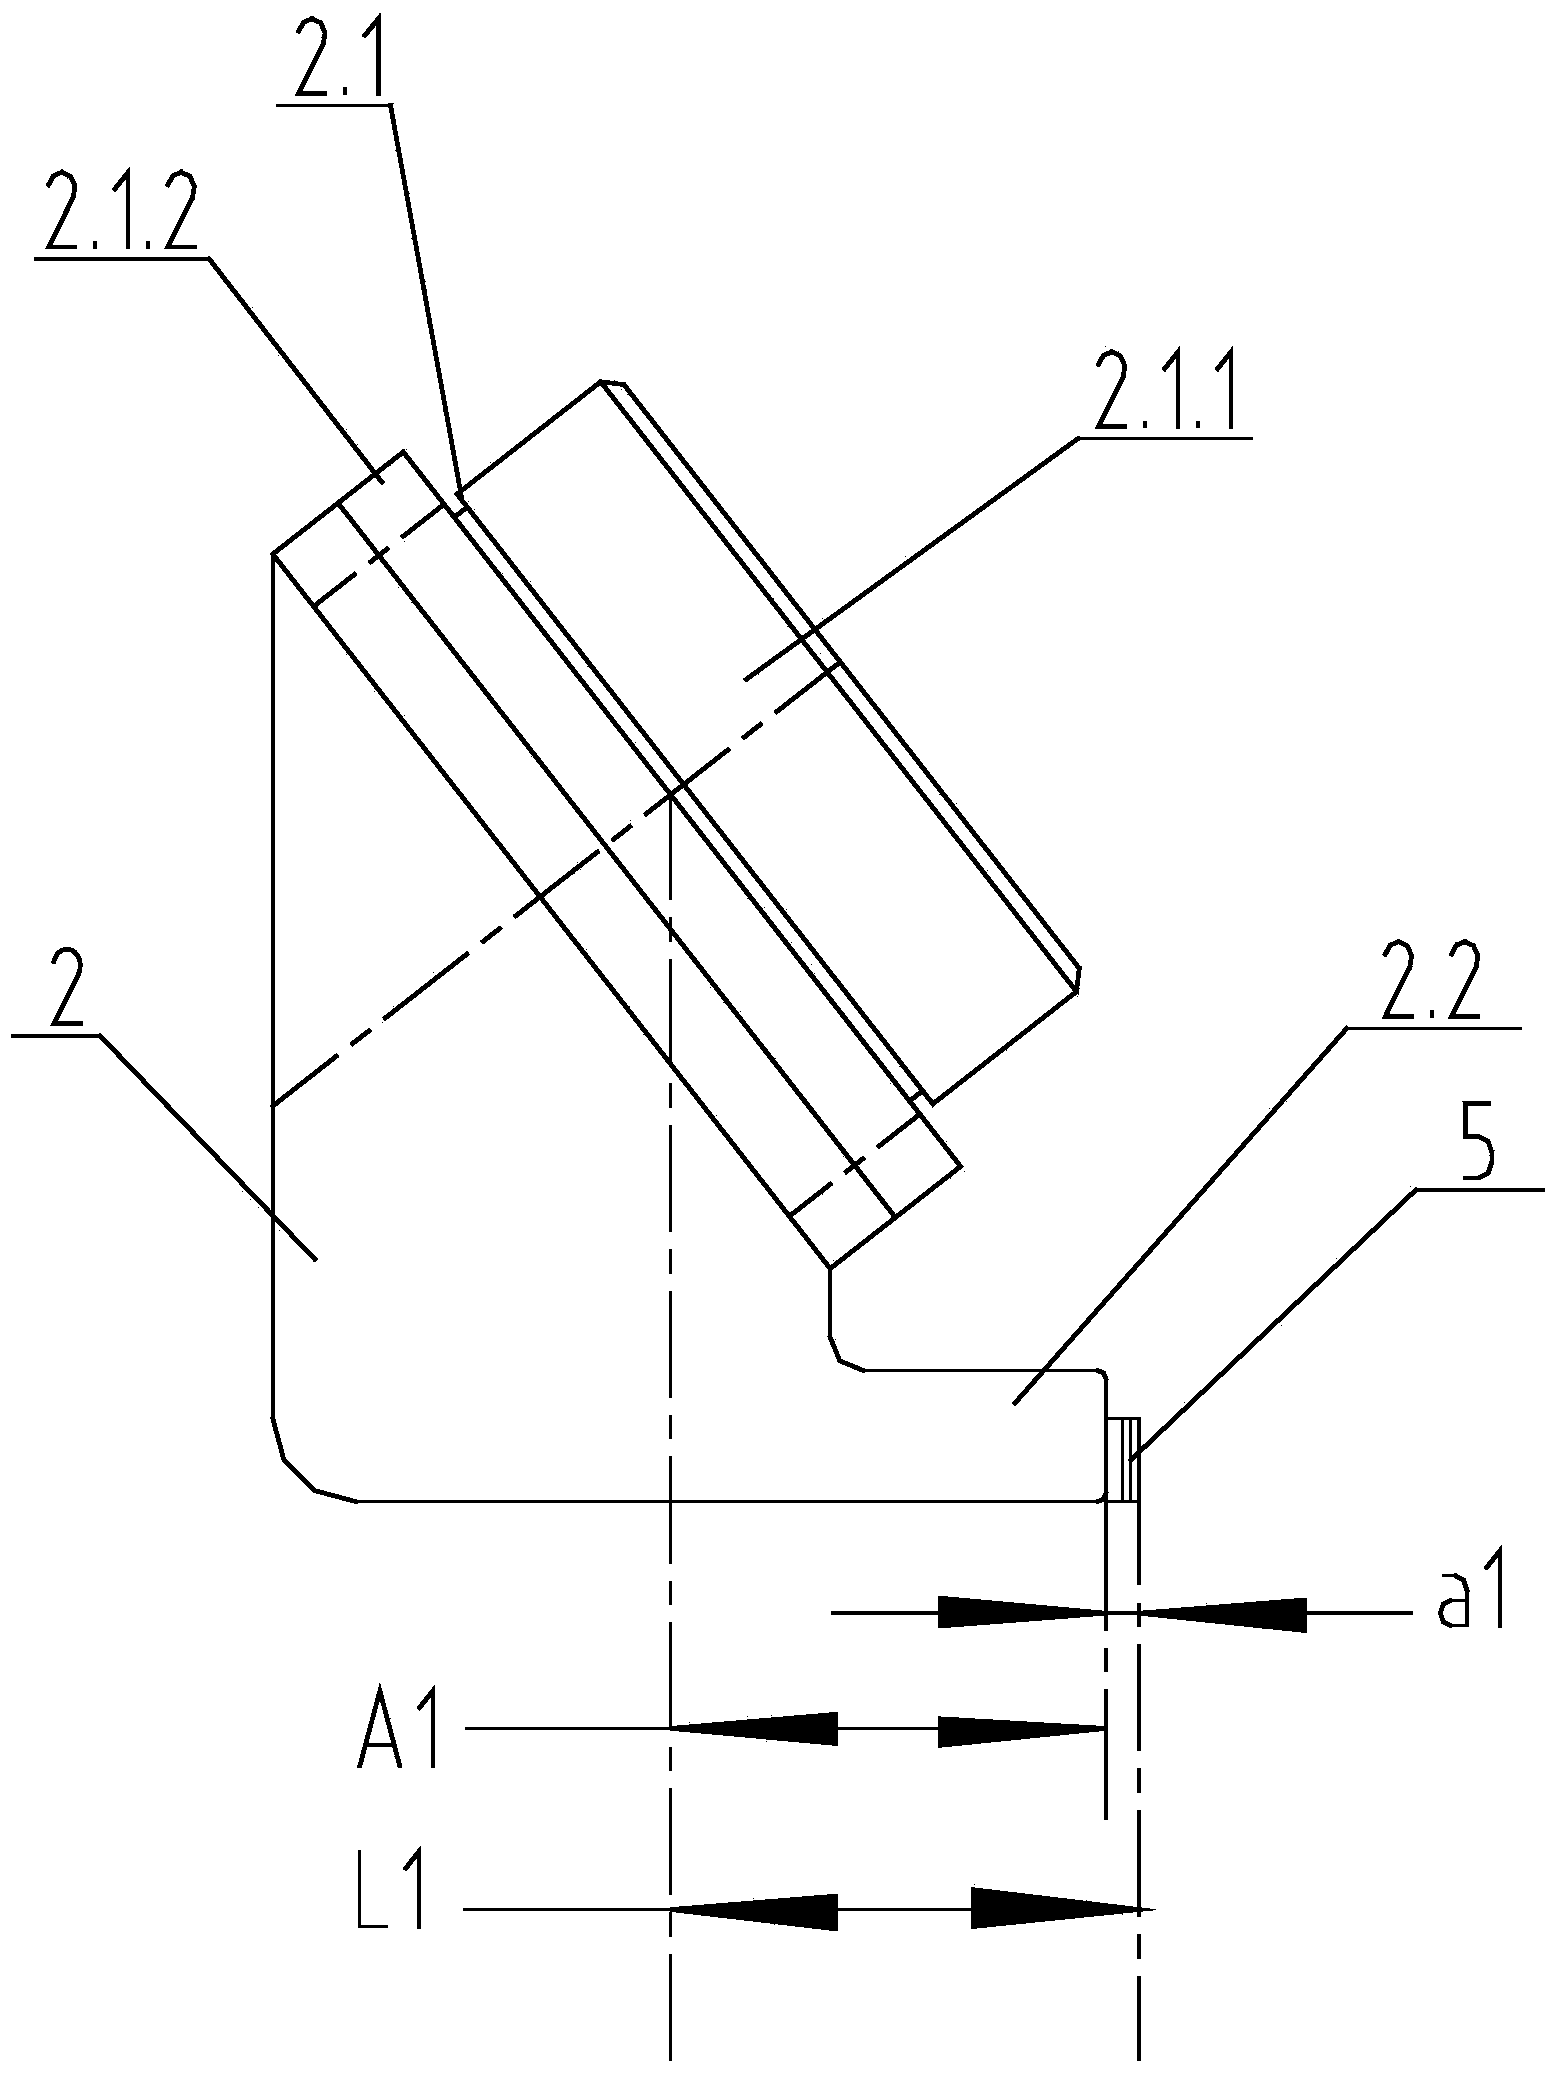
[0033] 1) Measure the spatial position dimension L1 of the anti-spray hole 1.2: the first positioning end 2.1 of the first special measuring fixture 2 is closely attached to the anti-spray hole 1.2 in the axial direction, and the side surface of the first measuring end 2.2 is aligned with the end face of the front skirt 1.1 Parallel with a gap, the gap value a1 is measured by the standard block gauge 5, a1 is 4.97mm, and the distance A1 between the center of the outlet end face of the anti-spray hole 1.2 and the side of the first measuring end 2.2 is measured, and the actual measured value of A1 is accurate to 0.01mm. 77.78mm, the calculation formula of L1 is L1=...
Embodiment 2
[0039] For the shell 1 of an aircraft Φ1200mm×6000mm rocket combustion chamber, the theoretical requirements for the spatial position, size and angle of the anti-injection hole 1.2: L1=136.3±0.5mm, L2=171.7±0.5mm, L3=340.92mm, anti-injection angle α=40°±5′. Such as figure 1 As shown, the measurement process is as follows:
[0040] 1) Measure the spatial position dimension L1 of the anti-spray hole 1.2: the first positioning end 2.1 of the first special measuring fixture 2 is closely attached to the anti-spray hole 1.2 in the axial direction, and the side surface of the first measuring end 2.2 is aligned with the end face of the front skirt 1.1 Parallel with a gap, the gap value a1 is measured by the standard block gauge 5, a1 is 5.03mm, and the distance A1 between the center of the outlet end face of the anti-spray hole 1.2 and the side of the first measuring end 2.2 is measured, and the actual measured value of A1 is accurate to 0.01mm. 131.32mm, the calculation formula of ...
PUM
 Abstract
Description
Claims
Application Information


