Dimension measuring device for long material
a measurement device and long material technology, applied in the direction of measurement devices, mechanical diameter measurements, instruments, etc., can solve the problems of long time required and reduce pipe production efficiency, and achieve the effects of reducing the measurement error caused by vibration, enhancing the dimensional measurement accuracy of long material, and high accuracy
- Summary
- Abstract
- Description
- Claims
- Application Information
AI Technical Summary
Benefits of technology
Problems solved by technology
Method used
Image
Examples
example 1
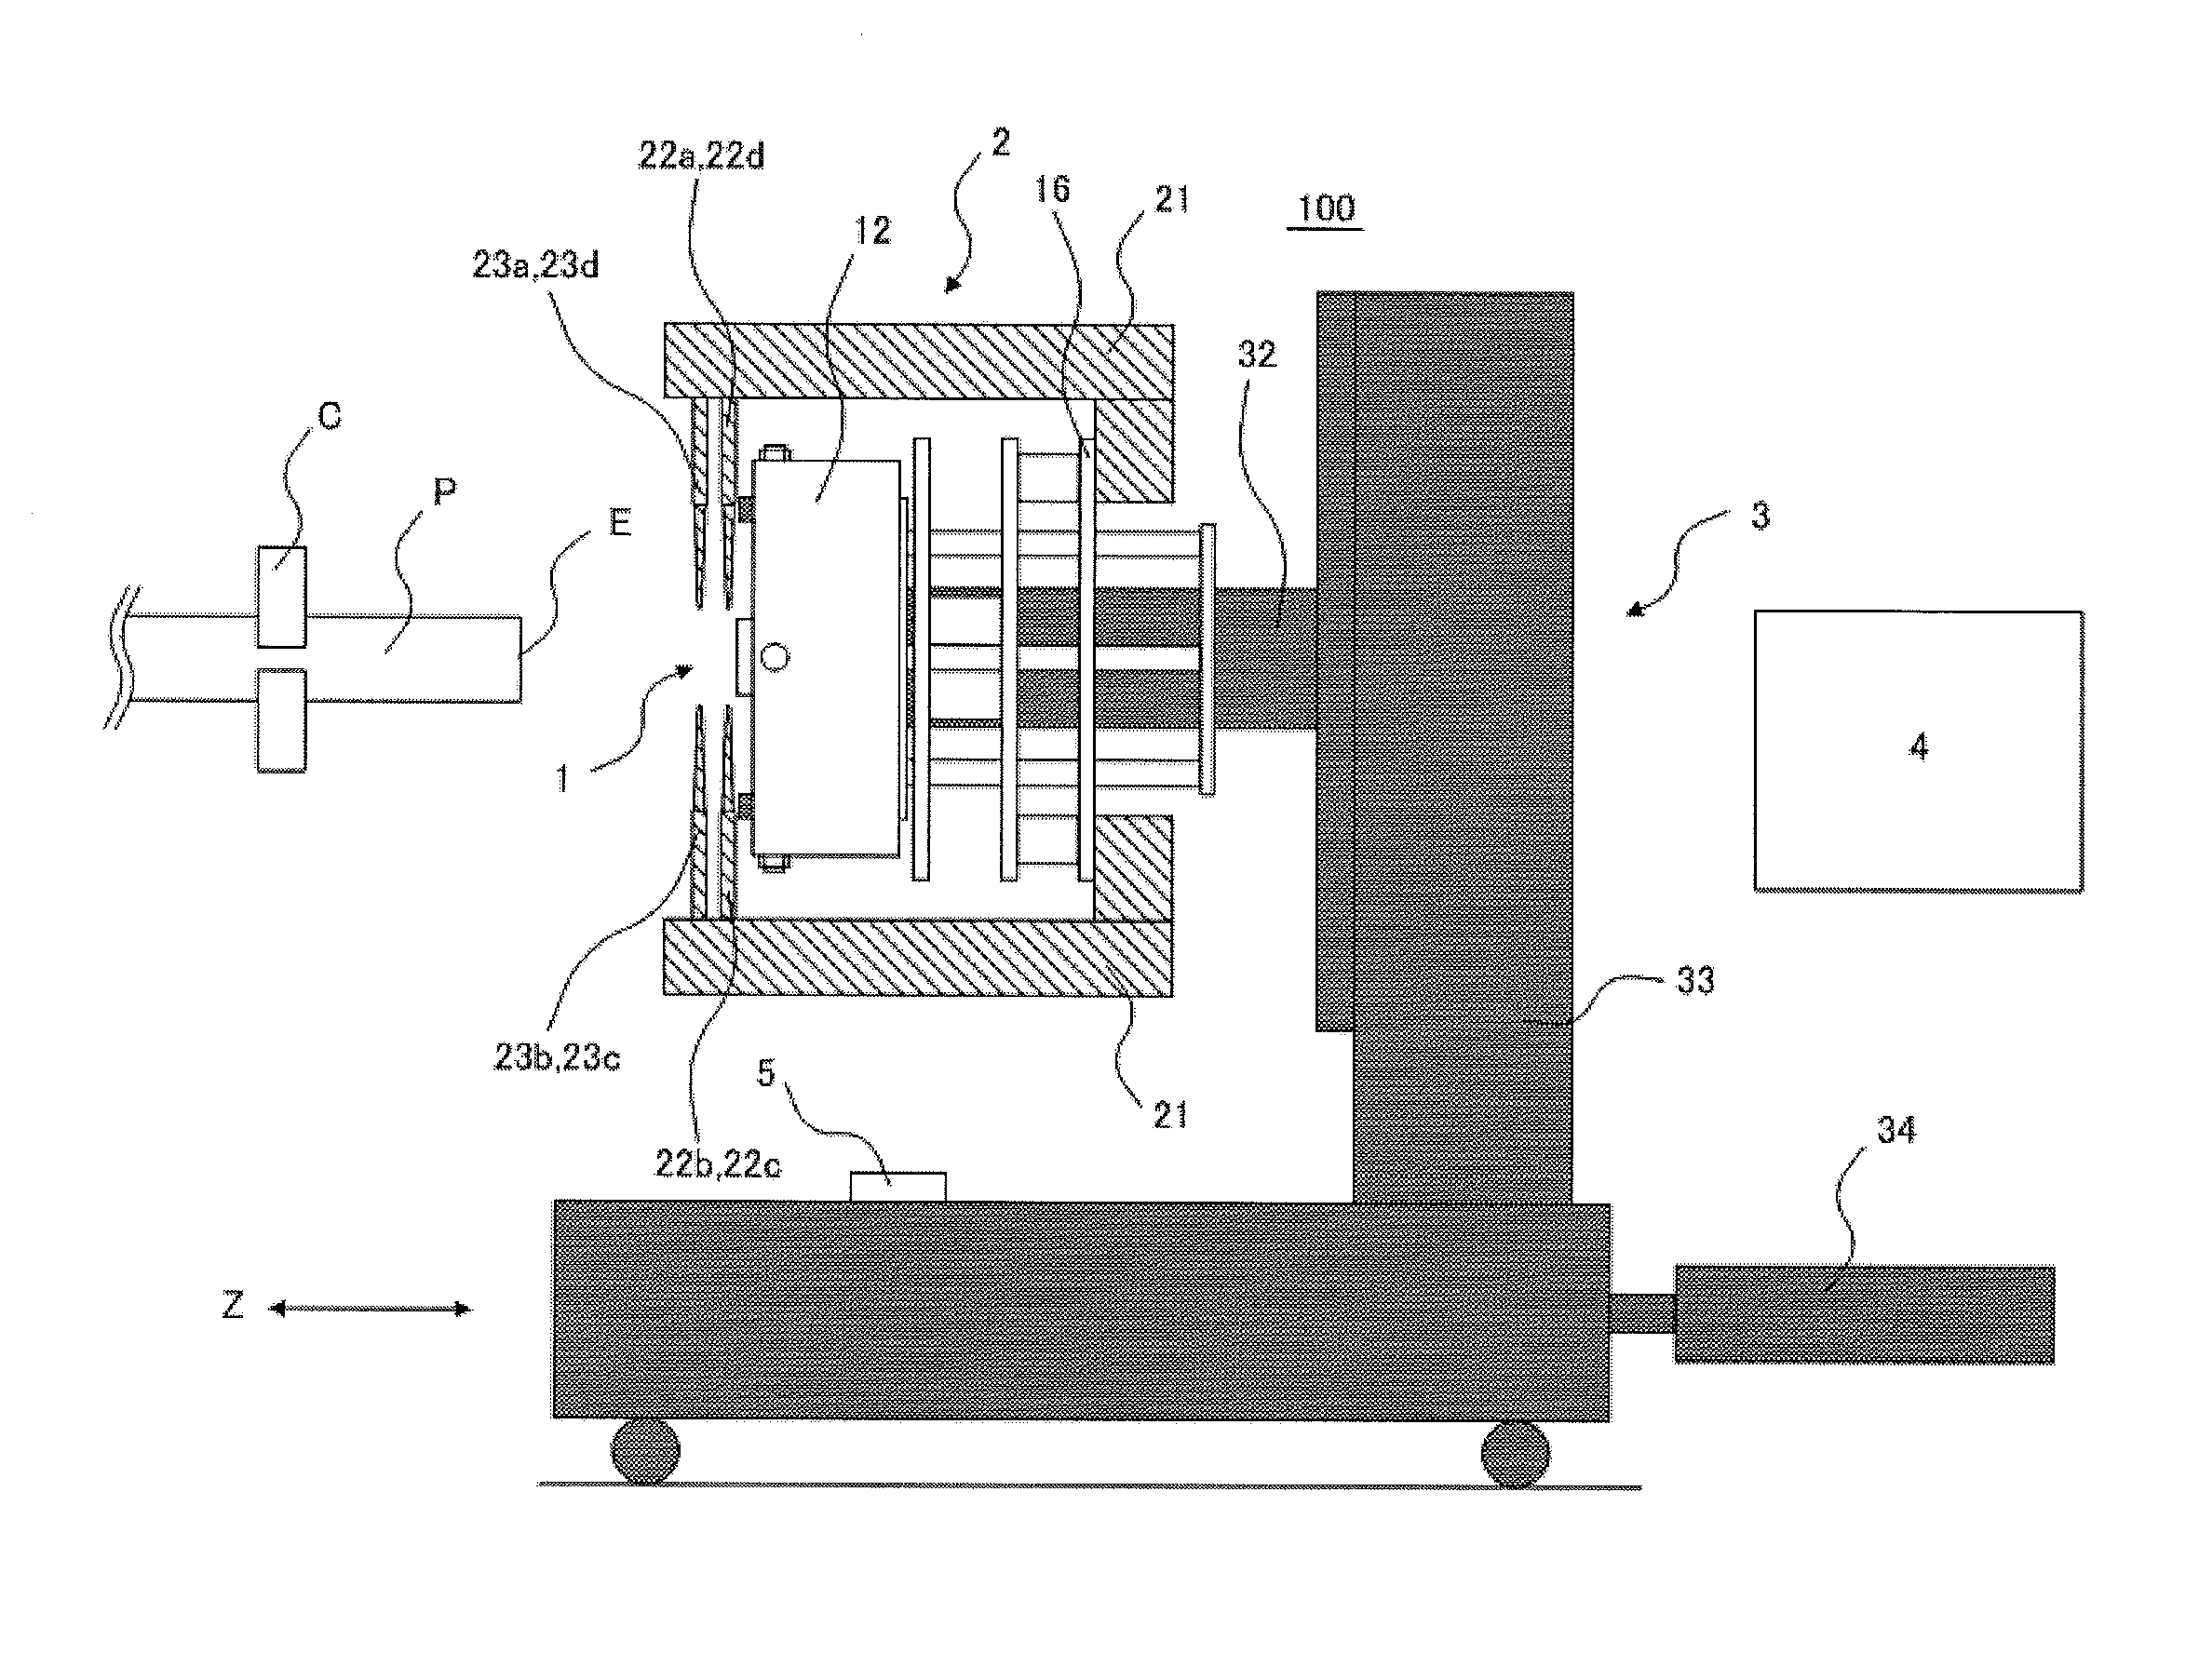
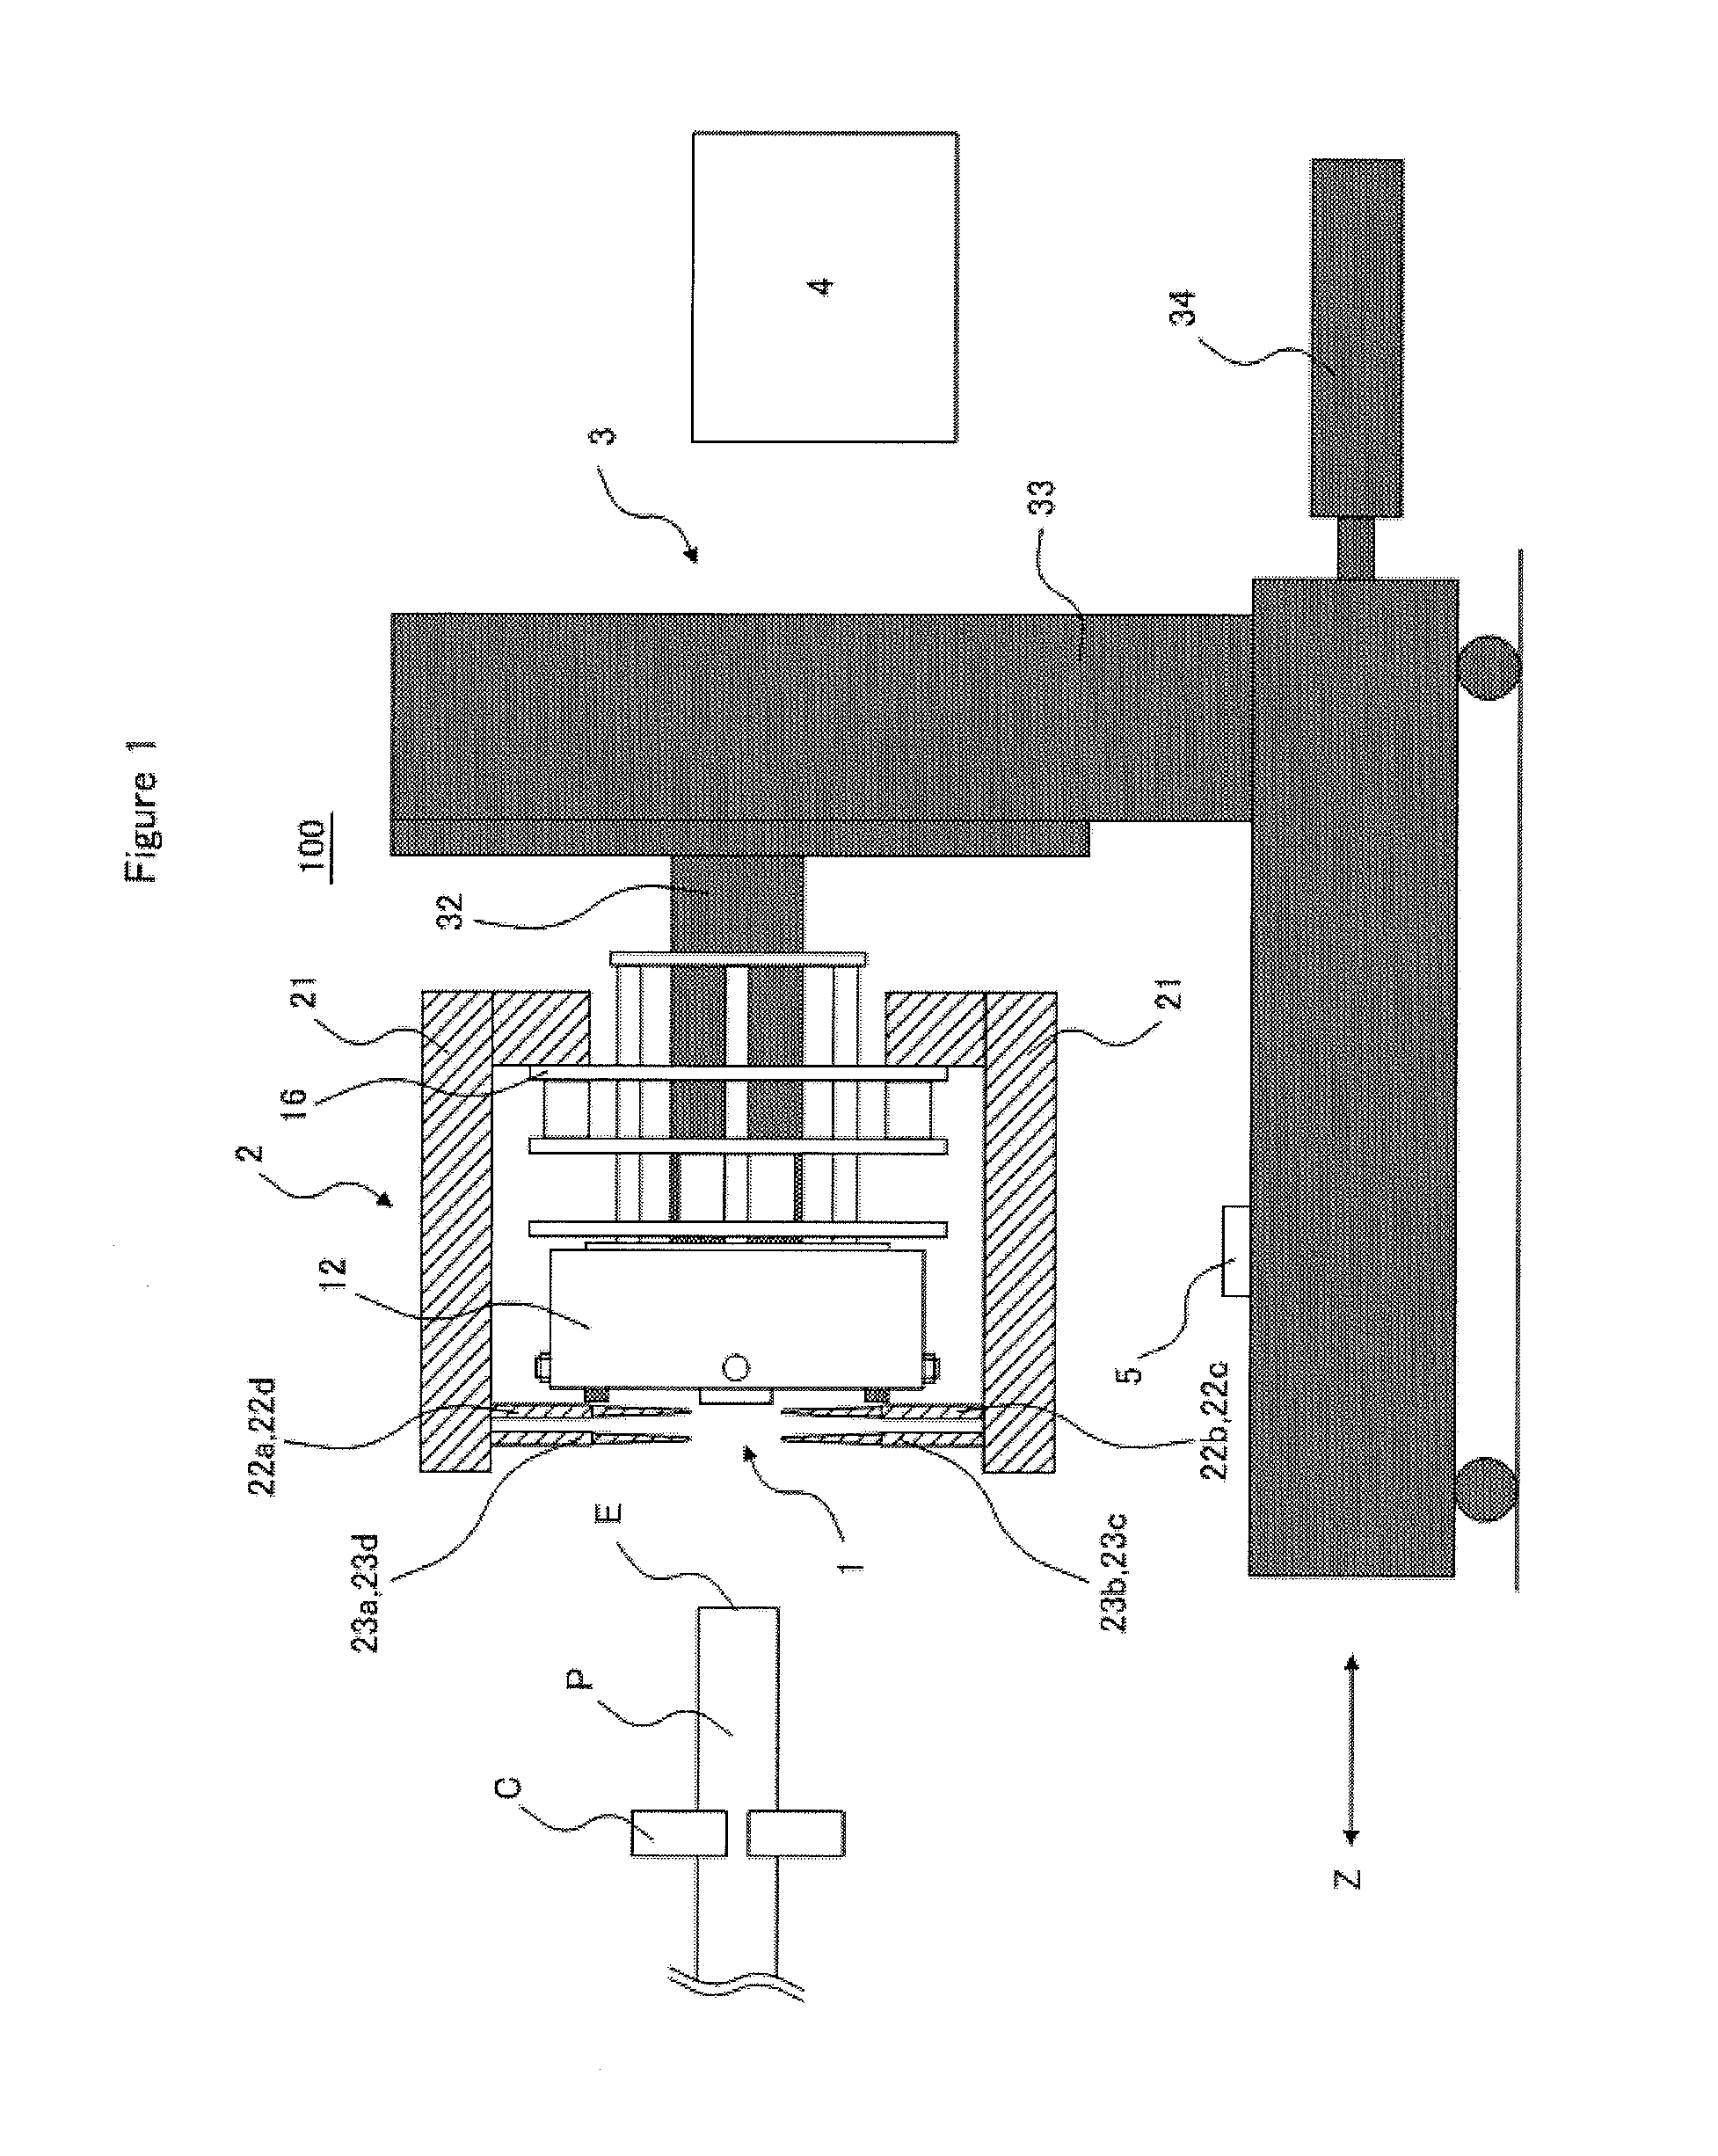
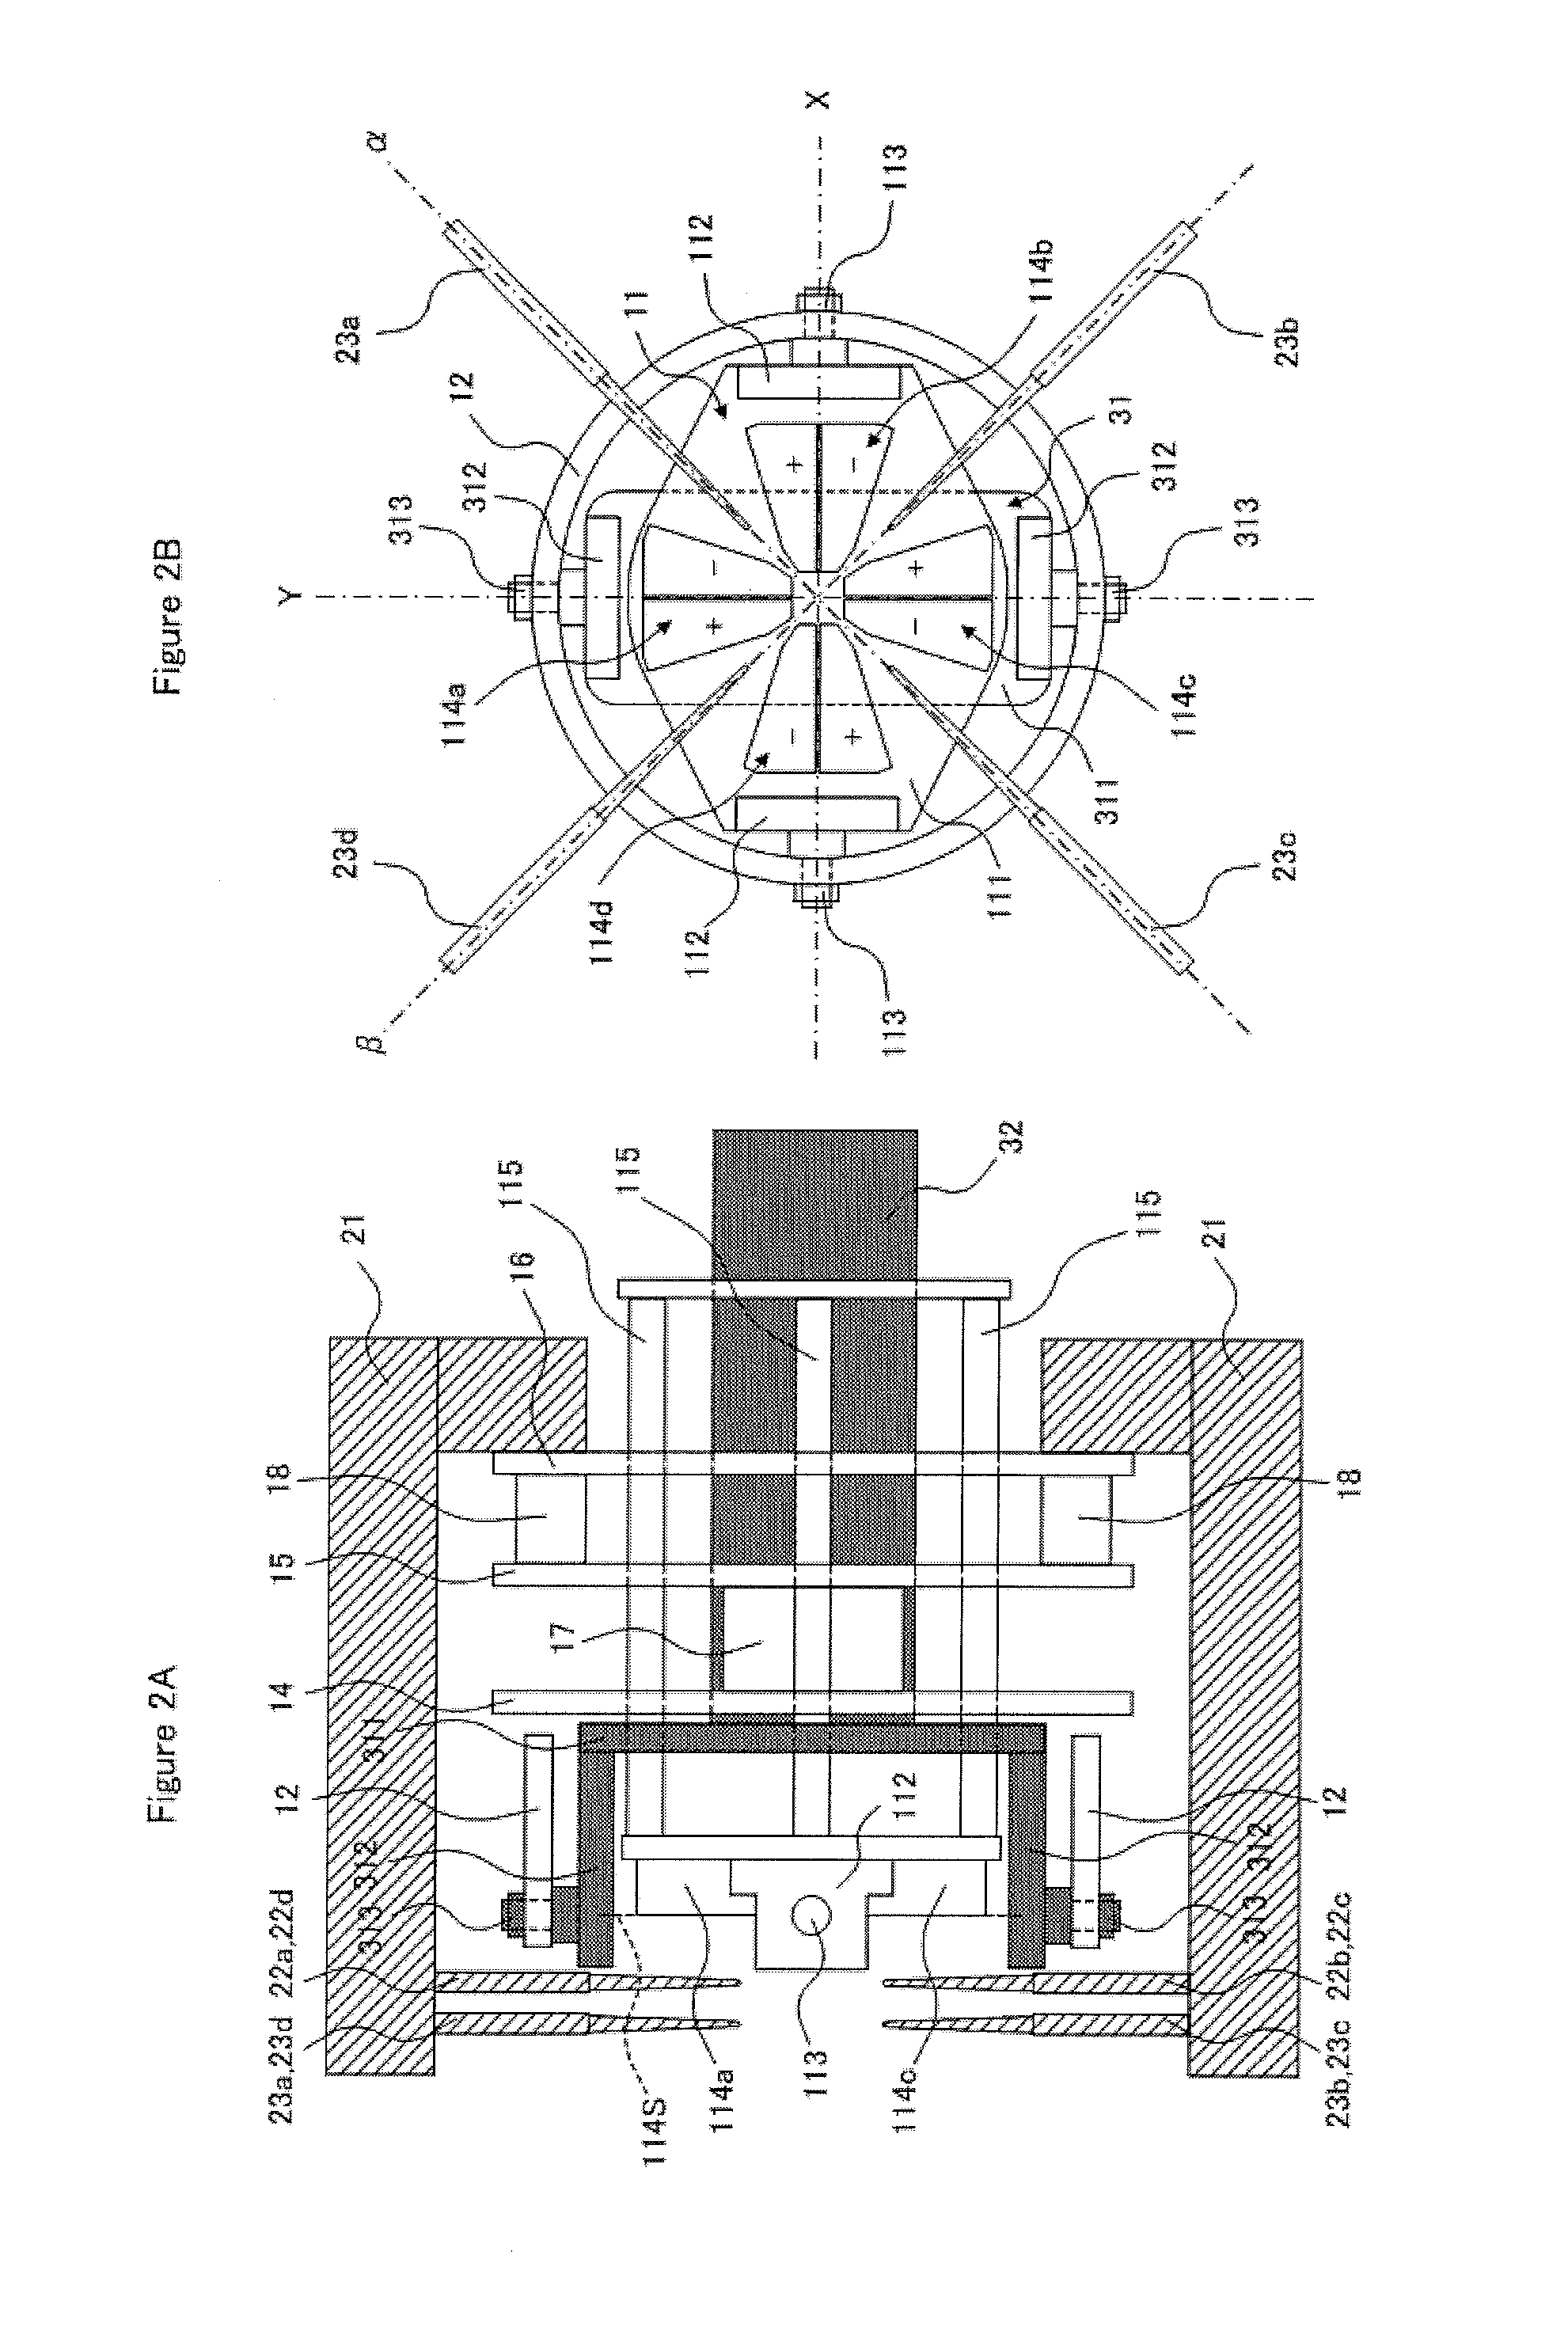
[0067]The seal diameter and the thread diameter of the pin joint formed in the end portion of the pipe P were measured by using the dimension measuring device 100 the general configuration of which is shown in FIG. 1 and FIGS. 2A and 2B. The pipe P to be measured had an outside diameter of 73.0 mm, a wall thickness of 5.51 mm, and a length of 9500 mm. A portion about 500 mm distant from the end face of the pipe P was restrained by the chuck member C, and the axial direction of the restrained portion of the pipe P was made approximately parallel to the pushingly moving direction of the end face following part 11. The bend amount of the end portion of the pipe P (=a shift amount of the cross section center of the pipe P / a length of the shift amount measuring portion) was 1.2 mm / 1000 mm at a maximum in the β-axis direction. The measurement position of seal diameter (distance SL, refer to FIGS. 6A and 6B) was 1.9 mm distant from the reference plane, and the measurement position of threa...
example 2
[0069]The seal diameter and the thread diameter of the pin joint formed in the end portion of the pipe P were measured under the same conditions as those of example 1 except that the bend amount of the end portion of the pipe P to be measured was 2.1 mm / 1000 mm at a maximum in the α-axis direction. The difference between the seal diameter and thread diameter measured as described above and the seal diameter and thread diameter measured manually by using the special-purpose measuring instrument was used as an evaluation result.
example 3
[0071]The seal diameter and the thread diameter of the pin joint formed in the end portion of the pipe P were measured under the same conditions as those of example 1 except that the bend amount of the end portion of the pipe P to be measured was 2.8 mm / 1000 mm at a maximum in the β-axis direction. The difference between the seal diameter and thread diameter measured as described above and the seal diameter and thread diameter measured manually by using the special-purpose measuring instrument was used as an evaluation result.
PUM
 Abstract
Description
Claims
Application Information


