Double probe same-point measurement scanning probe microscope
A scanning probe and dual-probe technology, applied in the field of scanning probe microscopes, can solve the problems of complicated control of dual-probe simultaneous measurement, difficulty in selecting different types of probes, etc., achieving low noise, avoiding manual adjustment, anti-interference and Strong vibration effect
- Summary
- Abstract
- Description
- Claims
- Application Information
AI Technical Summary
Problems solved by technology
Method used
Image
Examples
Embodiment 1
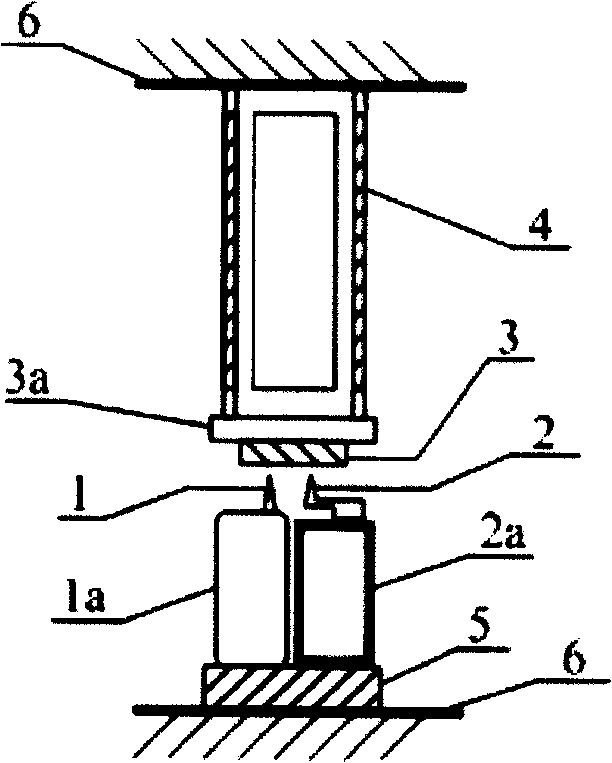
[0044] Example 1: Parallel same-point measurement dual-probe scanning probe microscope
[0045] figure 1 It is a schematic diagram of the structure of the dual-probe scanning probe microscope for parallel and same-point measurement in the present invention. The sample 3 is fixed on the sample holder 3a, the sample holder 3a is fixed on the XY piezoelectric scanner 4, the first Z positioner 1a is fixed on the positioning seat 5, and the first probe 1 is fixed on the movement of the first Z positioner 1a end and point to the sample 3 to form the first Z adjuster; the second Z positioner 2a is fixed on the positioning seat 5, the second probe 2 is fixed on the moving end of the second Z positioner 2a and points to the sample 3, the positioning seat 5 and The XY piezoelectric scanner 4 is fixed on the substrate 6 to form a second Z adjuster. In this way, the spacing between the double needles 1, 2 and the sample 3 can be independently controlled. The first positioner 1a and the...
Embodiment 2
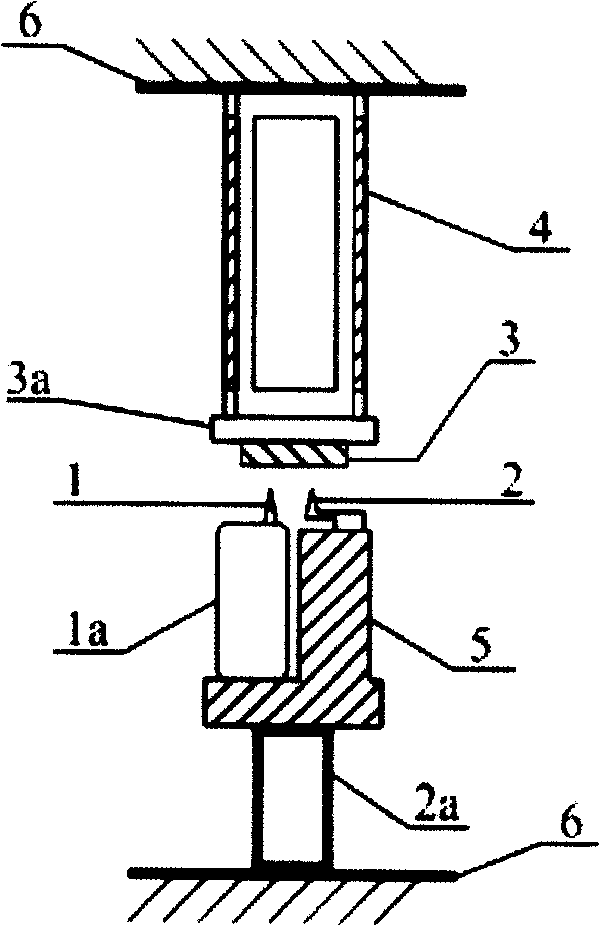
[0048] Example 2: Serial Same-Point Measurement Dual-probe Scanning Probe Microscope
[0049] The purpose of the second Z regulator in the above-mentioned embodiment 1 is to independently adjust the distance between the second probe 2 and the sample 3, so the second regulator can also be adjusted according to figure 2 The structure shown in the figure: the second probe 2 is fixed on the positioning seat 5 and points to the sample 3, the positioning seat 5 is fixed on the moving end of the second Z positioner 2a, and the second Z positioner 2a is fixed to the XY piezoelectric scanner 4 on the substrate 6. In this way, when the second Z positioner 2a performs Z telescopic adjustment, the distance between the sample 3 and the second probe 2 can be adjusted. Although the distance between the sample 3 and the first probe 1 also changes due to the serial connection between the first Z positioner 1a and the second Z positioner 2a, this distance can be adjusted by adjusting the firs...
Embodiment 3
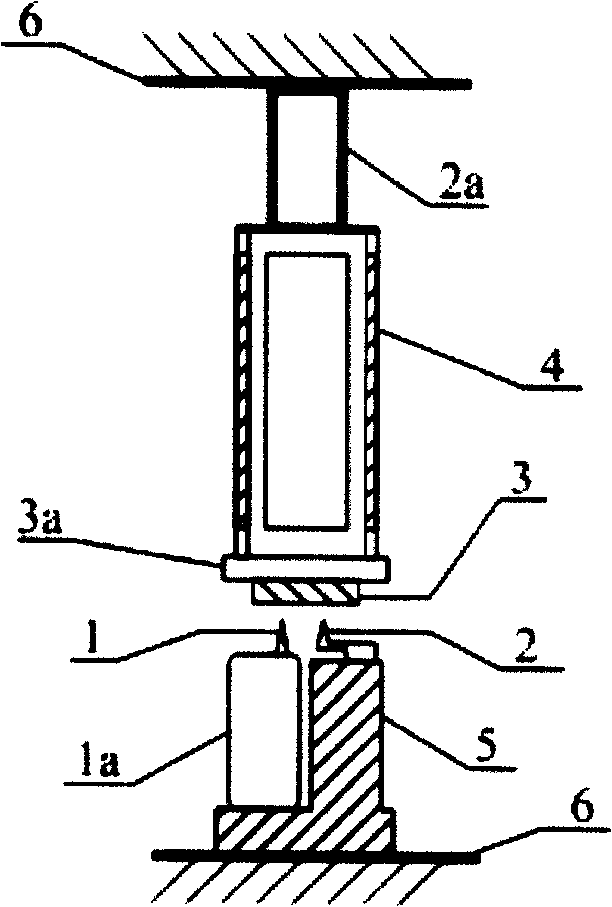
[0050] Example 3: Linkage-type same-point measurement dual-probe scanning probe microscope
[0051] See image 3, the second probe 2 is fixed on the positioning seat 5 and points to the sample 3, the XY piezoelectric scanner 4 is fixed on the moving end of the second Z positioner 2a, and the second Z positioner 2a and the positioning seat 5 are both fixed on the substrate 6 superior. In this way, when the second Z positioner 2a performs Z telescopic adjustment, the entire XY piezoelectric scanner 4 and the sample 3 fixed on it will be linked to it, thereby adjusting the distance between the second probe 2 and the sample 3 . Although the distance between the sample 3 and the first probe 1 also changes accordingly, this distance can be adjusted by adjusting the first Z positioner 1a so that the first probe 1 and the sample 3 will not be damaged without contact. Probe 1. This structure also enables independent adjustment of the distance between the dual probes and the sample. ...
PUM
 Abstract
Description
Claims
Application Information


