A dimensional chain calculation demonstration experiment platform dimensional chain and calculation demonstration method
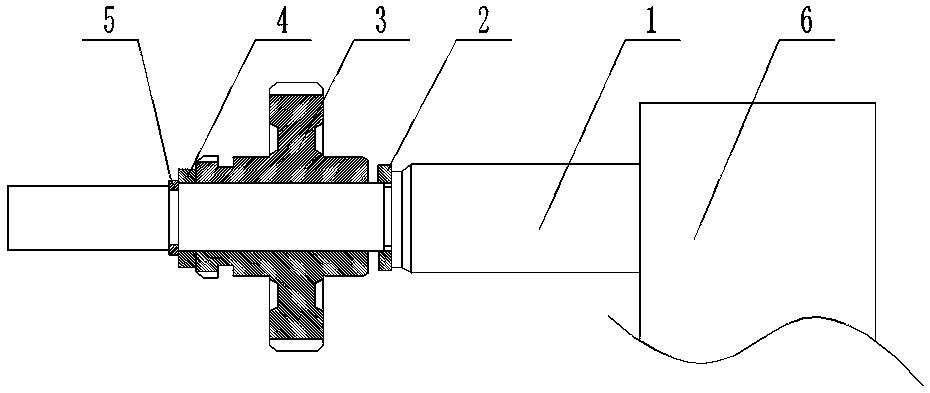
A demonstration method and a technology of a test bench, applied in the field of dimension chain teaching auxiliary equipment, can solve problems such as difficult for students to understand, lack of teaching auxiliary equipment, and inability to master well, and achieve quick disassembly and assembly, simple structure, and deepened understanding Effect
- Summary
- Abstract
- Description
- Claims
- Application Information
AI Technical Summary
Problems solved by technology
Method used
Image
Examples
Embodiment 1
[0030] Use the reverse calculation method.
[0031] Given A0 1 The limit deviation value is: 0.5mm~0.8mm;
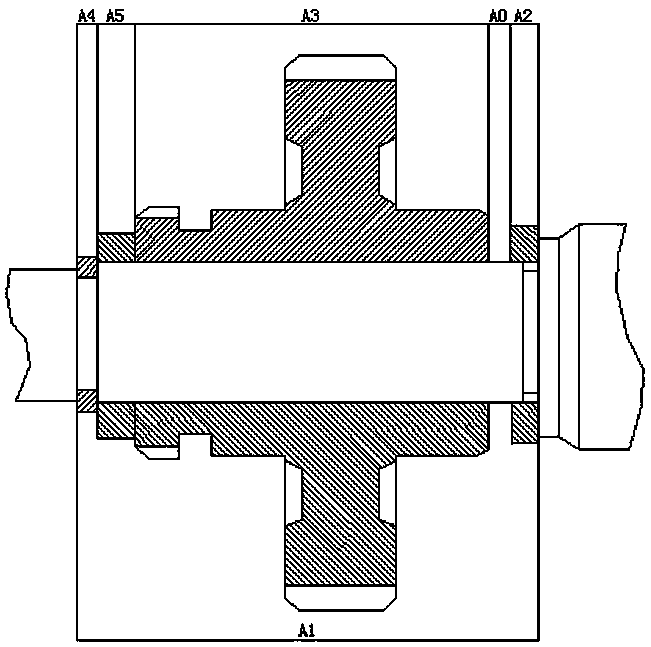
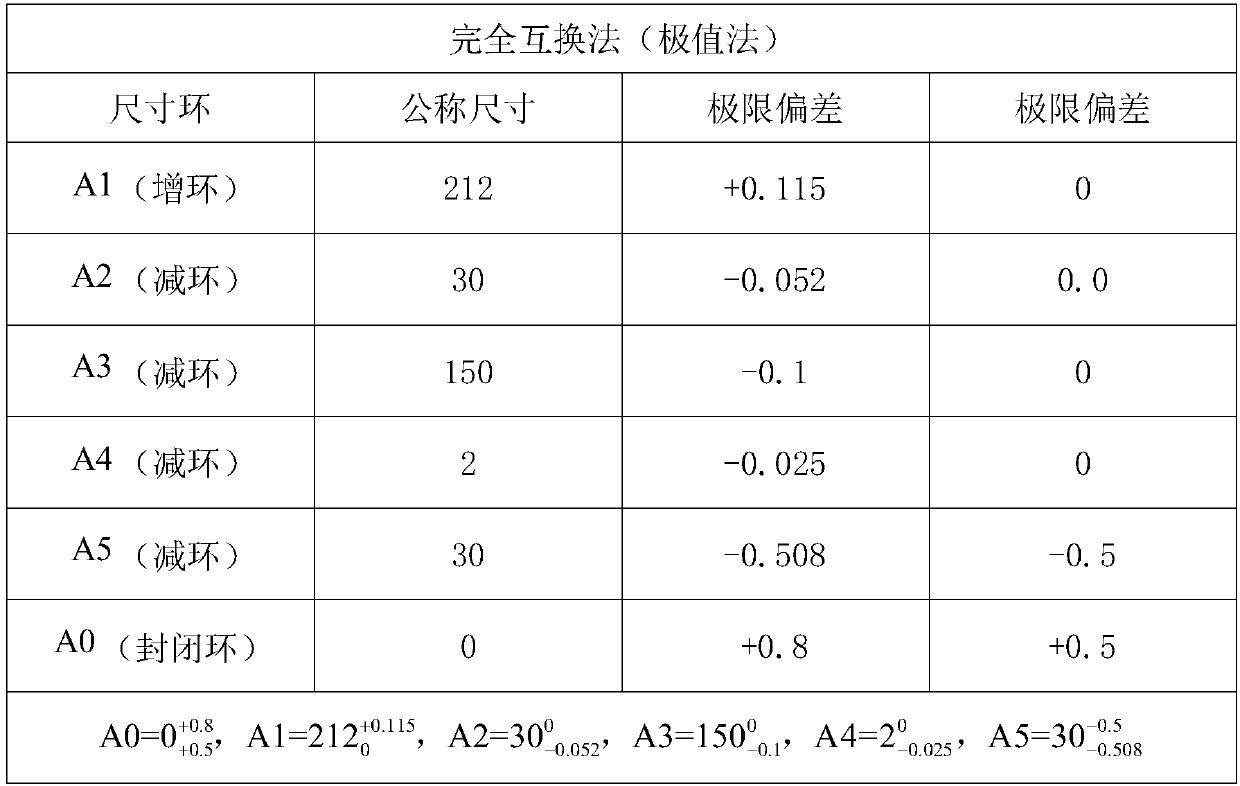
[0032] Then, through two theoretical calculation methods, the tolerances and limit deviations of A1, A2, A3, A4, and A5 are obtained, as shown in Table 1 and Table 2:
[0033] Table 1 (unit: mm)
[0034]
[0035] Table 2 (unit: mm)
[0036]
[0037] Then actually measure the corresponding values of A1, A2, A3, A4, A5 in each group of parts, and calculate their limit deviation accordingly.
[0038] The measurement results of each group of parts are shown in Table 3.
[0039] Table 3 (unit: mm)
[0040]
[0041] The measured value was compared with the given value, and the results were consistent.
Embodiment 2
[0043] Use the reverse calculation method.
[0044] Given A0 1 The limit deviation value is: 0.8mm~1.2mm;
[0045] Then, through two theoretical calculation methods, the tolerances and limit deviations of A1, A2, A3, A4, and A5 are obtained, as shown in Table 4 and Table 5:
[0046] Table 4 (unit: mm)
[0047]
[0048]
[0049] Table 5 (unit: mm)
[0050]
[0051] Then actually measure the corresponding values of A1, A2, A3, A4, A5 in each group of parts, and calculate their limit deviation accordingly, as shown in Table 3. The measured value was compared with the given value, and the results were consistent.
Embodiment 3
[0053] Use the reverse calculation method.
[0054] Given A0 1The limit deviation value is: 1.0mm~1.5mm;
[0055] Then, through two theoretical calculation methods, the tolerances and limit deviations of A1, A2, A3, A4, and A5 are obtained, as shown in Table 6 and Table 7:
[0056] Table 6 (unit: mm)
[0057]
[0058]
[0059] Table 7 (unit: mm)
[0060]
[0061] Then actually measure the corresponding values of A1, A2, A3, A4, A5 in each group of parts, and calculate their limit deviation accordingly, as shown in Table 3. The measured value was compared with the given value, and the results were consistent.
PUM
 Abstract
Description
Claims
Application Information


