Measurement apparatus, test method, and physical property evaluation program for indentation creep test, and recording medium recording physical property evaluation program
- Summary
- Abstract
- Description
- Claims
- Application Information
AI Technical Summary
Benefits of technology
Problems solved by technology
Method used
Image
Examples
example 1
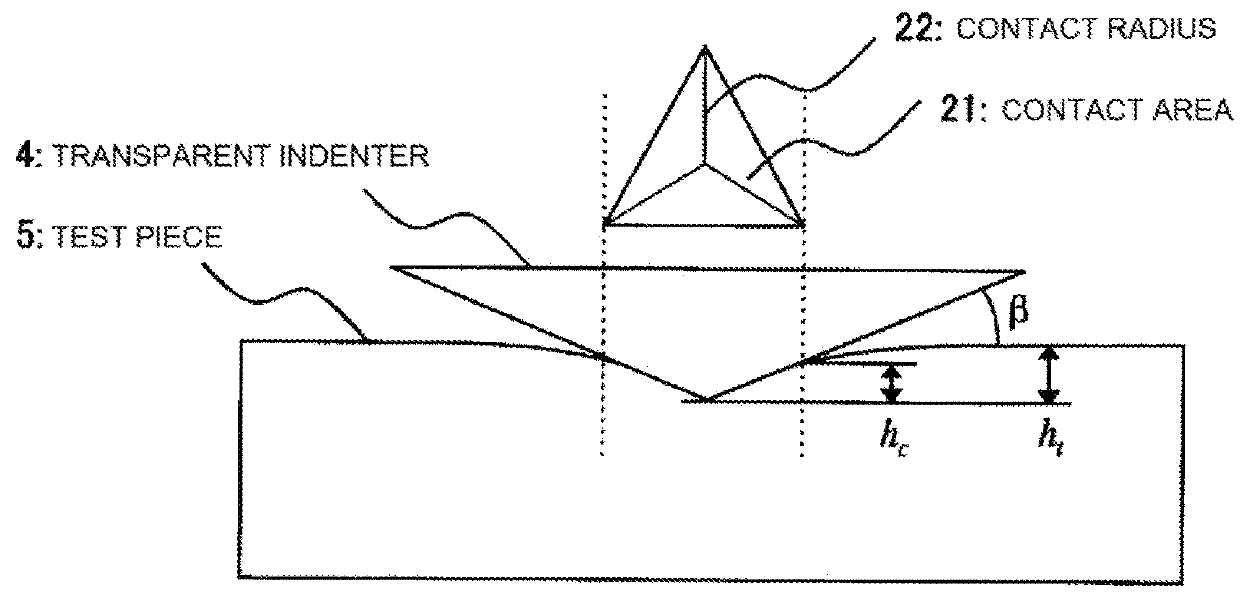
[0108]FIG. 5 illustrates actual measured values of an applied load (an indentation load) P0 and a contact area Ac during an indentation creep test carried out by the measurement apparatus according to the embodiment of the present invention in a case where a commercially available plastic plate (polycarbonate (PC)) is used as a specimen. The indentation creep test was carried out with respect to a plate-like test piece (10×10×5 mm) at room temperature (T=21.0° C.), using a diamond Berkovich indenter having a three-sided pyramidal tip and an inclined face angle β of 24.7 degrees. FIG. 5 illustrates a case where a constant applied load (P0=20.000 gf=196.14 mN) is loaded for a predetermined testing time (t=300 seconds), representing a creep curve in which the contact area Ac increases over time. In the following analysis of the power-law creep, viscoelastic analysis was practiced in regard to test data from which data for 10 seconds just after the start of loading was removed. The time...
example 2
[0117]FIG. 11 illustrates actual measured values of an applied load (an indentation load) P0 and a contact area Ac during an indentation creep test carries out by the measurement apparatus according to the embodiment of the present invention in a case where a commercially available synthetic-resin plate (polymethyl methacrylate (PMMA)) is used as a specimen. The indentation creep test was carried out with respect to a plate-like test piece (5×8×1 mm) at room temperature (T=24.0° C.), using a diamond Berkovich indenter having a three-sided pyramidal tip and an inclined face angle β of 25.0 degrees. FIG. 11 illustrates a case where a constant applied load (Po=1.000 gf=9.807 mN) is loaded for a predetermined testing time (t=300 seconds), representing a creep curve in which the contact area Ac increases over time.
[0118]FIG. 12 is a graph plotting natural logarithms of the contact stress as the X-axis, and plotting natural logarithms of a viscoelastic strain rate as the Y-axis in accorda...
example 3
[0123]FIG. 13 illustrates actual measured values of an applied load (an indentation load) P0 and a contact area Ac during an indentation creep test according to the embodiment of the present invention in a case where a commercially available magnesium alloy (AZ31) is used as a specimen. The indentation creep test was carried out with respect to a plate-like test piece (10×10×1.6 mm) at room temperature (T=25.0° C.), using a diamond Berkovich indenter having a three-sided pyramidal tip and an inclined face angle β of 25.0 degrees. FIG. 13 illustrates a case where a constant applied load (P0=5.000 gf=49.035 mN) is loaded for a predetermined testing time (t=3000 seconds), representing a creep curve in which the contact area Ac increases over time.
[0124]FIG. 14 is a graph plotting natural logarithms of viscoelastic contact stress as the X-axis, and plotting natural logarithms of the viscoelastic strain rate as the Y-axis in accordance with Formula 13, where the base is represented by e....
PUM
 Abstract
Description
Claims
Application Information


