A LED driver and a LED module for use with the driver
Active Publication Date: 2021-07-08
SIGNIFY HOLDING B V
0 Cites 0 Cited by
AI-Extracted Technical Summary
Problems solved by technology
The high inrush current to the LEDs usually shortens the work life and harms the reliability of the LEDs.
It can also cause dangerous safety issues.
However, the presence of a series device even during normal operation, nam...
Method used
[0078]In this way, every time the LED module is connected, the LED driver goes through a ramp-up process starting from a low regulated output voltage lower than the LED forward voltage, the LED driver increases its duty cycle and output power gradually so that the outrush current can be eliminated/reduced.
[0090]This three contact connector provides a safe mechanical structure of the connectors to avoid unintentional or premature short circuiting between the connector 311 and 312. The short circuit between contacts 311 ...
Benefits of technology
[0019]This driver has a normal current regulating (first) mode for driving a LED module. In addition, it has an open circuit protection (second) mode. This second mode on the one hand prevents the LED driver from overloading, and on the other hand keeps the LED driver activated and enables a LED module to be powered and emit light as soon as it is connected to the LED driver, in particular because it is placed in a voltage regulating second mode. Detection of the connection of a LED module is based on a third contact, and this de...
Abstract
A LED driver comprises two output contacts (310, 311) and an additional contact (312) which enables detection of connection of the LED driver to a LED module (301). The LED driver has a normal current regulating mode and an open circuit protection voltage regulating mode. The LED driver is switched from the voltage regulating mode to the current regulating mode in response to the detection of connection of the LED module. This enables a LED module to be connected to the LED driver while it remains powered, in particular because the LED driver is placed in a voltage regulating mode prior to connection to the LED module.
Application Domain
Electrical apparatusElectric circuit arrangements +2
Technology Topic
PhysicsLed driver +5
Image
Examples
- Experimental program(1)
Example
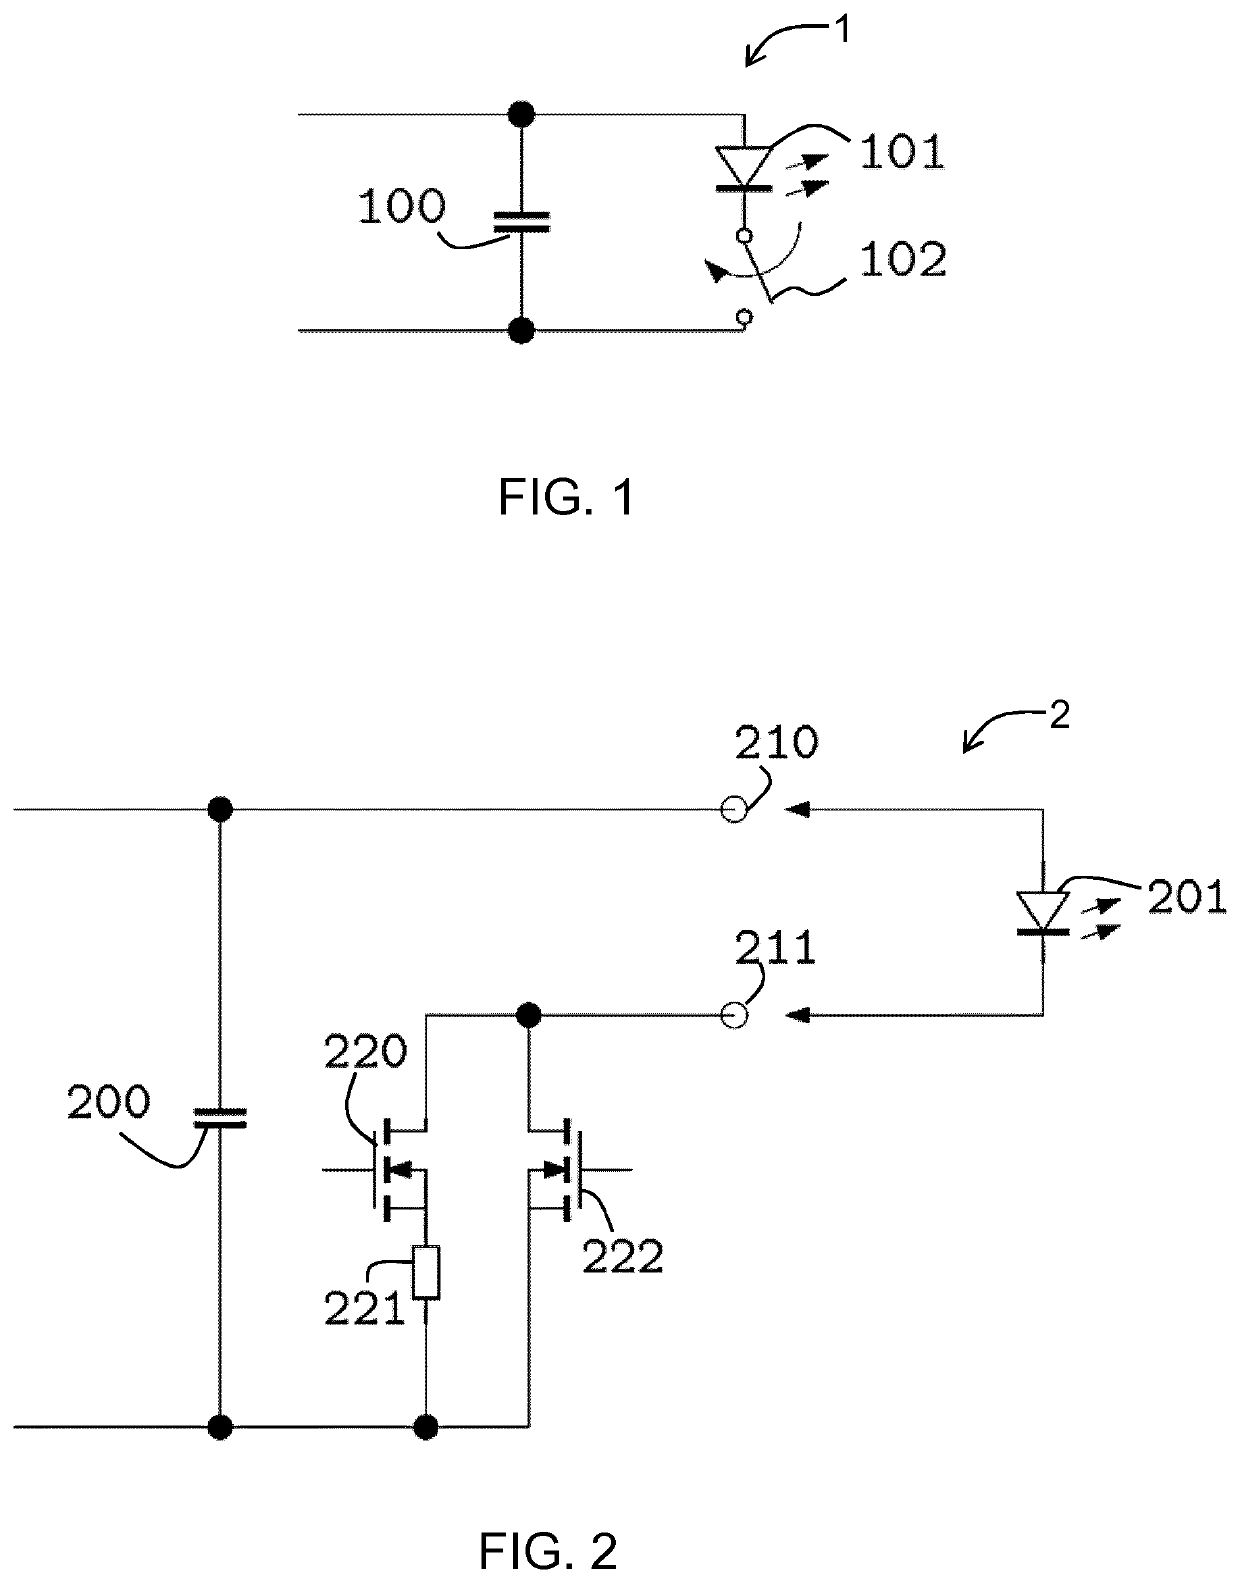
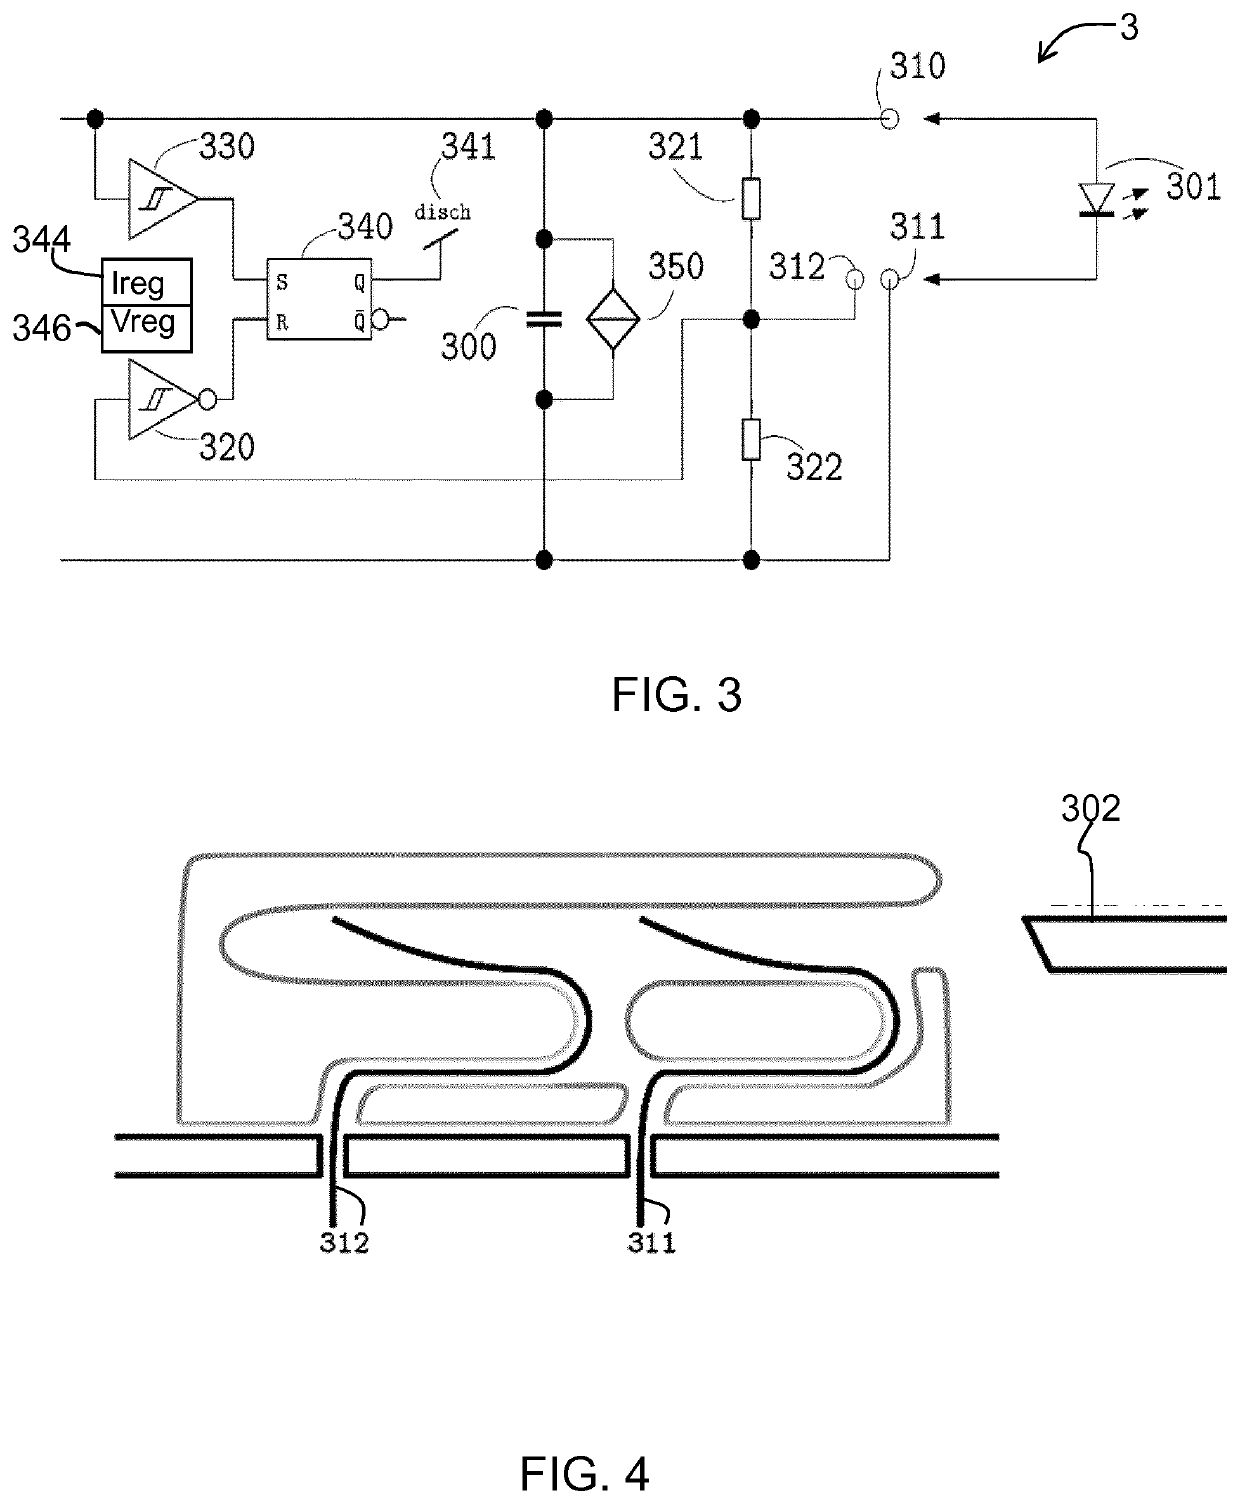
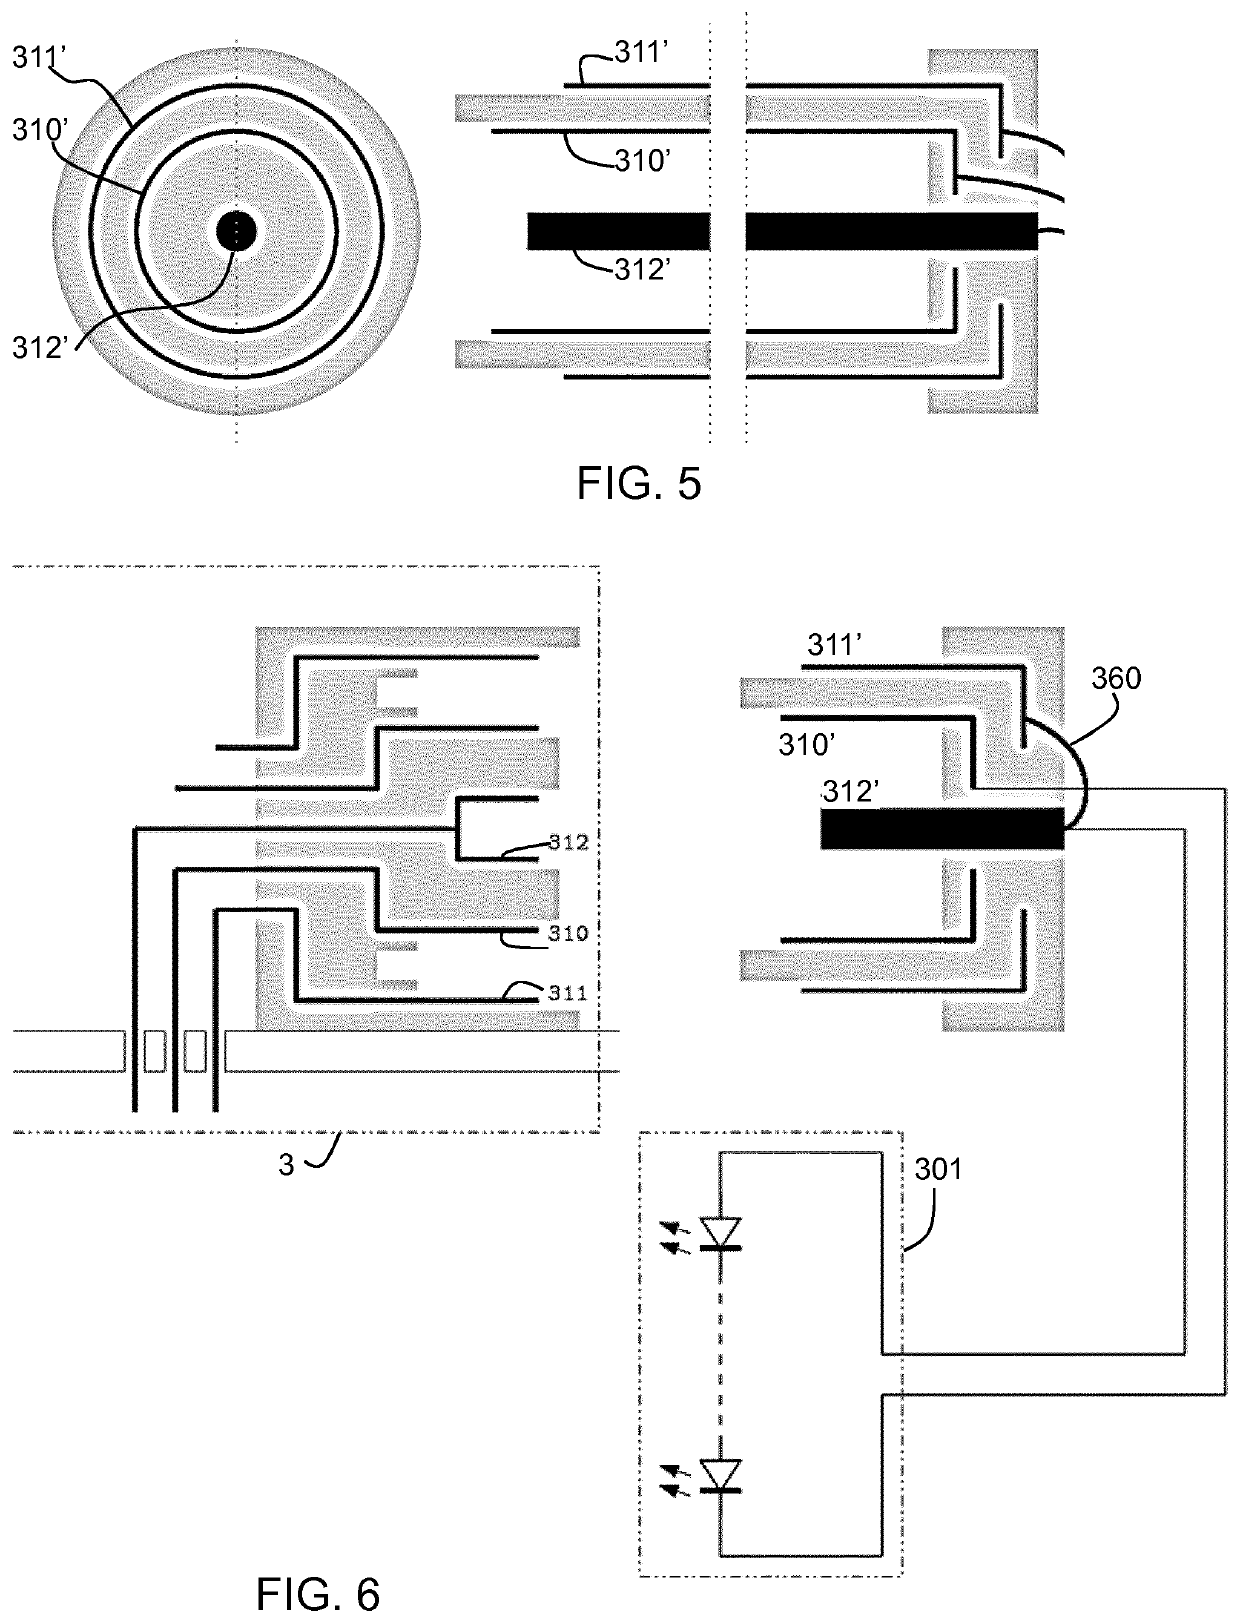
[0064]The invention will be described with reference to the Figures.
[0065]It should be understood that the detailed description and specific examples, while indicating exemplary embodiments of the apparatus, systems and methods, are intended for purposes of illustration only and are not intended to limit the scope of the invention. These and other features, aspects, and advantages of the apparatus, systems and methods of the present invention will become better understood from the following description, appended claims, and accompanying drawings. It should be understood that the Figures are merely schematic and are not drawn to scale. It should also be understood that the same reference numerals are used throughout the Figures to indicate the same or similar parts.
[0066]The invention provides a LED driver which comprises two output contacts and an additional contact which enables detection of connection of the LED driver to a LED module. The driver has a normal current regulating mode and an open circuit protection voltage regulating mode. The LED driver is switched from the voltage regulating mode to the current regulating mode in response detection of connection of the LED module. This enables a LED module to be connected to the LED driver while the LED driver remains powered, in particular because it is placed in a voltage regulating mode prior to module connection.
[0067]FIG. 3 shows a first example of a LED driver 3 in accordance with the invention. The driver output capacitor is shown as 300. One capacitor terminal connects to a first output contact 310 of the driver. The LED load 301 connects between the first output contact 310 and a second output contact 311. The second output contact 311 connects to the other capacitor terminal.
[0068]A resistor divider of a first impedance 321 and a second impedance 322 is provided between the first output contact 310 and the second output contact 311. These impedances define a potential divider. The output of the resistor divider connects to a third contact 312.
[0069]A controller 340, in this example in the form of a latch circuit, has two inputs. A first input is from the output voltage of the driver which is fed to a comparator 330 with a hysteresis structure (or a Schmitt trigger). A second input is from the voltage divider 321, 322 which is also fed to a comparator 320 with a hysteresis. An output signal 341 (“disch”, standing for “discharging”) is provided as output from the controller 340. It is used to control the discharge of the output voltage stored on the driver output capacitor 300 as explained below.
[0070]The driver provides a regulated output current when driving the LED load/module. A current regulator 344 is shown schematically for this purpose. A voltage regulator 346 is shown for a voltage regulating mode. The latch 340, regulators 344 and 346 and comparators 320 and 330 may be considered together to form part of the overall controller of the LED driver.
[0071]When the load is disconnected, the result of the regulated current driving is that the current continues to flow into the capacitor 300 and the comparator 330 detects that the output voltage increases above a first output voltage threshold. The latch circuit 340 is then set so that the output 341 (signal “disch”) is taken to a value “1”. The voltage regulating mode (for open circuit protection) is for regulating the output to a regulation voltage which is lower than the first output voltage threshold. Thus, once an open circuit has been detected based on a high output voltage being reached during current regulation, the mode switches to voltage regulation at a lower voltage.
[0072]The actual voltage levels will depend on the load being driven. The high voltage threshold will be higher than the normal forward voltage of the LEDs in the LED module, and the regulation voltage will be lower than that normal forward voltage. The regulation voltage is for example a required power supply voltage for other circuits such as sensors or wireless communication circuits to be powered by the LED driver. Thus, the voltage threshold may be tens or even hundreds of volts, whereas the regulation voltage may be less than 10V.
[0073]The voltage regulator 346 monitors the signal “disch”341 and sets the regulation voltage (by setting a reference provided to the voltage regulator), to a suitable level below the first output voltage threshold, such that the low voltage power supply of the controllers or other circuits can still operate.
[0074]When switching from the current regulating mode to the voltage regulating mode (i.e. when the first output voltage threshold is reached) the LED driver discharges the output voltage stored on the capacitor 300 to the regulation voltage. For this purpose, a discharging element 350 such as a current source or dummy load is used to discharge the output capacitor 300. Note the discharging element 350 is an optional feature. It could also be that the LED driver will let the output capacitor leak charge to reach the regulation voltage.
[0075]The voltage divider associated with the third contact 312 is for sensing the connection between the LED driver and the LED/LED module. In this embodiment, the correction connection of the LED module would change the voltage division ratio, and if the output of the voltage divider 321, 322 drops below a certain threshold, the output signal “disch” is cleared such that the discharging of the output capacitor 300 stops, and the reference of the voltage controller is sets back to normal. This is in particular in response to the output voltage of the voltage divider, at contact 312, being pulled down to the negative output 311 by the connection to the LED module, as will be apparent from the description below.
[0076]The latch thus processes the output voltage at the capacitor as well as the detection voltage relating to connection to the LED module. The latch triggers (e.g. sets) when the high capacitor voltage is detected and triggers (e.g. resets) when the LED module connection is detected.
[0077]The circuit needs to be able to detect the insertion of the LED module 301. This is accomplished by the third contact 312, which forms a two-contact connector with the second output contact 311. The second output contact 311 and the third contact 312 are short-circuited when the LED is connected, and open-circuited when the LED module is removed.
[0078]In this way, every time the LED module is connected, the LED driver goes through a ramp-up process starting from a low regulated output voltage lower than the LED forward voltage, the LED driver increases its duty cycle and output power gradually so that the outrush current can be eliminated/reduced.
[0079]The third contact 312 is thus adapted to associate with different voltages depending on whether or not the LED driver is connected to the LED module. When the LED module is not connected, the contact 312 is at the normal voltage divider output and the voltage division ratio is R322/(R322+R321), and when the LED module is connected, the contact 312 is pulled down to the low voltage rail, connected to the second output contact 311 and the voltage division ratio is zero.
[0080]The driver thus has a normal current regulating first mode for driving a LED module. In addition, it has an open circuit protection mode which is a voltage regulating second mode. A LED module can be connected to the LED driver while the LED driver remains powered in this mode. This avoids the need for current limiting elements in series with the LED module, because at the time of connection of the LED module, the driver is in a (low) voltage regulating mode.
[0081]When the LED module is removed, the output voltage is higher than a threshold, so the comparator 330 outputs 1, the comparator 320 with an inverter outputs 0, thus the latch 340 outputs 1 “disch”, to discharge the output voltage and control the LED driver to enter voltage regulation mode. After the discharging, the output voltage is lower than the threshold, the comparator 330 outputs 0, but the latch circuit 340 still outputs the previous output which is 1 and keeps the voltage regulation mode. The latch circuit 340 would output zero upon the reset input R changing to 1, meaning the voltage on the third contact 312 is zero which is caused by a correct connection of the LED module. The zero output of the latch circuit would disable the discharging and also control the LED driver to enter the current regulation mode.
[0082]The design requires connection to the LED module to form a short between the contacts 311 and 312. FIG. 4 shows a general two-contact connector which can achieve this aim. The pin 302 is one terminal (negative input) of the LED module designed to fit mechanically with the two-contact connector of the contacts 311 and 312. Upon insertion into the connector, it first contacts a wire which is connected to the contact 311 and then contacts a wire which is connected to the contact 312 (as well) thereby connecting the two contacts together. This mechanical structure, which allows only an earlier connection of the second contact 311, is for preventing that the LED driver enters the current regulating mode before the real current loop via the second contact 311 is formed.
[0083]The connector needs to reliably short circuit contacts 311 and 312 when the LED module is plugged in. Furthermore, connection should be made to contact 310 before short-circuiting 311 and 312. This is because as soon as the short circuit is detected, the LED module should be fully ready to receive a regulated current, i.e. the other contact 310 should already be connected.
[0084]If a two-contact connector is used, and which can be connected in either order (for example if there are two separate connectors which can be connected in either order), then the connected needs to be in the correct order for the mode switching to take place correctly.
[0085]FIG. 14 shows the contacts' connection upon the removal of the LED module; and the other way around shows the connection upon the attach of the LED module. The darker blocks connected to the anode and cathode of the LED are the positive contact and negative contacts of the LED module. Especially, the negative contact is 302. In the left figure, the LED module is correctly connected to the driver wherein the positive contact of the LED module connects to the positive output 310 of the driver; and the negative contact 302 connects to both the negative output 312 and the third contact 311. As illustrated above, since the negative output 312 and the third contact 311 are shorted and the third contact receives the ground voltage, the driver would be in normal current mode. In the middle figure, the LED module is being removed, the third contact 311 is first disconnected from the negative contact 302 and the negative output 311 such that its voltage changes from ground to a certain voltage. The driver would exit the normal current mode and enter open protection mode. In the right figure, the LED module is completely removed.
[0086]To ensure a correct connection order, a three contact connector may be used. In this way, the connector itself defines the order in which electrical connections are made.
[0087]FIG. 5 shows a male connector in end view and in cross section, having three concentric terminals of different length. The inner terminal 312′ is on the central axis, and the middle terminal 310′ and outer 311′ terminal are concentric. The middle terminal 310′ projects furthest forward so makes contact first with a female connector. Thus, it is suitable as the LED module terminal 310′ for contacting the LED driver first output contact 310. The inner terminal 312′ projects slightly further back so makes contact next with a female connector. Thus, it is suitable as the LED module terminal 312′ for contacting the LED driver third contact 312. The outer terminal 311′ projects furthest back so makes contact last with a female connector. Thus, it is suitable as the LED module terminal 311′ for contacting the LED driver second output contact 311.
[0088]Note that in an alternative embodiment (shown in FIG. 11) the contacts 311 and 312 may make contact in either order since only when both are connected will the voltage divider output be pulled down to the low voltage rail (as explained further below).
[0089]FIG. 6 shows the connector of FIG. 5 used for the LED module 301, and a female version (with all three contacts terminating at the same longitudinal extent) for the LED driver 3. In this LED module, the contact 312′ and 311′ are short circuited by a wire 360.
[0090]This three contact connector provides a safe mechanical structure of the connectors to avoid unintentional or premature short circuiting between the connector 311 and 312. The short circuit between contacts 311 and 312 takes place in the male connector by the last connection of 312 and 312′. Thus, only when both connections 311/311′ and 312/312′ are made will the voltage divider output be pulled down.
[0091]This design requires a three pin connector for the LED module, which is not standard. The use of a three contact connector however ensures that the connector can only be joined in one way.
[0092]FIG. 7 shows a modification to the circuit of FIG. 3 which allows a two pin connector, and one which can be connected with either pin first. By requiring only two lead wires from the LED module the total system cost is reduced, but such a system needs to be able to tolerate a random order of insertion of the two lead wires.
[0093]The same components as in FIG. 3 are given the same reference numbers and the description is not repeated.
[0094]The contact 310 is split into two contact portions, 310a and 310b (i.e. the first output contact is 310a and there is a new fourth contact 310b). The control logic 340b is modified compared to the latch 340 of FIG. 3 such that a voltage rising at the third contact 312 above an arming voltage Varm must be detected before it falls below a firing voltage Vfire, where Varm>Vfire.
[0095]During correct insertion, the third contact 312 first is pulled to the voltage divider output (when 310a and 310b are connected) with a certain value above zero then it is pulled down to the low voltage rail (when 311 and 312 are connected) with a substantial zero voltage.
[0096]If the end user inserts the cathode lead wire (LED-) before the anode lead wire (LED+), the “arm-fire” process is missing and the output capacitor 300 is kept at a low voltage. During incorrect insertion, the contact 312 first is pulled to the low voltage (when 311 and 312 are connected) directly and never goes up. At the output of the voltage divider, the voltage is always zero.
[0097]Thus, only the correct order of insertion leads to the current regulating mode, without outrush current. This enables a conventional LED module to be used with two separate lead wires instead of requiring replacement with a three contact power adaptor type cable. If connection is in the wrong order, the LED module will not function, and the user will need to disconnect and reconnect in the correct order.
[0098]The fourth contact 310b is coupled to the third contact 312 through the top impedance 321 of the voltage divider. The fourth contact 310b is adapted to be coupled to the first output contact 310a upon a correct connection of the LED module to the first contact 310a and before a correct connection of the LED module to the third contact 312. Thus, the intended connection order is to connect 310a and 310b and then to connect 311 and 312.
[0099]In this design, the first impedance 321 of the voltage divider is between the third contact 312 and the fourth contact 310b and the second impedance 322 of the voltage divider is between the third contact 312 and the second output contact 311.
[0100]The use of a four-contact arrangement enables the connection order to the LED module to be detected, because connection to both output contacts can be detected. In this way, if the connection is in the wrong order the current regulating mode is not initiated, because the output of the voltage divider is always zero and the LED driver is not aware of whether the LED module is or is not correctly connected to receive the current. Thus, the controller is adapted to switch the LED driver to the first mode only for one connection order. Thus, random connection of the LED module can be tolerated.
[0101]The logic inside the controller 340b may be implemented by a finite-state machine such as an algorithm in a microcontroller.
[0102]For completeness, FIG. 8 shows a set-reset latch 4 which may implement the latch 340 of FIG. 3. It comprises a set of transistors 400, 401, 402 and resistors 403, 404, 410, 411, 420, 421. It has a set input S, a reset input R and a latch output Q. This is a discrete circuit implementation but of course an integrated circuit may be used. The circuit of FIG. 8 is a standard SR latch circuit and will not be described in full, as it will be well known to those skilled in the art.
[0103]FIG. 9 shows an example of the discharging element 350 in the form of a current source circuit. The transistor 510 is turned on by the latch circuit, which then sets an output voltage at the junction of a potential divider 511,512.
[0104]This voltage is supplied to the gate of a FET device 500 and turns it on to draw a predetermined current from the capacitor 300 (FIG. 3) through a resistor 501. When the capacitor voltage has dropped to the potential divider voltage, the potential divider 511,512 outputs a low voltage that turns off the MOSFET 500, and the capacitor stops discharging. Thus, the transistor 500 functions as a current source that discharges the capacitor to a set level after the removal of the LED module.
[0105]FIG. 10 shows an example of the voltage regulator 346 with a switchable reference.
[0106]A potential divider 600, between a reference Vref and ground, sets the voltage to the non-inverting input of a comparator 610. The set voltage depends on the switching state of transistor 620 which sets the lower impedance of the voltage divider to be either one resistor or two resistors in parallel. The comparator 610 has a negative feedback path 630 which regulates the output in dependence on the input provided to the non-inverting input.
[0107]Thus, two voltage regulation output are generated, depending on the state of transistor 620, which is controlled by the latch circuit 340.
[0108]The examples above enable connection to a standard LED module, either with a standard two pin layout or a three pin connector.
[0109]FIG. 11 shows a possible modification to the LED module in which a first input terminal 310′ and a second input terminal 311′ are adapted to connect to the first 310 and second 311 output contacts of the LED driver.
[0110]The connection between the driver and the module is three pins. The shorting between contacts 311 and 312 is implemented in the LED module rather than by the pin connector design.
[0111]A third input terminal 312′ is to contact the third contact 312 of the LED driver. A switch 700 is provided to change the voltage associated with the third input terminal 312′ upon an active voltage from the first input terminal 310′.
[0112]Thus, if the connection is first made to the first input terminal 310′, the connection provides a control signal to the switch 700 which then immediately implements the shorting of the second and third input terminals 311′ and 312′. This arrangement means connection of the LED module can be tolerated with either terminal making contact first. If the first output contact 310 is connected first, the short circuiting between the second output contact and the third contact is forced by the switch.
[0113]If the second output contact 311 is connected first before the first output contact 310, the shorting between the second output contact 311 and the third contact 312 still does not happen until it is forced by the switch when the first output contact 310 makes its connection.
[0114]Thus, different connection orders can be tolerated, and the current regulating mode can be established for those different orders, rather than requiring disconnection and reconnection as in the examples above.
[0115]The discussion above assumes that the LED module is always connected with the correct polarity. In particular, the mechanical connector designs may ensure that this is always the case. Thus, the protection systems above ensure only that the correct connection order is ensured.
[0116]The detection of connections and resulting voltages and currents may also be used to detect the polarity of the connected LED module, and thus prevent the current regulating mode when the LED module is incorrectly connected.
[0117]In an alternative embodiment, an Rset interface between the LED driver and the LED module is re-used for detecting the presence of the LED module and make the LED driver switch between normal current mode and open protection mode. This embodiment is shown in FIG. 12.
[0118]Rset interface is a well known interface for setting the nominal output current of the LED driver. At the LED driver side, besides the positive output contact 310 and negative output contact 311, a third contact 312 is used for connecting to an end of a setting impedance in the LED module, shown as 312′. The other end of the impedance could connect the either of the two input contacts of the LED module, and in this embodiment it connect to the negative input contact 311′. A bias current source injects a bias current Ibias through the third contact 312 and the negative output contact 311. Normally, the LED driver detects the presence and value of the Rset during startup, by detecting the voltage across the contacts 312 and 311. If there is voltage, the voltage is processed by an amplifier AMP and sent to the MCU or IC to determine the set current Iset of the LED driver; if there is no voltage, the MCU or IC would also operate in normal current mode with a default/minimum output current. Note that the setting impedance Rset is a fixed resistor or is once-for-all configured thus is not likely to change in the operation of the LED module. Also, the Rset interface has not be considered as a means for any protection purpose. This Rset interface is quite different from the temperature protection interface based on the above facts, which temperature protection interface has varying impedance during the operation of the LED module.
[0119]The embodiment proposes to detect the presence of the LED module and switches between the normal current mode and open protection mode according to the voltage on the third contact 312 (with respective to ground 311) which is to be connected to Rset of the LED module. As shown in FIG. 12, an extra comparator Comp is used for detecting the voltage on the third contact 312. The contacts are also shaped so that the third contact 312 and the contact 312′ are the last to connect upon connecting the LED module, and first to disconnect upon the removal. In the FIG. 12 and the left figure of FIG. 13, the voltage on the contact 312 is Rset*Ibias, and comparator Comp determines this voltage is within a threshold and output an enable signal=1, and the driver works in normal current mode. In the middle figure of FIG. 13, the contacts 312 and 312′ are firstly disconnected. If the voltage on the contact 312 become large, when the comparator Comp determined that the voltage excessive a threshold, it outputs the enable signal=0. The driver would see Rset as not present and neither is the LED module, thus the driver would exit the normal current mode and enters the open protection mode. In the right figure of FIG. 13, all the contacts are completely disconnected.
[0120]The driver can be configured flexibly how it would react with the absence of the Rset on the third contact: either as the traditional driver that output a default current, or as the proposed embodiment that enters the open protection mode. For example, a maintenance signaling can be sent to the driver indicating that the LED module is to be replaced, and the driver would react as the proposed embodiment thus it is safe when the LED module is hot plugging out and in; after the maintenance, a signaling can be sent to the driver again and request the driver to react in traditional manner: outputting a default/minimum current even if the Rset is not present.
[0121]It is noted that the term “contact” is used for the driver output pins and the term “terminal” is used for the LED module input pins. This difference is terminology is to assist in the clarity of the text, but is essentially arbitrary.
[0122]Variations to the disclosed embodiments can be understood and effected by those skilled in the art in practicing the claimed invention, from a study of the drawings, the disclosure and the appended claims. In the claims, the word “comprising” does not exclude other elements or steps, and the indefinite article “a” or “an” does not exclude a plurality. A single processor or other unit may fulfill the functions of several items recited in the claims. The mere fact that certain measures are recited in mutually different dependent claims does not indicate that a combination of these measures cannot be used to advantage. A computer program may be stored/distributed on a suitable medium, such as an optical storage medium or a solid-state medium supplied together with or as part of other hardware, but may also be distributed in other forms, such as via the Internet or other wired or wireless telecommunication systems. Any reference signs in the claims should not be construed as limiting the scope.
PUM


Description & Claims & Application Information
We can also present the details of the Description, Claims and Application information to help users get a comprehensive understanding of the technical details of the patent, such as background art, summary of invention, brief description of drawings, description of embodiments, and other original content. On the other hand, users can also determine the specific scope of protection of the technology through the list of claims; as well as understand the changes in the life cycle of the technology with the presentation of the patent timeline. Login to view more.