

Slope protecting method based on slope with soil layer as upper part and rock layer as lower part
A slope and soil quality technology, applied in botany equipment and methods, excavation, infrastructure engineering, etc., can solve the problems of unsuitable high slope, poor protection effect, poor greening effect, etc., to achieve good protection effect and greening Excellent and fast results
- Summary
- Abstract
- Description
- Claims
- Application Information
AI Technical Summary
Problems solved by technology
Method used
Image

Examples
Embodiment Construction
[0018] The technical solution of the present invention will be described in detail below in conjunction with the accompanying drawings.
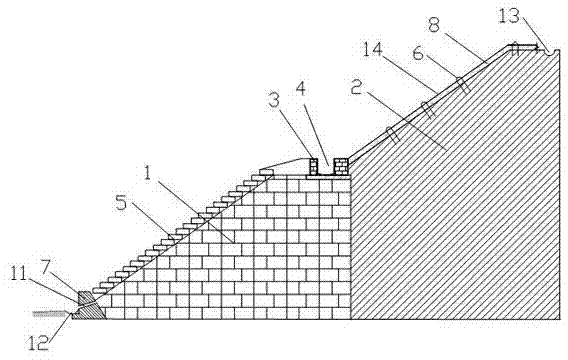
[0019] Such as Figure 1 to Figure 3 As shown, the vertical height of the slope in the embodiment is 10m, the lower 6m is the rock layer 1, and the upper 4m is the soil layer 2, and the design slope of the slope is 1:1.2. The slope protection method for the slope where the upper part is the soil layer 2 and the lower part is the rock layer 1 comprises the following steps:
[0020] 101. Finishing the slope: remove the sundries on the surface of the slope to make the surface of the slope smooth.
[0021] In step 101, removing sundries on the slope surface includes cleaning stones protruding from the slope surface, so as to ensure the smoothness of the slope surface.
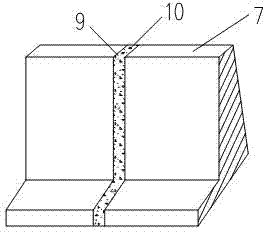
[0022] 102. Carry out foundation construction on the slope: firstly, excavate the slope surface step by step according to 5m-6m with the excavator; Set the settlement joint 9...
PUM
| Property | Measurement | Unit |
|---|---|---|
| Depth | aaaaa | aaaaa |
Abstract
Description
Claims
Application Information