Method for evaluating welding degree of hole type defect in forge piece
A technology of internal holes and evaluation methods, which is applied in the direction of applying a stable bending force to test the strength of materials, to achieve the effects of convenient sampling, loose sample size requirements, and simple operation
- Summary
- Abstract
- Description
- Claims
- Application Information
AI Technical Summary
Problems solved by technology
Method used
Image
Examples
Embodiment 1
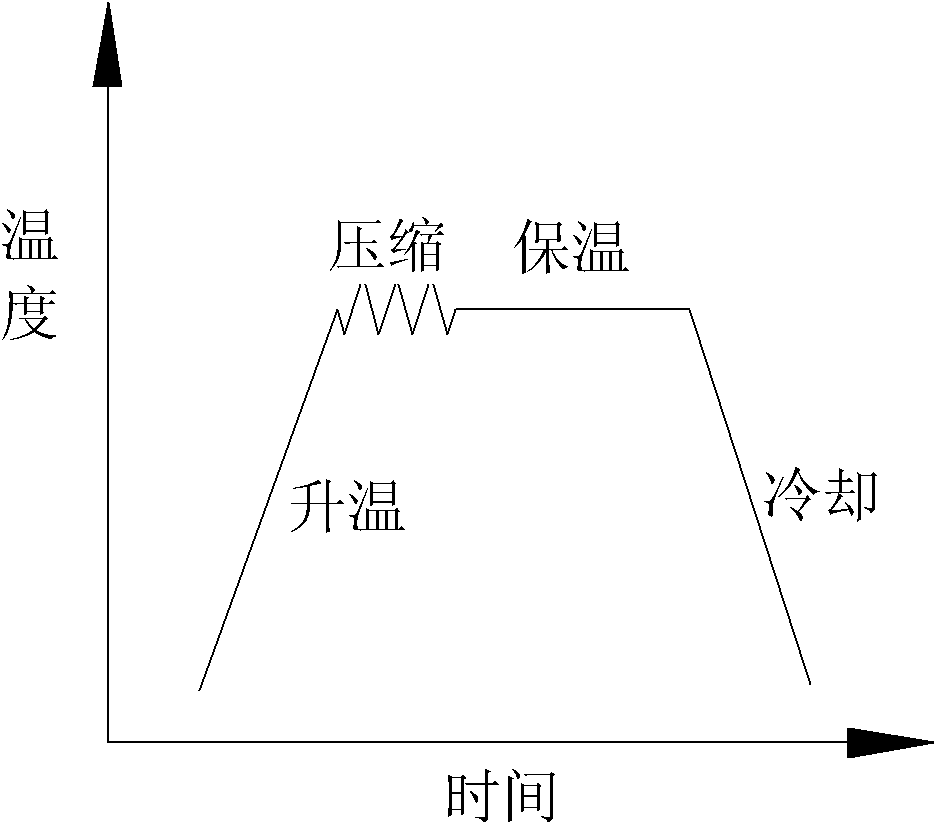
[0029] The experimental material 34MnV steel is processed into a small cylinder of Φ8×12mm, and the end surface roughness of the sample is Ra0.8. The surface of the processed sample was cleaned with acetone, and the sample docking experiment was carried out on a thermal simulation testing machine according to the preset deformation temperature of 1200°C, holding time of 28 minutes and strain of 0.24. The heating rate in the experiment is 5°C / s, the soaking time is 5s, and the strain rate is 0.01s -1 , strain 0.24, the pressure at both ends of the sample during the heat preservation stage is 5MPa, and air-cooled after the heat preservation is over.
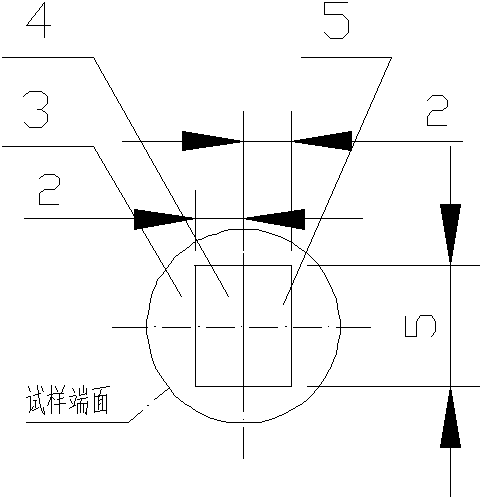
[0030] The butt joint sample after the experiment was cut into a bending sample as shown in Figure 3, and a three-point bending test was carried out ( Figure 4 ). The bending strength of the bent sample is 2170MPa, while the bending strength of the intact sample is 2600MPa, then the welding degree η of the internal hole defect i...
Embodiment 2
[0032] The experimental material 34MnV steel is processed into a small cylinder of Φ8×12mm, and the end surface roughness of the sample is Ra0.8. The surface of the processed sample was cleaned with acetone, and the sample docking experiment was carried out on a thermal simulation testing machine according to the preset deformation temperature of 1100°C, holding time of 14 minutes and strain of 0.06. The heating rate in the experiment is 5°C / s, the soaking time is 5s, and the strain rate is 0.01s -1 , strain 0.06, the pressure at both ends of the sample during the heat preservation stage is 5MPa, and air-cooled after the heat preservation is over.
[0033] The butt joint sample after the experiment was cut into a bending sample as shown in Figure 3, and a three-point bending test was carried out ( Figure 4 ). The bending strength of the obtained bending sample is 1950MPa, while the bending strength of the intact sample is 2600MPa, then the welding degree η of the internal h...
PUM
 Abstract
Description
Claims
Application Information


