The mbd measurement process of large-scale composite high-precision and difficult parts
A high-precision and difficult technology, applied in measurement devices, instruments, and optical devices, etc., can solve the problems of inaccurate measurement data, constraint design benchmarks, and deviation of measured data, and achieve real measurement data and high measurement accuracy. Effect
- Summary
- Abstract
- Description
- Claims
- Application Information
AI Technical Summary
Problems solved by technology
Method used
Image
Examples
Embodiment 1
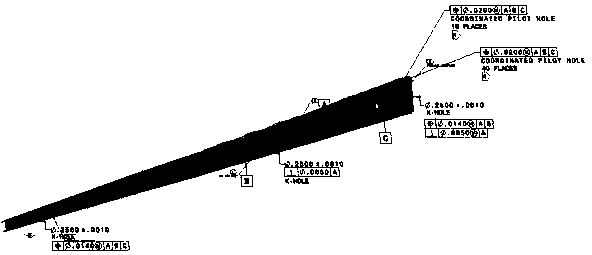
[0033] This embodiment takes the front beam of an aircraft as an example to illustrate the MBD measurement process of large-scale composite high-precision and difficult parts.
[0034] Such as figure 1 As shown, the total length of the front beam of the aircraft is 10 meters. According to the ABC benchmark, a 12-meter CMM three-coordinate measuring machine is used for measurement, combined with a laser tracker, and the measurement is carried out by pressing sandbags.
[0035] Put the high-precision and difficult parts on the milling tooling, combined with the comprehensive application of laser tracker, CMM three-coordinate measuring machine, tooling and process plan formulation, measure the high-precision and difficult parts in the natural state of MBD digital simulation; When the CMM three-coordinate measuring machine establishes the coordinate system, it adopts the ABC datum of the digital model of the part, first performs the ABC datum constraint, then establishes the corre...
Embodiment 2
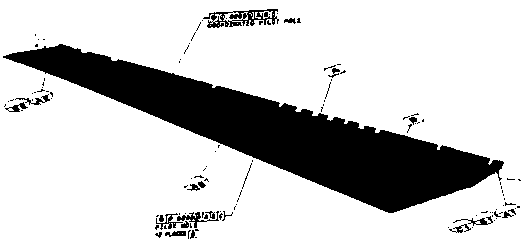
[0047] This embodiment takes the skin as an example to illustrate the MBD measurement process of large-scale composite high-precision and difficult parts.
[0048] The specific steps for establishing the coordinate system of the CMM three-coordinate measuring machine are as follows:
[0049]Step S201: A datum plane is fitted to the surface of the milling tooling, manually measuring 5 points on the tooling surface that fits with the A datum plane to establish a plane, and defining Z0 and Z+;
[0050] Step S202: Manually collect the center of the K hole of the B reference, and project it to a point (B') on the Z0 plane. This point is defined as the coordinate origin, and define X0; manually collect the center of the K hole of the C reference, and project it to a point (C') on the Z0 plane. , B, C datum projection point (B', C') connecting line defines X+;
[0051] Step S203: Using the defined X+, X0, Z+, and Z0, establish the right-hand measurement coordinate system M1 of the h...
Embodiment 3
[0060] This embodiment is further optimized on the basis of the above embodiments, and the parts are fixed by pressing sandbags according to the requirements of BAC5317. Specifically, it means that every about 300mm is pressed with 10 pounds of sandbags for compaction.
[0061] In this embodiment, the method of pressing sandbags is used to make the detection status of high-precision and difficult parts meet the requirements of BAC5317 "Fiber Reinforced Composite Parts" Table Ⅺ "Acceptable Deviation Standards for Completed Cured Parts" to apply 10 pounds on a 12-inch spacing positioning requirements.
PUM
 Abstract
Description
Claims
Application Information

