Method for evaluating tearing toughness of ductile metal materials
A metal material and toughness technology, applied in the field of mechanical performance evaluation and characterization of materials, to achieve the effect of improving the evaluation test method
- Summary
- Abstract
- Description
- Claims
- Application Information
AI Technical Summary
Problems solved by technology
Method used
Image
Examples
Embodiment 1
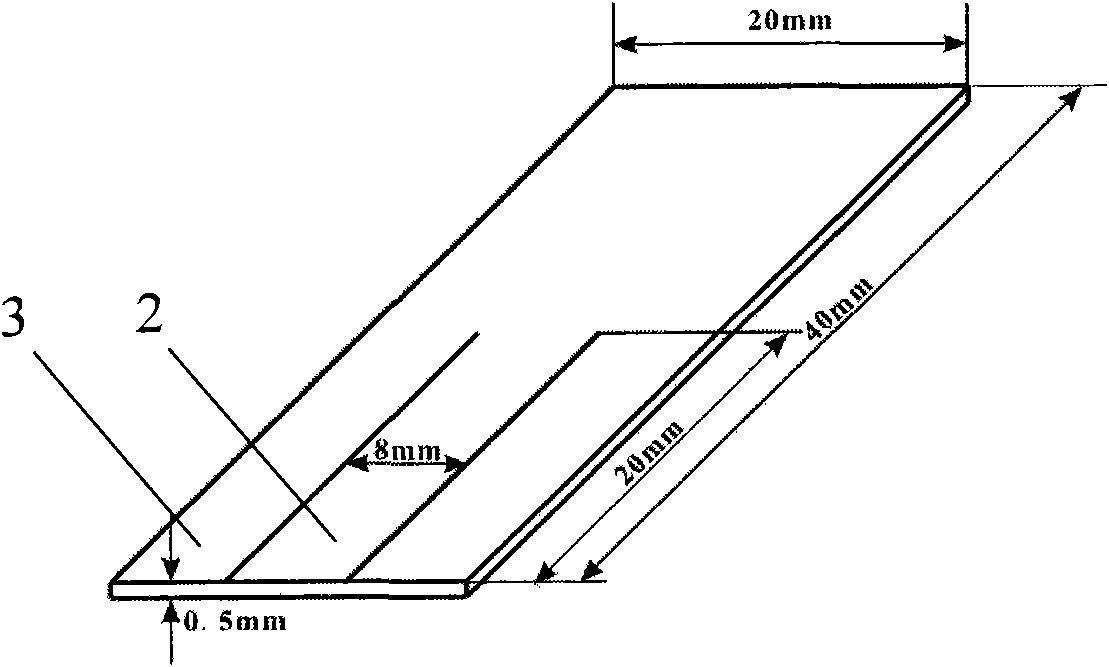
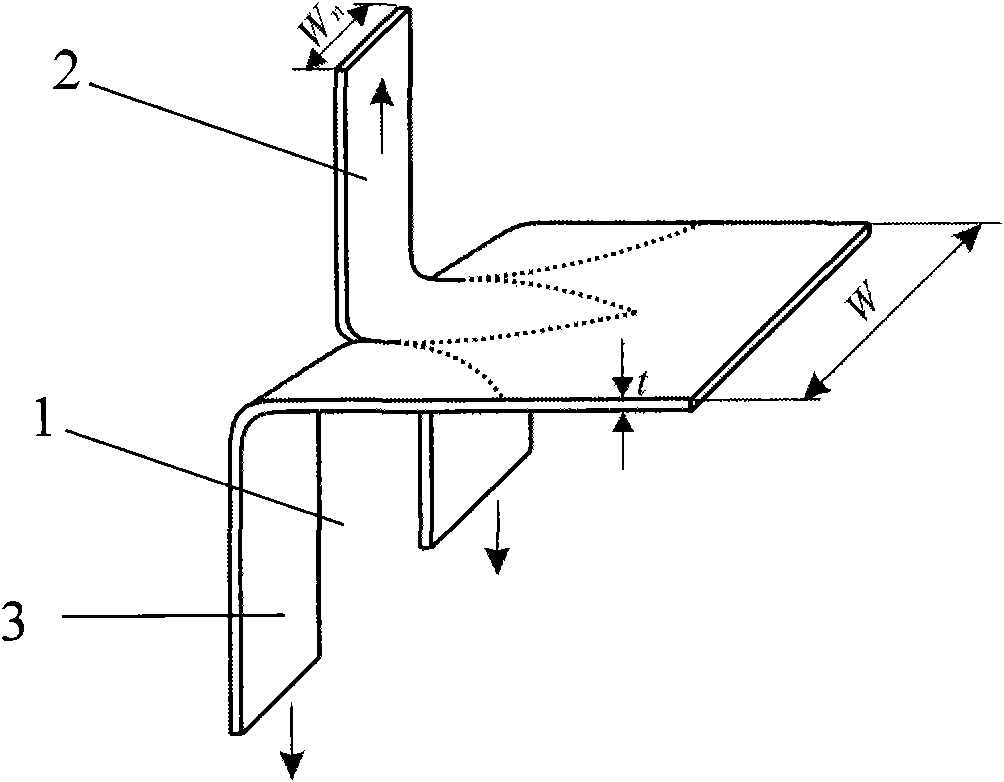
[0040] Material preparation: Cut the 3mm thick cold-rolled 20 steel plate into thin slices of 40mm×20mm×0.5mm along the rolling direction, cut two parallel notches in the length direction of the thin slices, the widths of the notches are 8mm and 12mm respectively, and the lengths of the notches are respectively 20mm( Figure 1-2 ); Cut the 3mm thick cold-rolled 20 steel plate along the rolling direction into a tensile test piece whose gauge length is 16mm×3mm×3mm.
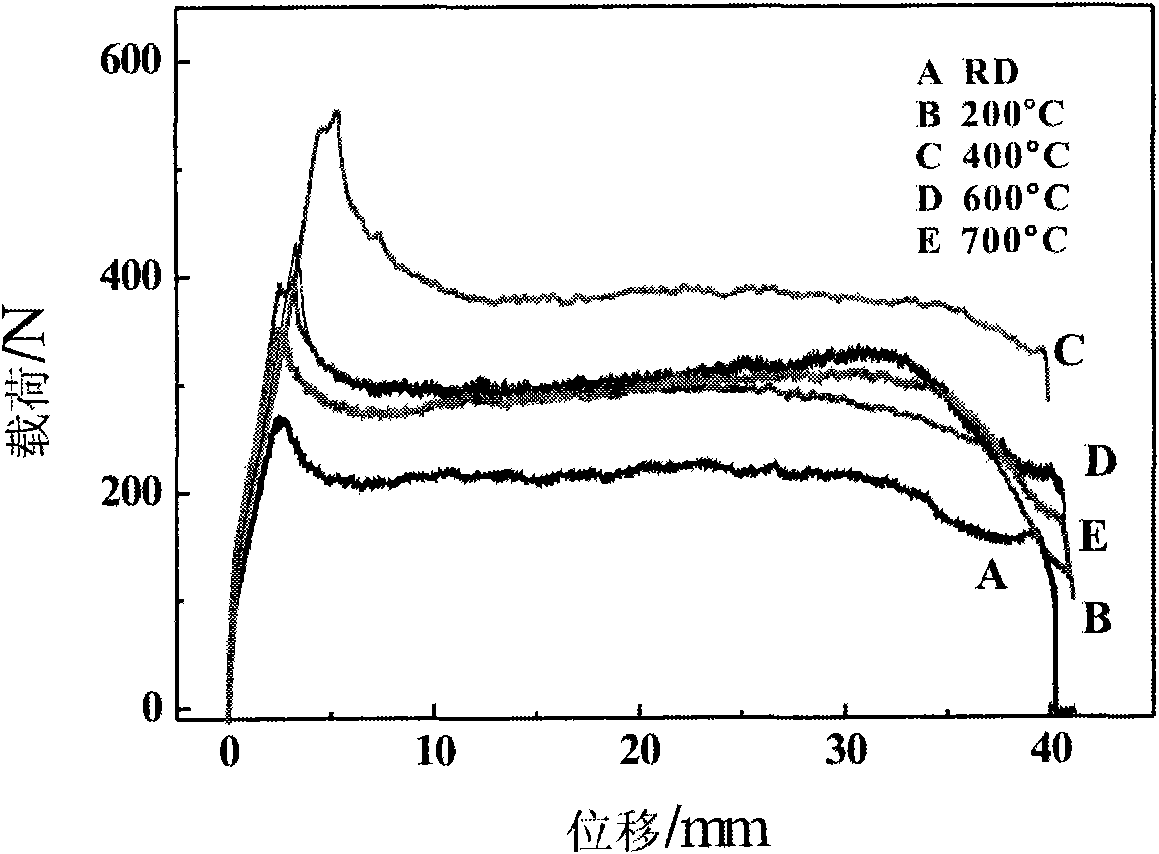
[0041] Heat treatment: Some samples are quenched at 920°C, then tempered at 200°C, 400°C, 600°C, and 700°C for 2 hours, and the samples are polished and polished;
[0042] Performance Testing:
[0043] The tensile samples after heat treatment at different temperatures were subjected to tensile tests, and the test results were as follows: Figure 5 shown.
[0044] The prepared tear sample (notch width 8mm) is clamped to the testing machine, and the tear test is carried out to obtain the applied load-displacement ...
Embodiment 2
[0056] Material preparation: Cut a 0.5mm thick cold-rolled aluminum sheet into 40mm×20mm slices along the rolling direction, and cut two parallel notches (that is, three-leg trousers-shaped tear samples) in the length direction of the slices. The widths of the notches are respectively 8mm, 10mm, 12mm, the gap length is 20mm ( Figure 1-2 ), grinding the tear sample and performing mechanical polishing;
[0057] The prepared tear sample (notch width 8mm) was clamped to the testing machine, and the tear test was carried out to obtain the applied load-displacement curve during the tearing process. According to the obtained load-displacement curve, using the definition of tear toughness γ=F S / 2t to calculate the tear toughness of the material.
[0058] In this embodiment, the specific calculation process of tear toughness γ is as follows:
[0059] Intercept the part of the tear load-displacement curve where the load is stable, and use formula (2) in the calculation process of t...
Embodiment 3
[0061] Material preparation: Cut the 0.5mm thick cold-rolled copper sheet into 40mm×20mm slices along the rolling direction, cut two parallel notches in the length direction of the slices, the width of the notch is 8mm, 10mm, 12mm, and the length of the notch is 20mm ( Figure 1-2 ), grinding the tear sample and performing mechanical polishing;
[0062] The prepared tear sample is clamped to the testing machine, and the tear test is carried out to obtain the applied load-displacement curve during the tearing process. According to the obtained load-displacement curve, using the definition of tear toughness γ=F S / 2t to calculate the tear toughness of the material.
[0063] In this embodiment, the calculation process of the tear toughness γ with a notch width of 8 mm is as follows:
[0064] Intercept the part of the tear load-displacement curve where the load is stable, and use the formula (2) in the calculation of the tear toughness to obtain the tear toughness of the 0.5mm ...
PUM
 Abstract
Description
Claims
Application Information


