Digital camera nonlinear calibration method based on LCDs
A technology of a digital camera and a calibration method, applied in the field of measurement, can solve the problems that affect the image shooting quality, the shooting angle is too large, the image is not clear, etc., and achieve the effects of geometric deformation approaching perfection, high image quality, and high calibration accuracy.
- Summary
- Abstract
- Description
- Claims
- Application Information
AI Technical Summary
Problems solved by technology
Method used
Image
Examples
Embodiment 1
[0019] The specific process and steps of this embodiment include:
[0020] 1. Draw a calibration table and take an image
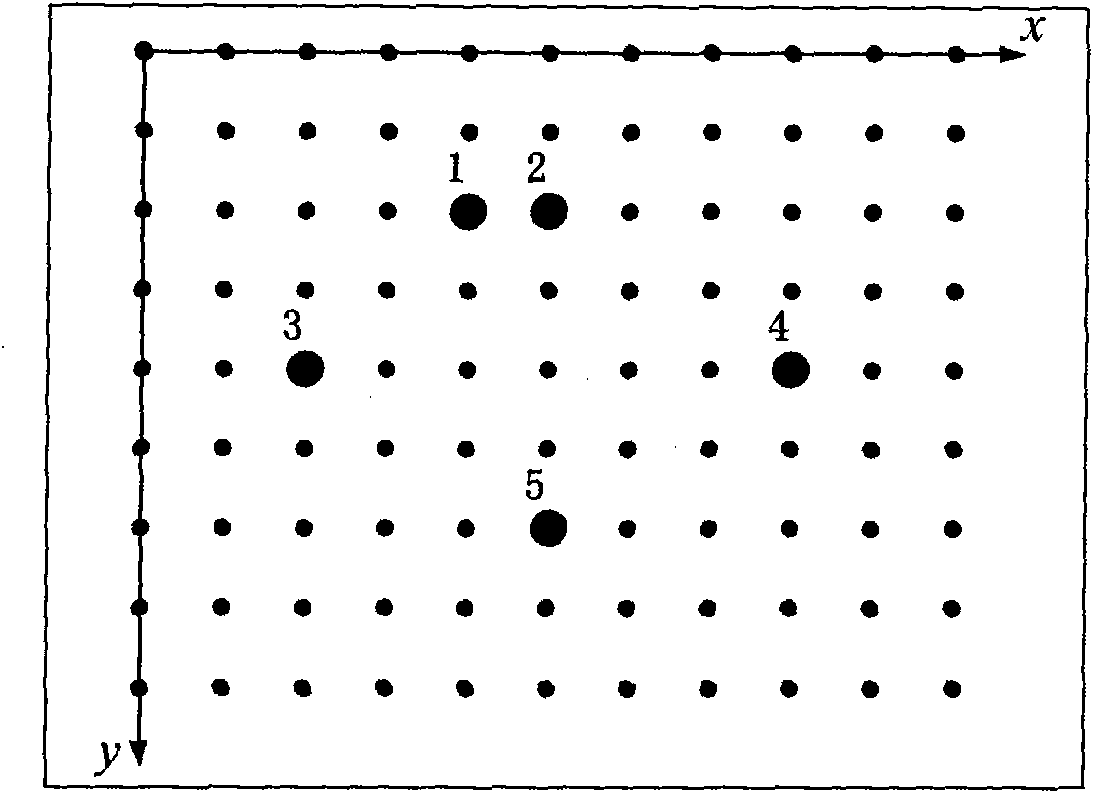
[0021] The calibration table used in this embodiment is as follows figure 1As shown, N rows and M columns of easily identifiable feature dots are distributed on it, and the diameters of 5 feature dots are obviously larger than the diameters of other feature dots, and the positions of the asymmetrically distributed 5 large dots can be distinguished Their respective identities; in addition, these 5 big circles are also used to determine the coordinate axis of the calibration table and the positioning and identification of other dots; take the center of the feature point in the upper left corner of the calibration table as the origin, and take the longer one of the calibration table as the origin The side is the x-axis, and the right is positive; the shorter side is the y-axis, and the downward is positive; take several images of the calibration table by rot...
Embodiment 2
[0076] This embodiment adopts the FinePix S5Pro digital camera that resolution is 4256 * 2848; The AF Nikkor optical lens that focal length is 24mm; ASUS X81H32SE-SL notebook computer, liquid crystal display screen size is 14.1 inches, resolution 1280 * 800, and dot pitch is 0.2375 mm; the calibration program is written with VC++6.0 and OpenCV, and runs on the WindowsXP system; the designed calibration table is as follows figure 1 , the diameter of the small circle is 4.75mm, the diameter of the large circle is 9.50mm, and the distance between the centers is 20.425mm.
[0077] First, the calibration table is displayed on the liquid crystal display LCD, and a digital camera is used to rotate the calibration table in the LCD (the optical axis is perpendicular to the LCD screen) around the optical axis to capture 4 images, and use the captured images to perform calibration experiments. The calibration result obtained is:
[0078] K = ...
PUM
 Abstract
Description
Claims
Application Information


