
Method of measuring shape of workpiece by using on-board measuring machine for carrying out temperature drift correction and machine tool having on-board measuring machine

a technology of temperature drift correction and on-board measuring machine, which is applied in the direction of mechanical measuring arrangement, program control, instruments, etc., can solve the problems of local deformation of the three-dimensional measuring machine itself, measurement value error, and relatively long time over ten minutes to measure the whole face of the measured surface of the measured obj

Active Publication Date: 2010-04-29
FANUC LTD
View PDF11 Cites 30 Cited by
  • Summary
  • Abstract
  • Description
  • Claims
  • Application Information

AI Technical Summary

Benefits of technology

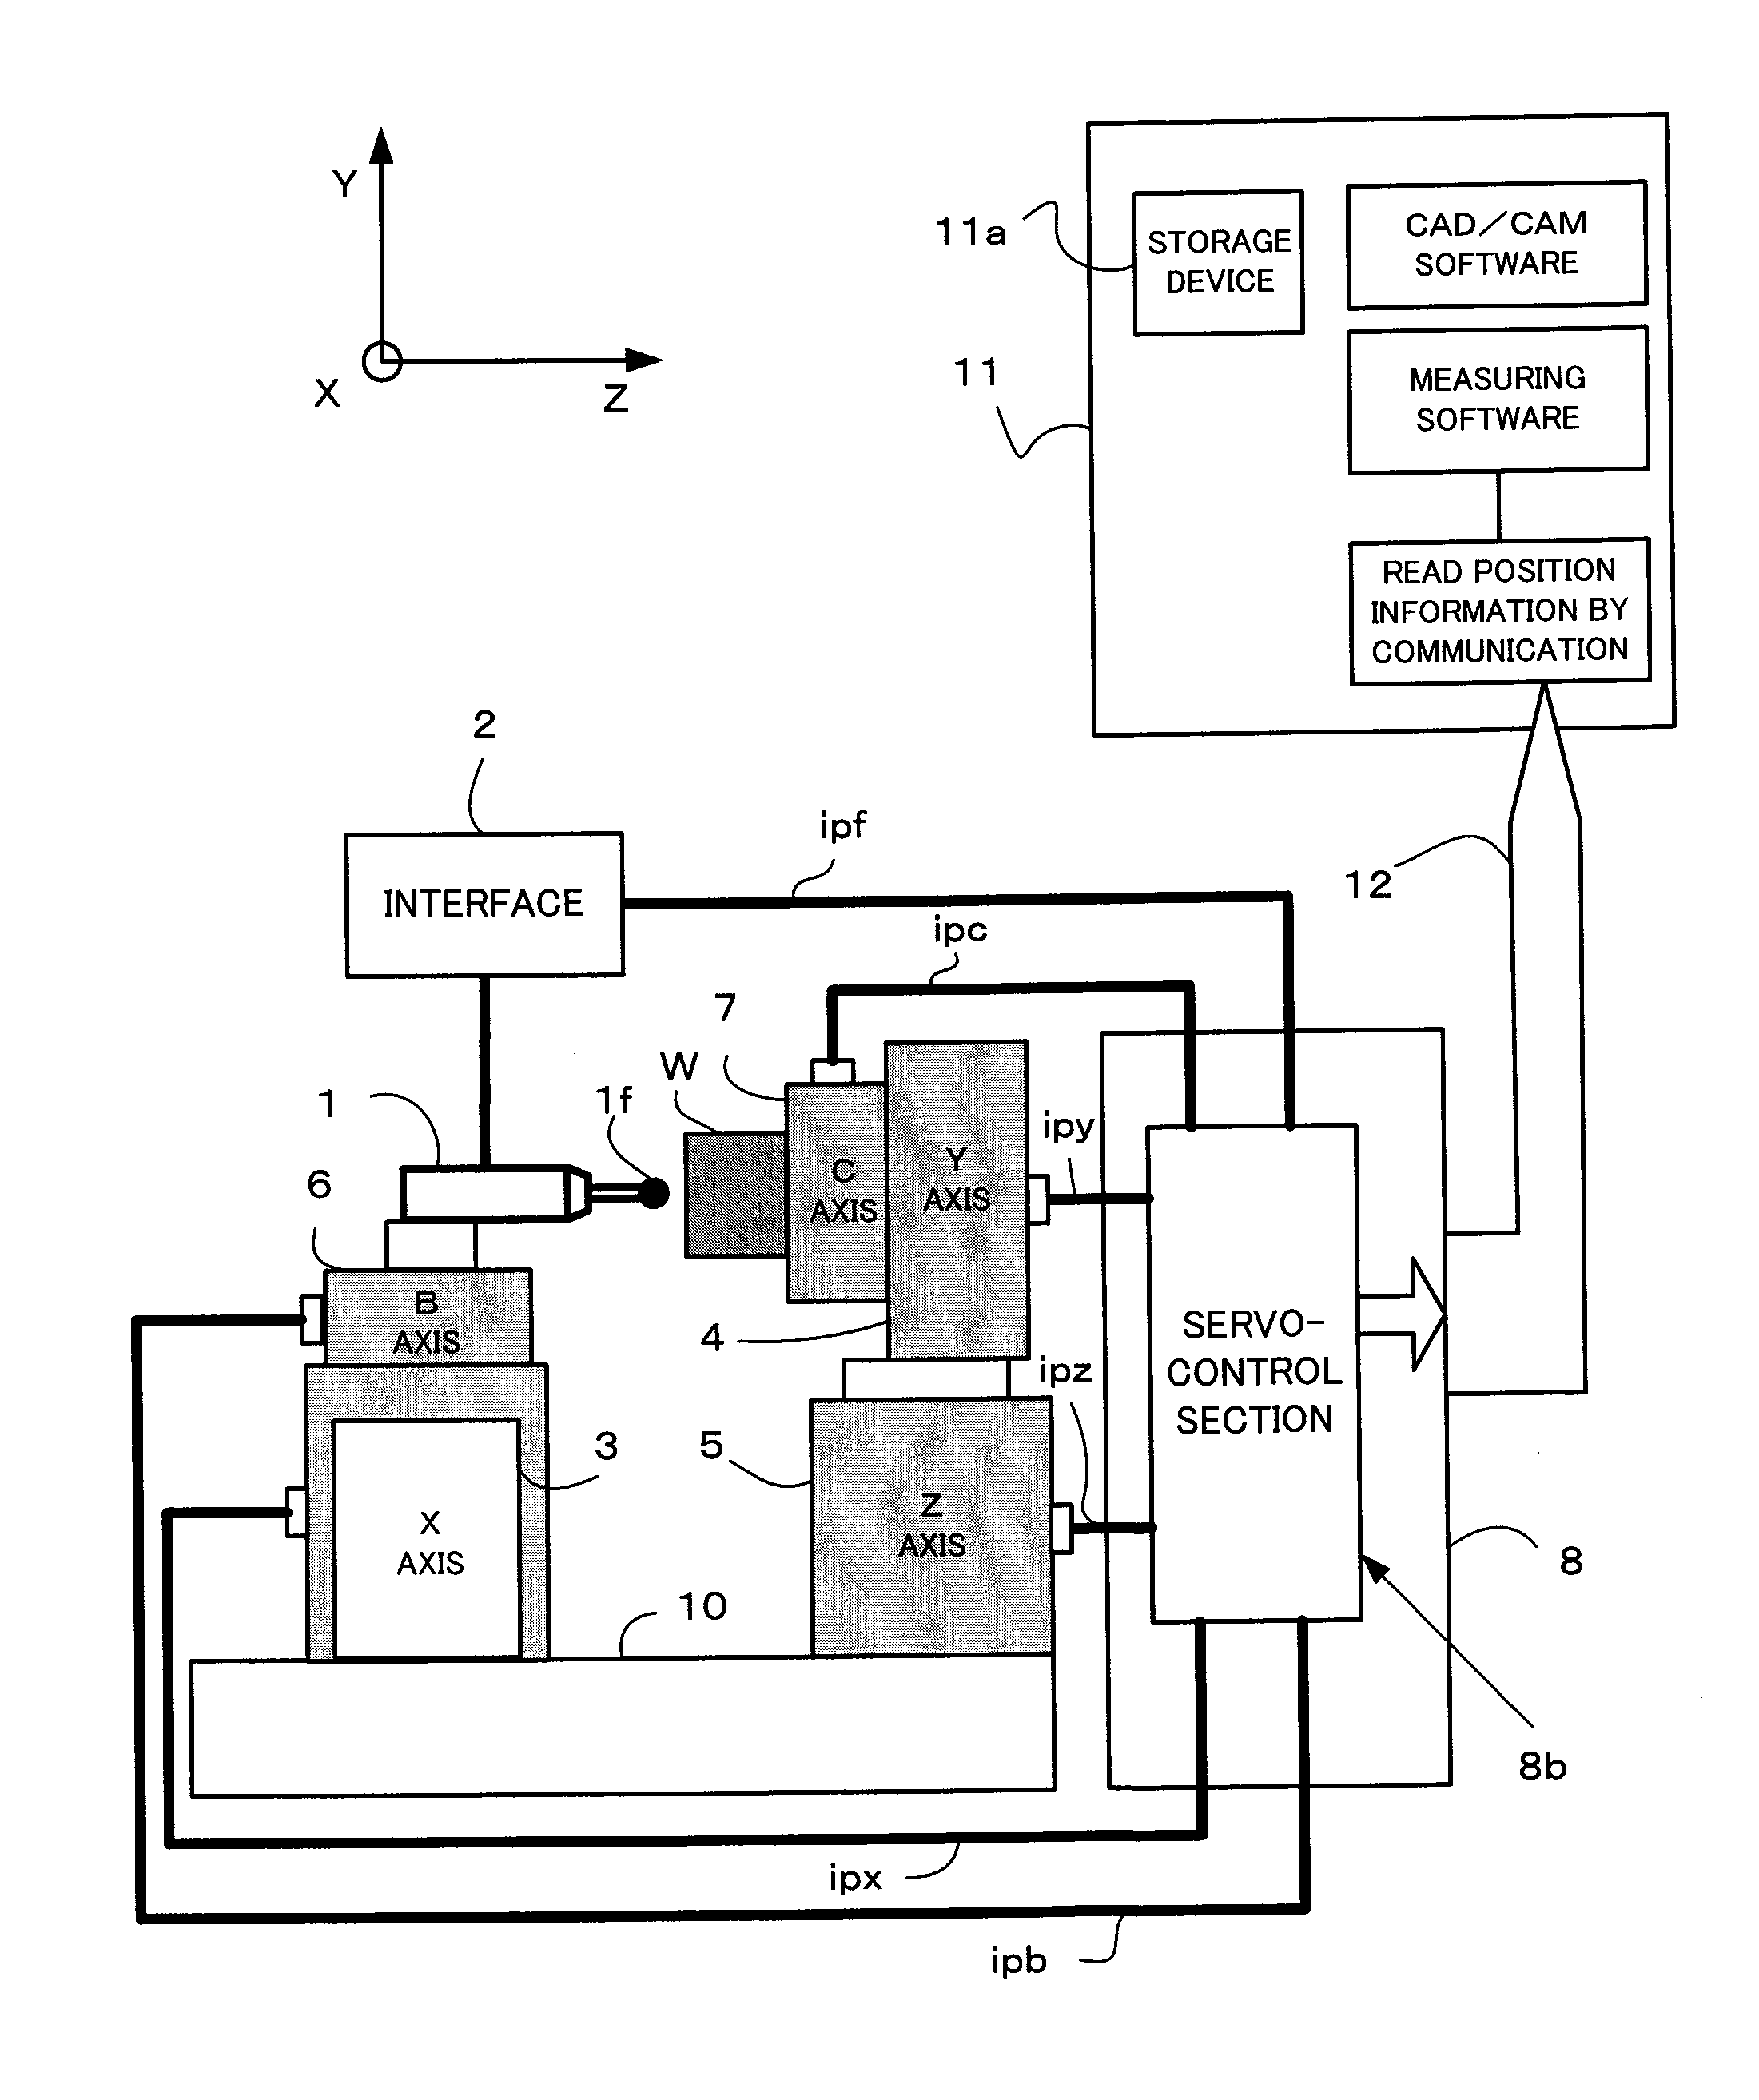
[0021]Therefore, it is an object of the present invention to provide a method of measuring a shape of a workpiece by using an on-board measuring machine which can solve the above problems and can correct a temperature drift and a machine tool having the on-board measuring machine.

Problems solved by technology

This three-dimensional measuring machine scans the measured surface of the measured object at relatively low speed of several tens of millimeters / second or lower by using the probe and therefore it takes a relatively long time over ten minutes to measure the whole face of the measured surface of the measured object.
However, if the measurement takes 10 minutes or longer, the three-dimensional measuring machine itself may suffer from local deformation because of its mechanism due to thermal expansion of members forming the three-dimensional measuring machine.
Therefore, even with sufficient design consideration, errors depending on the temperature change in the measurement environment are superimposed on measurement values obtained as a result of the measurement.
The error in the measurement value is mainly caused by thermal expansion or thermal contraction of the members forming the three-dimensional measuring machine and is a slow component with a relatively long period synchronized with a time period of the temperature change.
According to the technique disclosed in this Patent Document, a probe scans a measured surface along first scanning lines including a plurality of concentric circles about a center point of the measured surface through which an axisymmetry line of an axisymmetric workpiece (e.g., a lens and a semiconductor wafer) passes and second scanning lines including two straight lines (cross lines) passing through the center point, respectively, to obtain coordinate data (here, scanning along the first scanning lines takes a longer time than scanning along the second scanning lines and, as a result, the three-dimensional measuring machine suffers from drifts along coordinate axes direction due to the change in ambient temperature around the machine).
Moreover, calculation of interpolation for obtaining the coordinate data at the intersecting points of the first scanning lines and the second scanning lines is carried out based on approximation by using four arithmetic operations and the like and therefore nanoscale deviations from actual intersecting points may occur and the deviations directly result in errors caused by the interpolation.
As a result, an operation amount for the correction processing increases in proportion to the measurement data amount and a processing time may become long.
Therefore, a cost of the software and a prolonged takt time for one workpiece increase a cost.
Moreover, depending on material of a case member of the on-board measuring machine to which a laser head for detecting the displacement of the linear scale is attached, thermal expansion might occur to similarly cause a temperature drift.
However, at least in the ultraprecision working machine required to have 100-nanometer or less shape accuracy, even a minute thermal fluctuation might cause the temperature drift of the on-board measuring machine to reach several tens of nanometers to several hundreds of nanometers, which results in a fatal error.
Because the cross-line measurement finishes in a short time, an influence of the temperature drift on the measurement accuracy is ignorable.
However, the above-described cross-line measurement cannot be carried out in on-board measurement of a workpiece not in the axisymmetric shape to which the technique described in the above Patent Document is not be applied and therefore it is necessary to scan the whole face of the measured surface of the workpiece with the three-dimensional measuring machine.
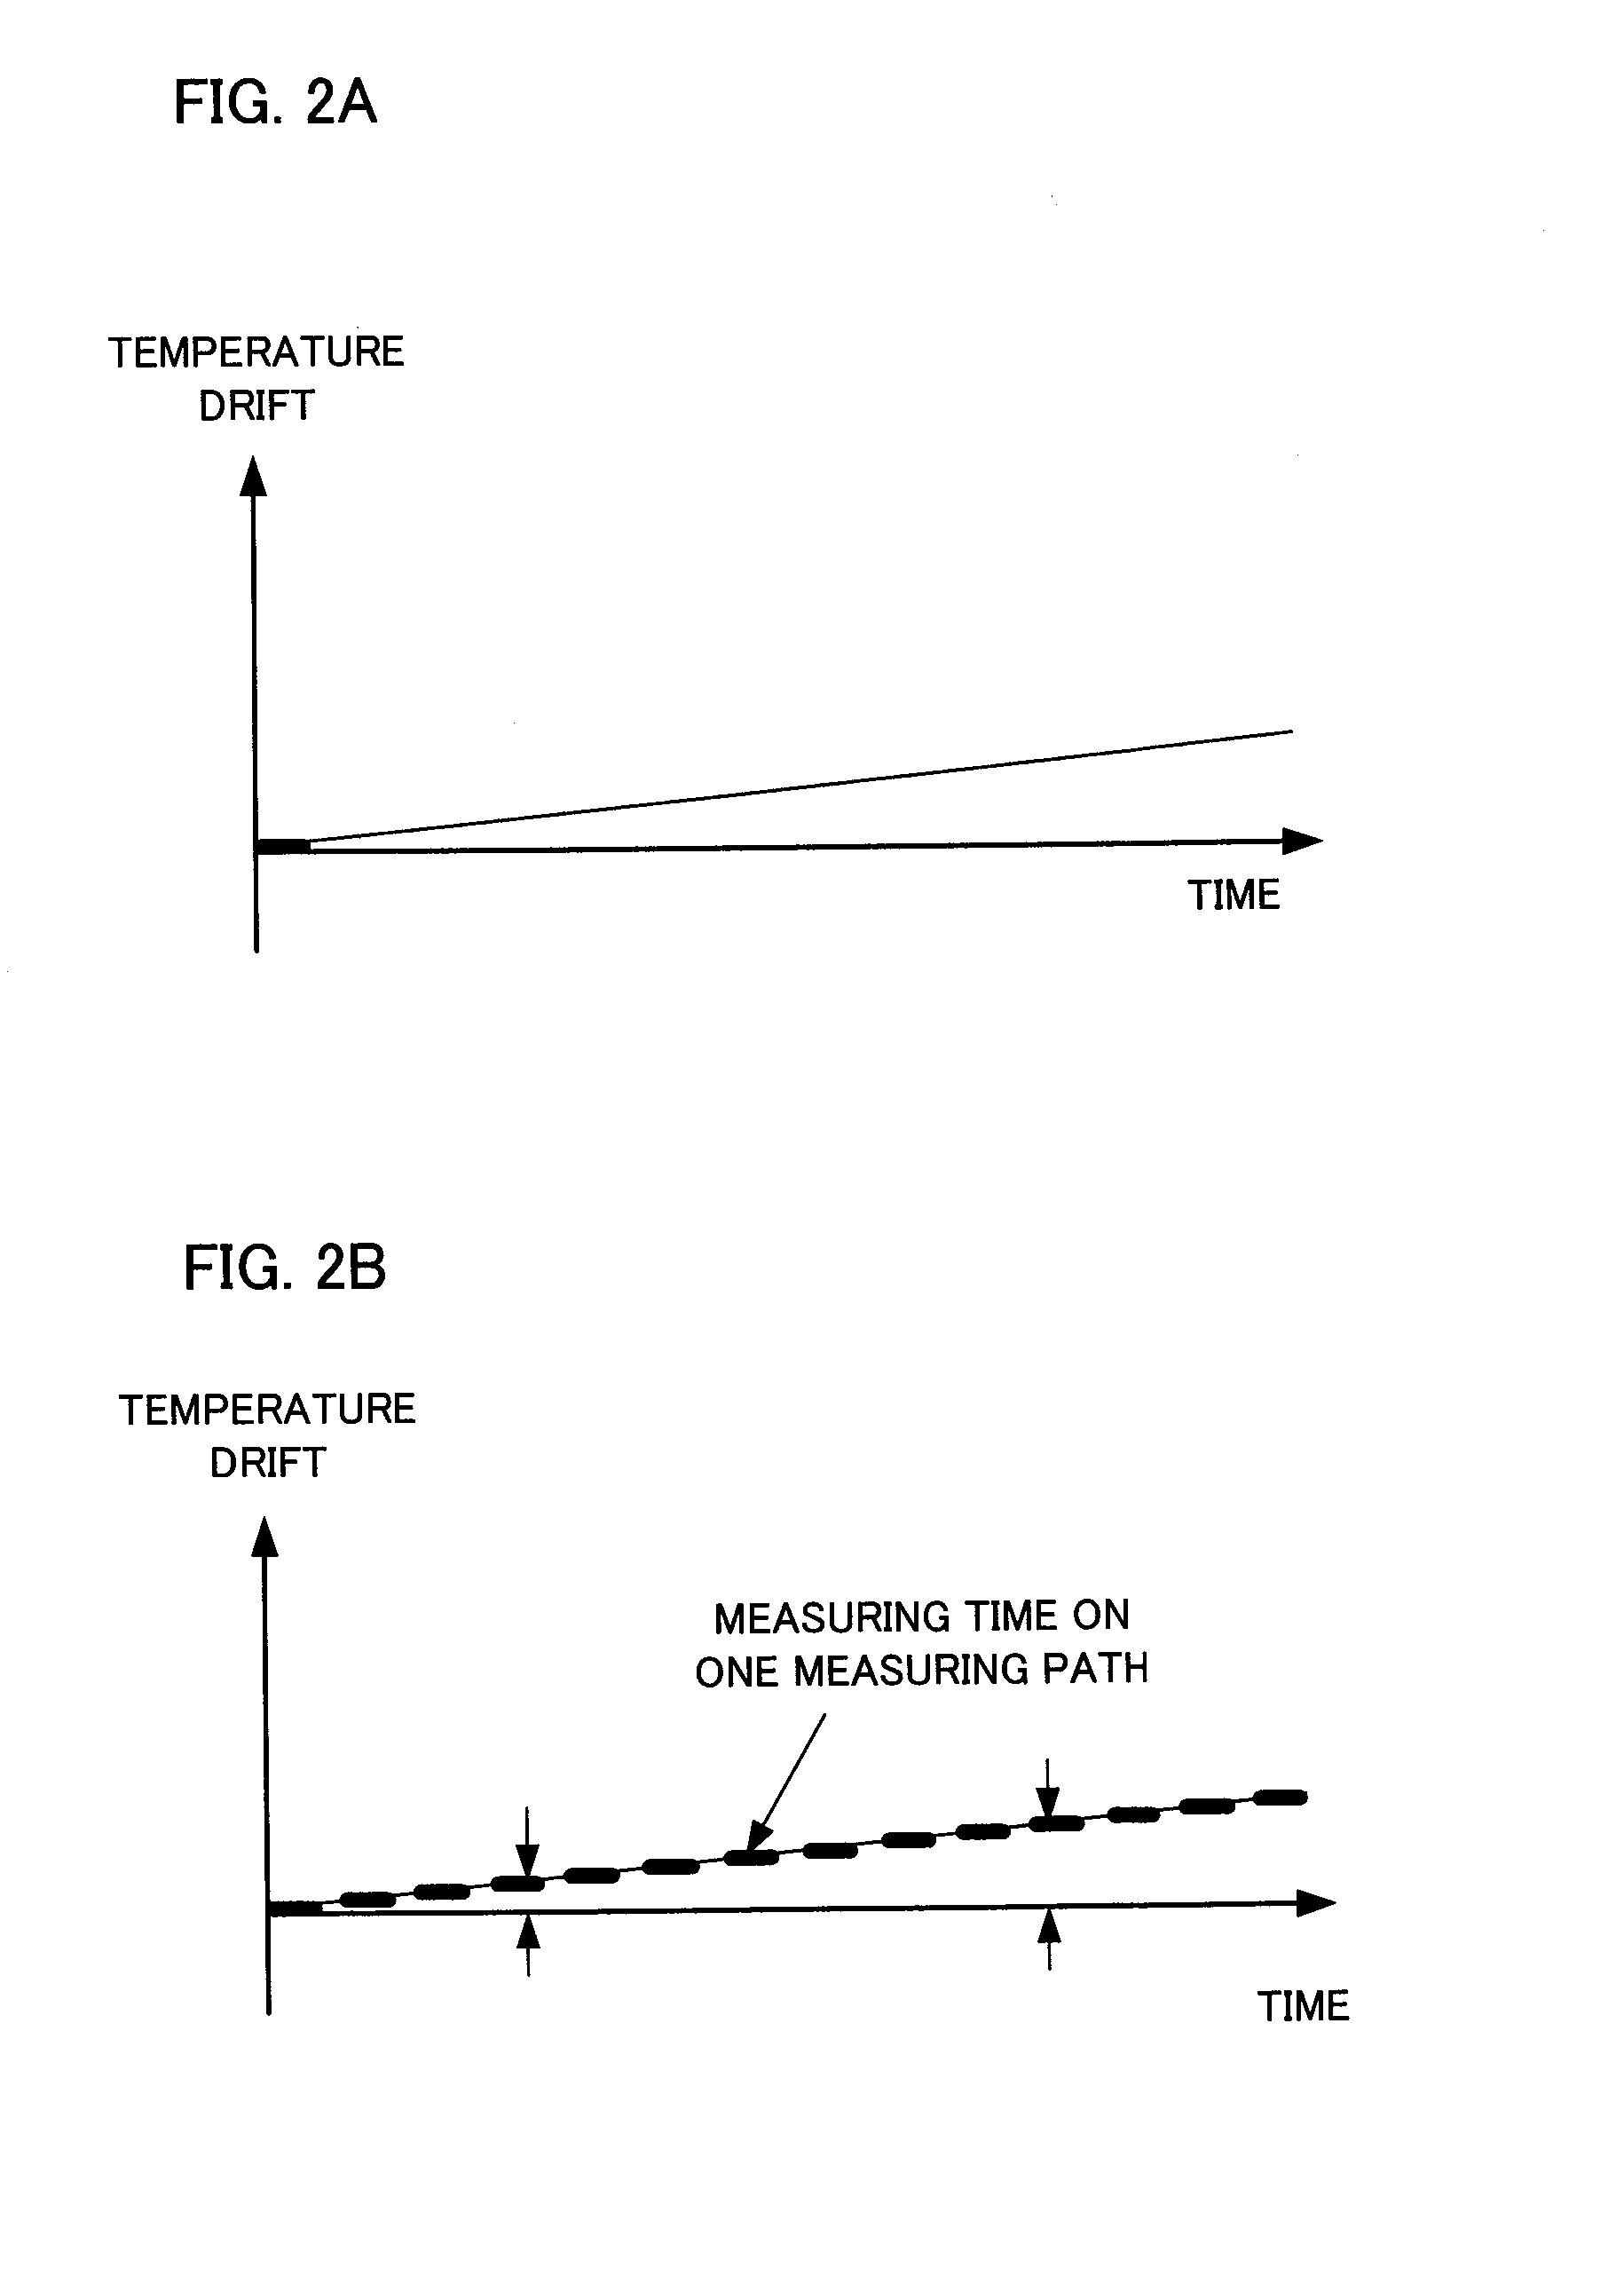
Although the temperature drift within the measurement time along one measuring path is small, the respective measuring paths suffer from different temperature drifts in measuring the whole face of the workpiece.
Therefore, the on-board measurement carried out for a long time is more susceptible to the temperature drift.
The longer the measurement time, the likelier it becomes that the measurement accuracy is impaired.

Method used


Image

  • Method of measuring shape of workpiece by using on-board measuring machine for carrying out temperature drift correction and machine tool having on-board measuring machine
  • Method of measuring shape of workpiece by using on-board measuring machine for carrying out temperature drift correction and machine tool having on-board measuring machine
  • Method of measuring shape of workpiece by using on-board measuring machine for carrying out temperature drift correction and machine tool having on-board measuring machine

Examples


Embodiment Construction

[0043]FIG. 3 is a drawing for explaining that an on-board measuring machine mounted on a machine tool is susceptible to heat from outside air and a person. By using FIG. 3, on-board measurement of the workpiece with the on-board measuring machine will be described.

[0044]A drive portion 21 and a support portion 22 of the five-axis machine tool are housed in a cover 23. The drive portion 21 and the support portion 22 are supported on a machine base 25 with vibration-isolating air springs 24 interposed therebetween. The cover 23 houses the drive portion 21, the support portion 22, the machine base 25, and the air springs 24 inside itself to prevent an outside ambient temperature from affecting the components. Compressed air is supplied to the drive portion 21 via a compressed air flow path 27 from a compressed air temperature regulator 26 for an air bearing and disposed outside the cover 23. To the compressed air temperature regulator 26 for the air bearing, compressed air from a compr...


PUM


Abstract

In a machine tool having an on-board measuring machine and controlled by a numerical controller, a method of measuring a shape of a workpiece presets a reference point for temperature drift correction on the workpiece, moves a probe to the reference point, resets a coordinate system of the probe to correct a temperature drift of the probe, and carries out shape measurement of the workpiece along a first measuring path. Next, the method moves the probe to the reference point again, resets the coordinate system of the probe to correct a temperature drift of the probe again, and carries out shape measurement of the workpiece along a second measuring path. Thereafter, similar temperature drift correction is carried out for each measuring path until the shape measurement of the workpiece is carried out along the last measuring path.

Description

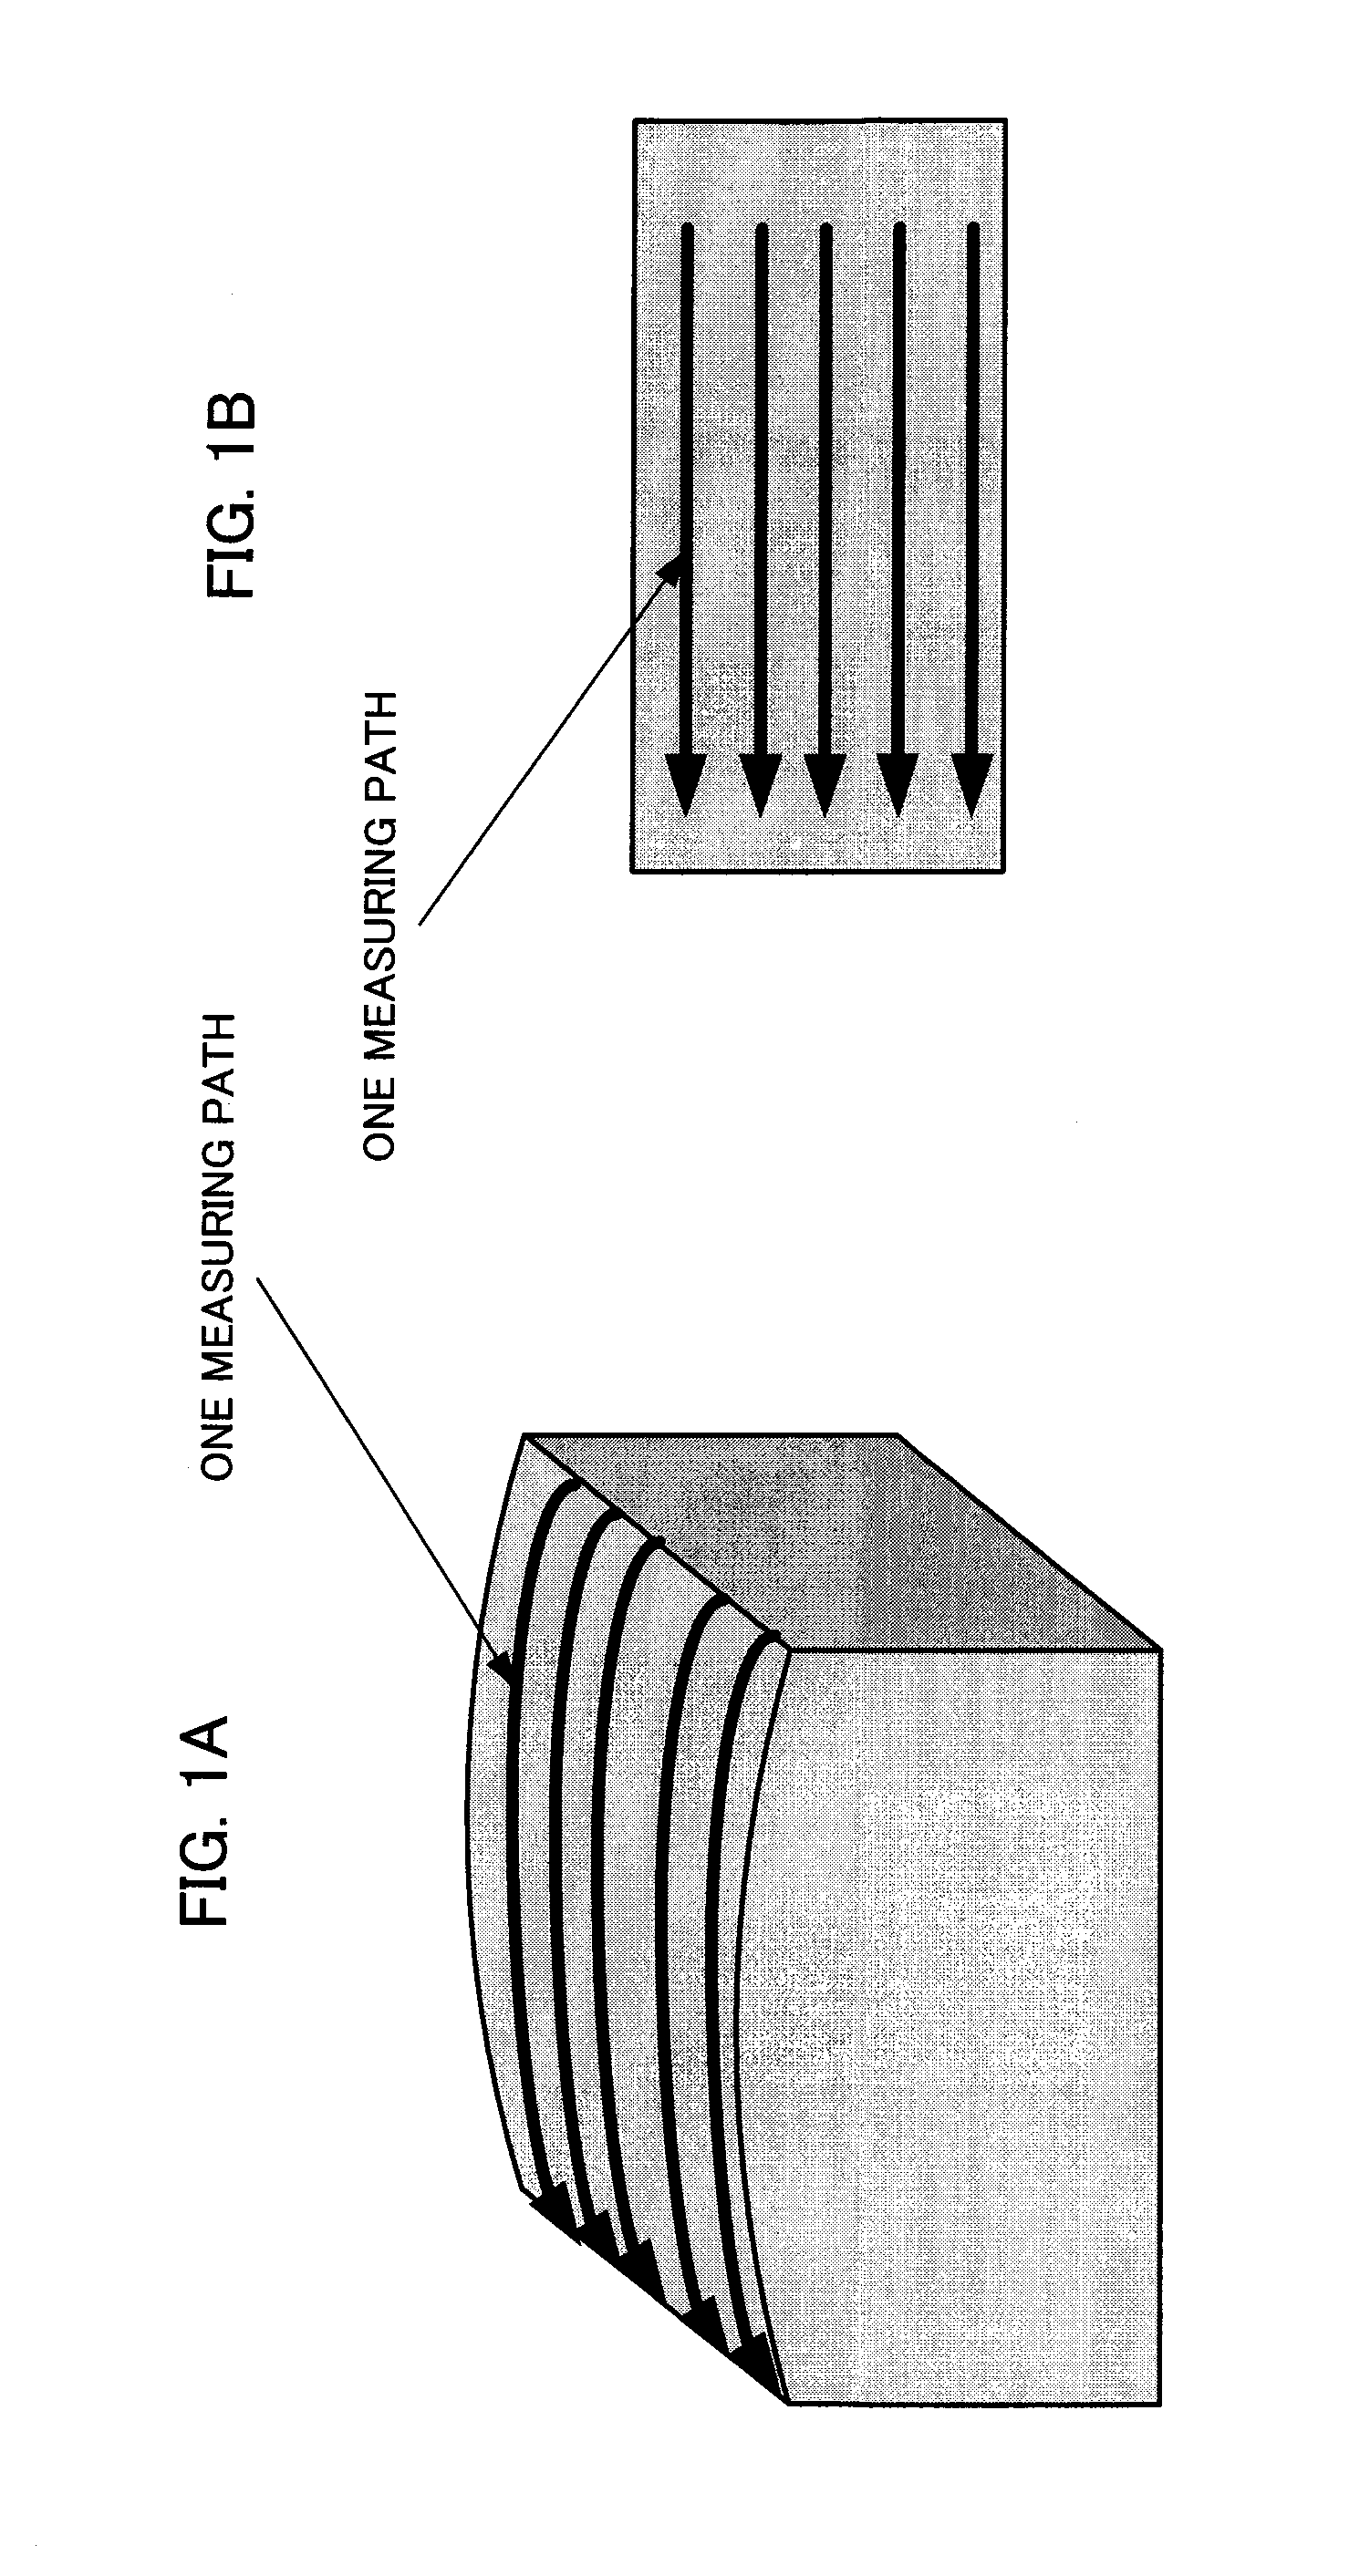
BACKGROUND OF THE INVENTION[0001]1. Field of the Invention[0002]The present invention relates to a method of carrying out temperature drift correction of a measuring machine (on-board measuring machine) provided on a machine tool and measuring a shape of a workpiece by using the on-board measuring machine and to a machine tool on which the measuring machine for measuring the shape of the workpiece is provided.[0003]2. Description of the Related Art[0004]As shown in FIGS. 1A and 1B, there is a well-known three-dimensional measuring machine for measuring a shape of a measured surface of a measured object by measuring positions in a height direction (i.e., a vertical direction) including components orthogonal to a scanned surface while scanning the measured surface of the measured object with a probe in a two-dimensional manner.[0005]This three-dimensional measuring machine scans the measured surface of the measured object at relatively low speed of several tens of millimeters / second o...

Claims


Application Information

Patent Timeline
IPC IPC(8): G01B5/20G01B5/012
CPCB23Q17/20G01B5/0014G05B2219/49219G05B19/401G05B2219/37509G01B21/045
Inventor HON, YONPYOEBIHARA, KENZOYAMAMOTO, AKIRAHAMURA, MASAYUKI
Owner FANUC LTD
Learn More