Method for improving surface friction wear performance by changing surface grain direction
A technology of surface texture and wear performance, applied in the direction of testing wear resistance, preparation of test samples, etc., can solve problems such as unpublished patents
- Summary
- Abstract
- Description
- Claims
- Application Information
AI Technical Summary
Problems solved by technology
Method used
Image
Examples
Embodiment 1
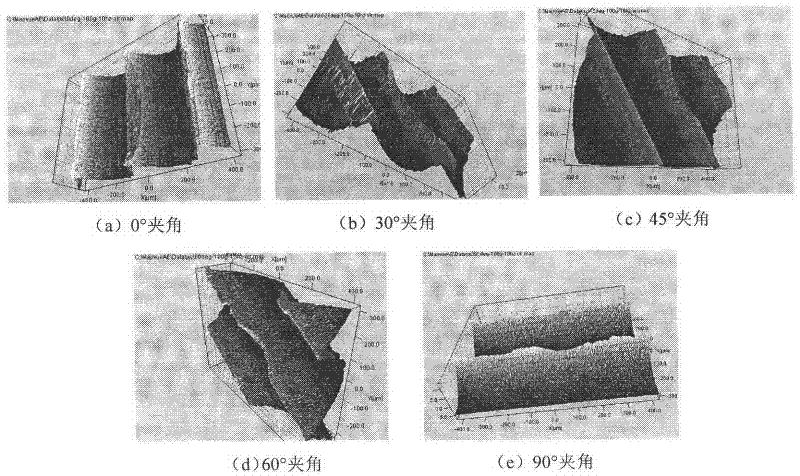
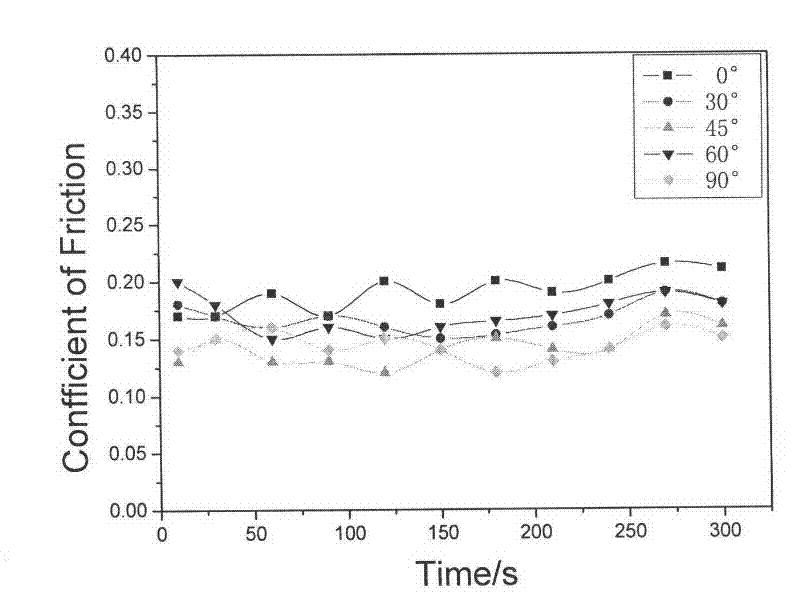
[0009] Planing of No. 45 carbon steel to obtain a wavy surface texture with a roughness of Ra3.2; then a quenching and tempering process is carried out. The workpiece of length 100mm×width 85mm×height 20mm is heated to 840℃ for 2 hours, and then quickly released Into the 10% salt solution for cold quenching to make it completely quenched, and then the workpiece is subjected to high temperature tempering treatment, 560 ℃ for 1.5 hours, the hardness of the obtained No. 45 carbon steel is about 35HRC; finally the treated No. 45 The carbon steel was processed into a test piece with a size of 22 mm in length × 20 mm in width × 4 mm in height. Before the friction and wear test, the surface of the specimen must be wiped with alcohol along the direction of the texture. During the friction and wear process, the surface is lubricated with lubricating oil. During the test, the angle of the specimen is changed with a protractor to realize the texture and the direction of the friction pair. ...
Embodiment 2
[0011] Planing of No. 45 carbon steel to obtain a wavy surface texture with a roughness of Ra3.2; then a quenching and tempering process is carried out. The workpiece of length 100mm×width 85mm×height 20mm is heated to 840℃ for 2 hours, and then quickly released Into the 10% salt solution for cold quenching to make it completely quenched, and then the workpiece is subjected to high temperature tempering treatment, 560 ℃ for 1.5 hours, the hardness of the obtained No. 45 carbon steel is about 35HRC; finally the treated No. 45 The carbon steel is processed into a test piece with a size of 22 mm in length × 20 mm in width × 4 mm in height. Before the friction and wear test, the surface of the test piece must be wiped with alcohol along the direction of the texture. During the friction and wear process, the surface is lubricated with lubricating oil. During the test, the angle of the test piece is changed with a protractor to realize the texture and the direction of movement of the ...
Embodiment 3
[0013] Planing of No. 45 carbon steel to obtain a wavy surface texture with a roughness of Ra3.2; then a quenching and tempering process is carried out. The workpiece of length 100mm×width 85mm×height 20mm is heated to 840℃ for 2 hours, and then quickly released Into the 10% salt solution for cold quenching to make it completely quenched, and then the workpiece is subjected to high temperature tempering treatment, 560 ℃ for 1.5 hours, the hardness of the obtained No. 45 carbon steel is about 35HRC; finally the treated No. 45 The carbon steel is processed into a test piece with a size of 22 mm in length × 20 mm in width × 4 mm in height. Before the friction and wear test, the surface of the test piece must be wiped with alcohol along the direction of the texture. During the friction and wear process, the surface is lubricated with lubricating oil. During the test, the angle of the test piece is changed with a protractor to realize the texture and the direction of movement of the ...
PUM
| Property | Measurement | Unit |
|---|---|---|
| Hardness | aaaaa | aaaaa |
Abstract
Description
Claims
Application Information

