Device and method of measuring yield strength and strain hardening exponent of metal material by indentation method
A technology of strain hardening index and yield strength, which is applied in the direction of measuring devices, testing material hardness, analyzing materials, etc., can solve the problems of failure to find and less test data, and achieve the effect of improving accuracy and improving experimental work efficiency
- Summary
- Abstract
- Description
- Claims
- Application Information
AI Technical Summary
Problems solved by technology
Method used
Image
Examples
Embodiment 1
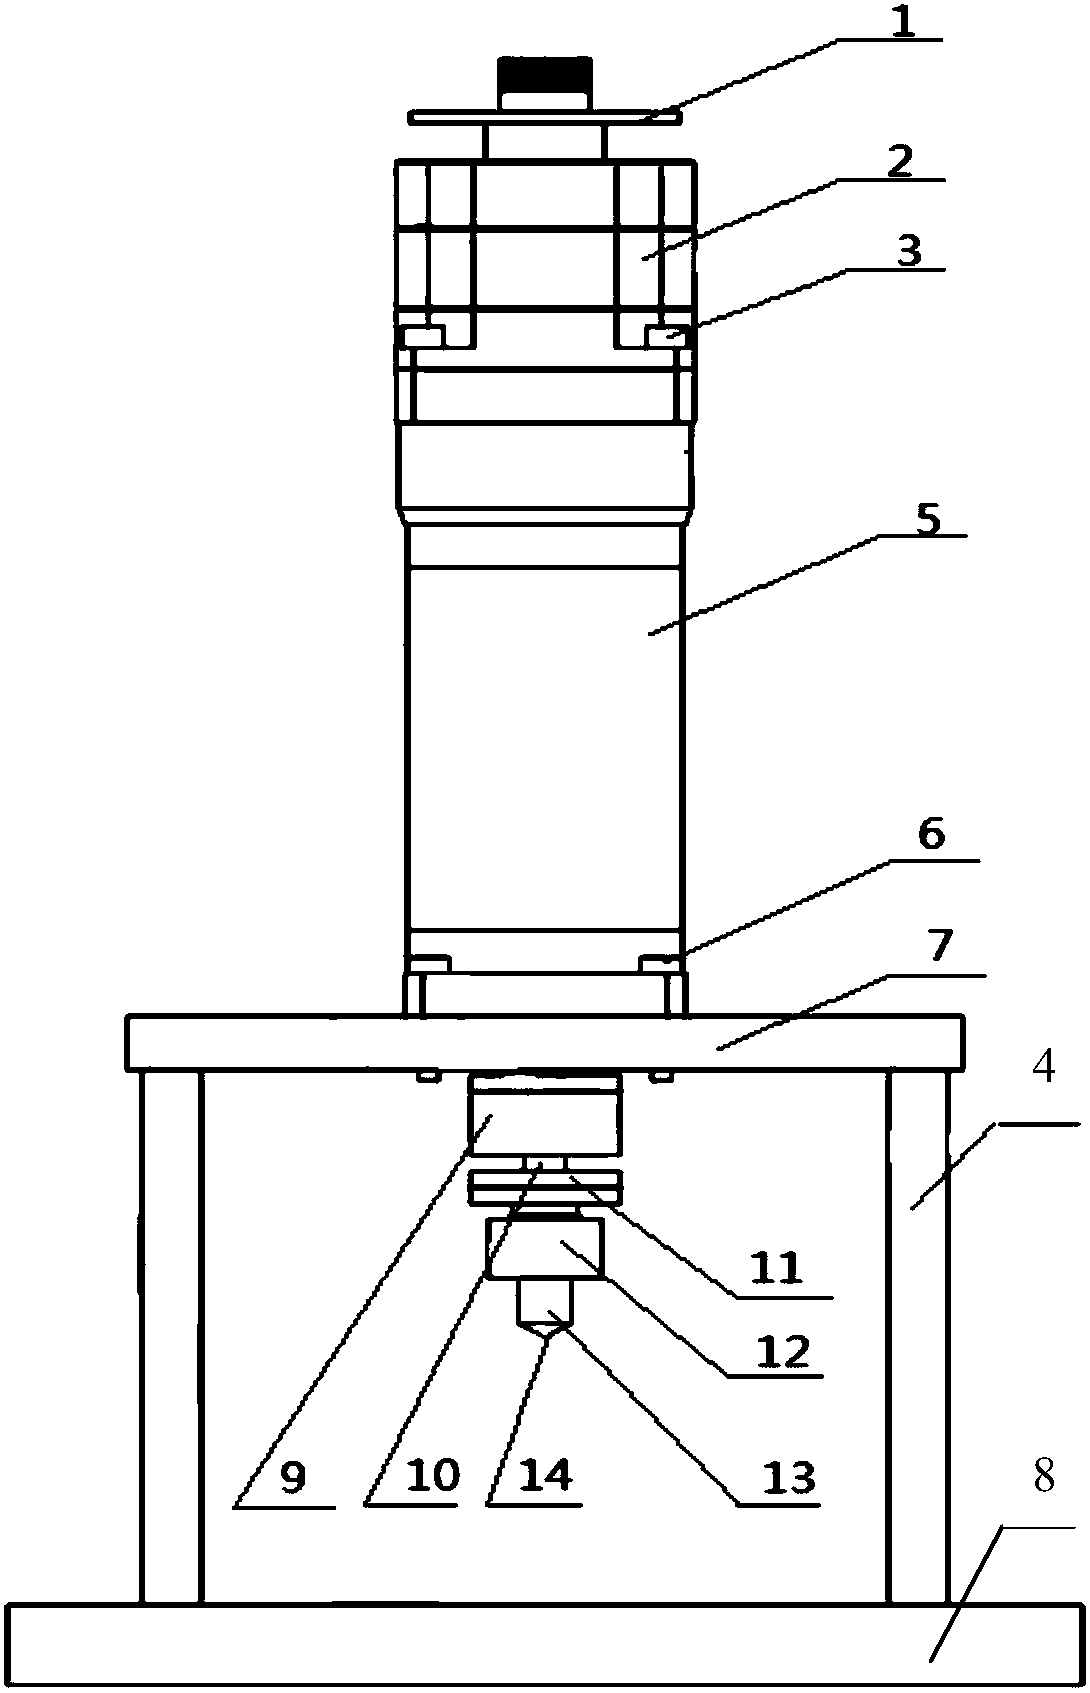
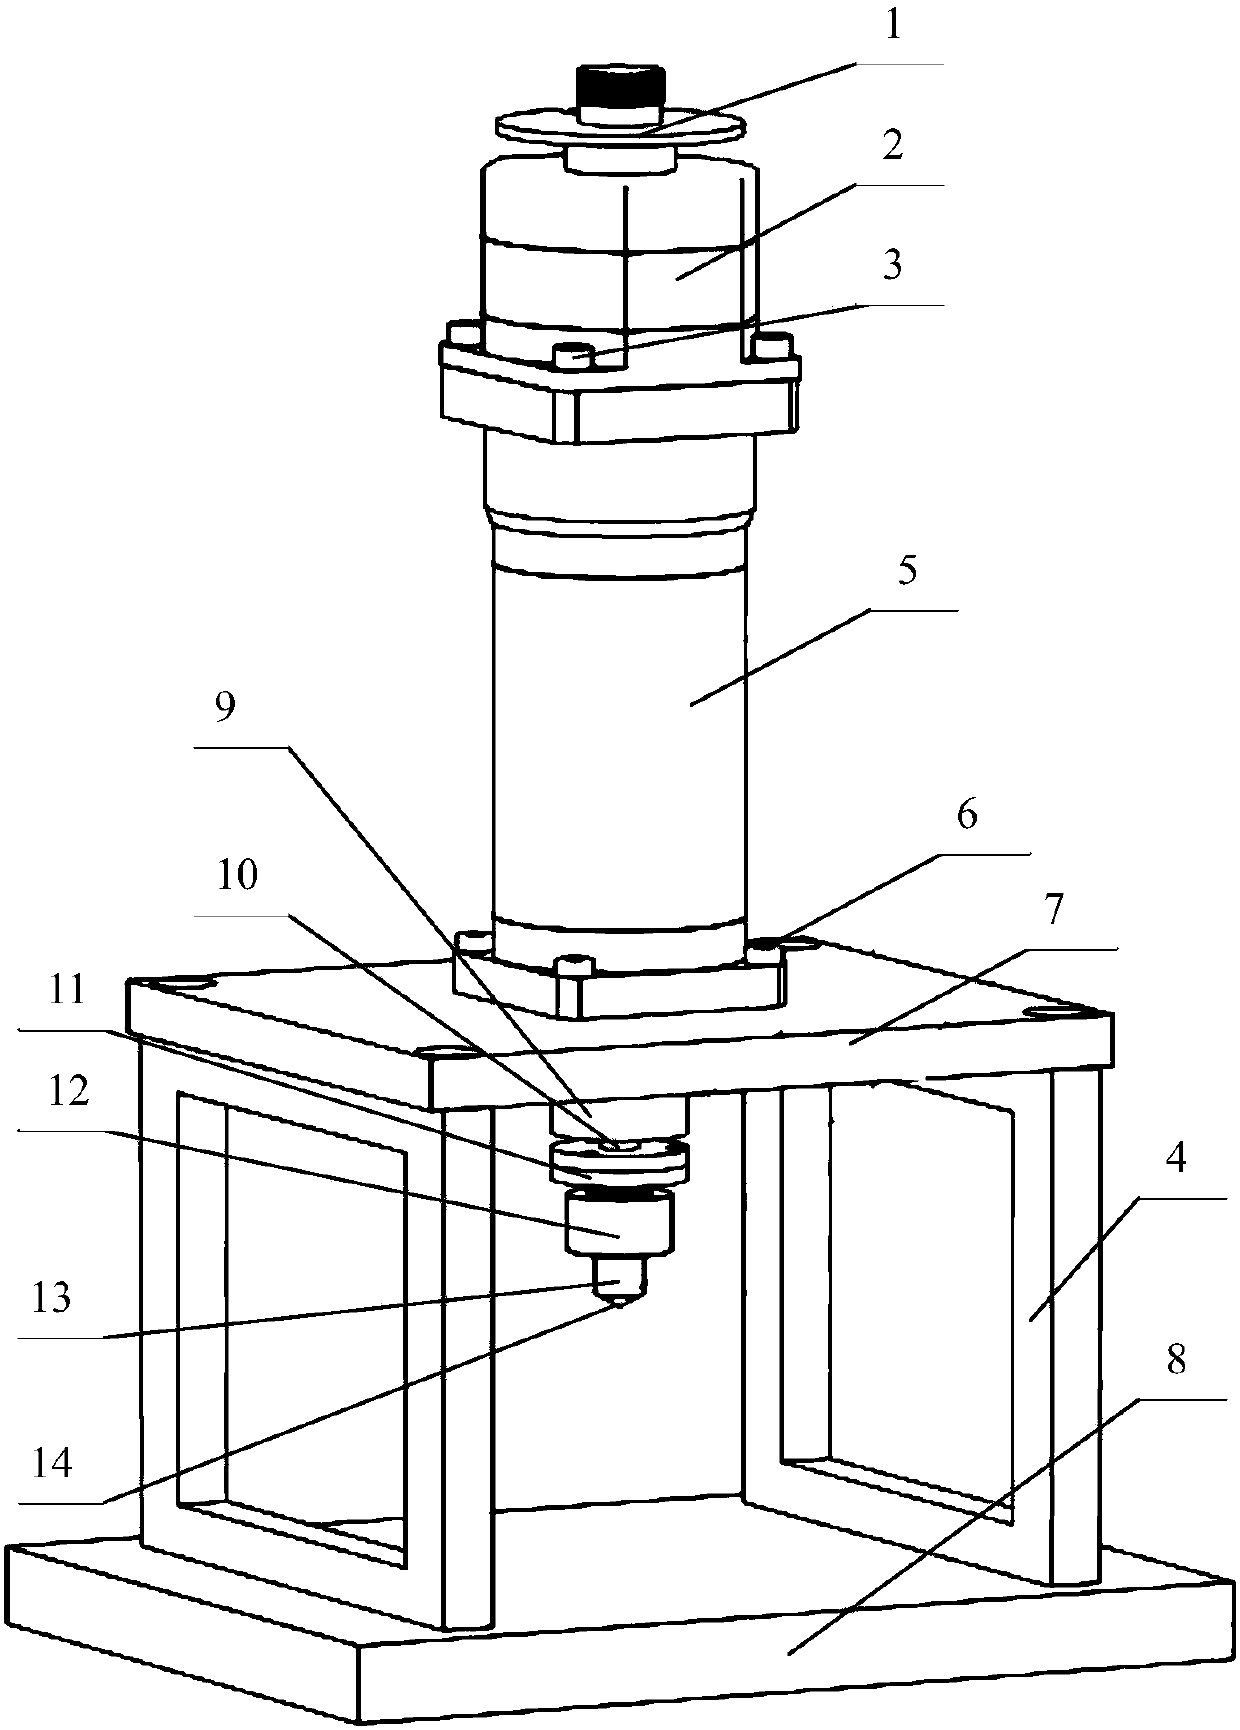
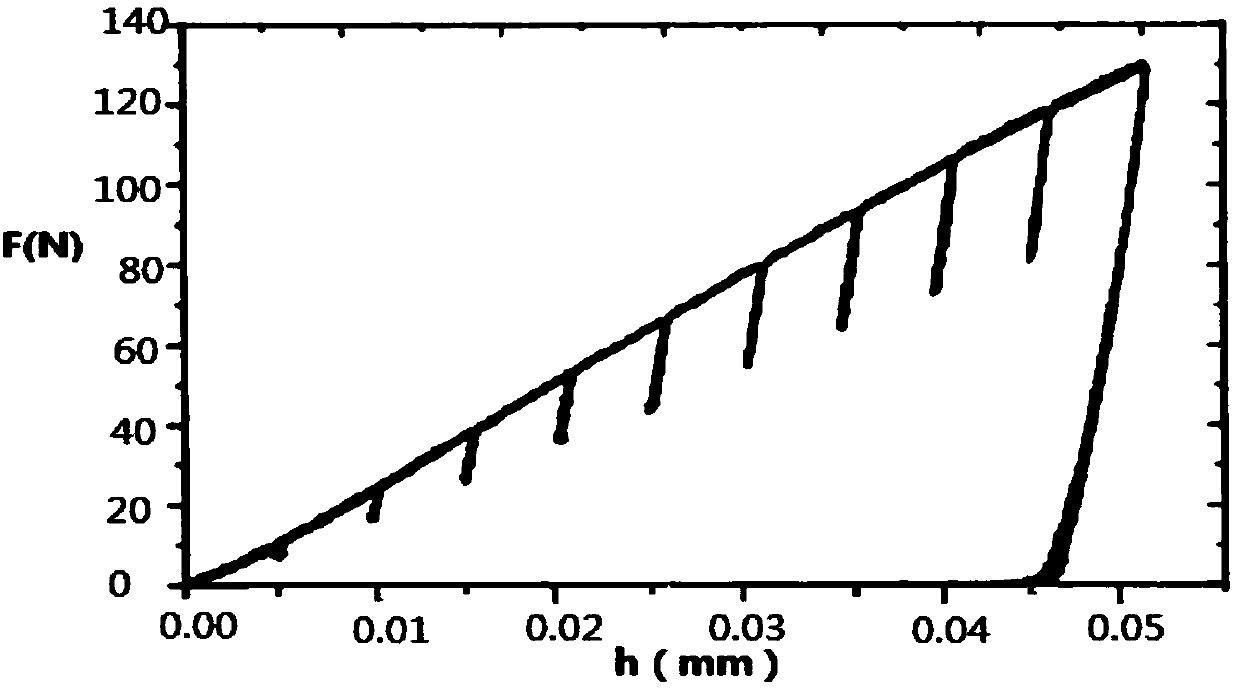
[0055] Such as figure 1 and figure 2 As shown, the device for measuring the yield strength and strain hardening index of metal materials by the indentation method includes a servo motor 2, a pressure pusher 5 and a horizontal plate 7 connected sequentially from top to bottom, and the servo motor 2 and the pressure pusher 5 are connected by bolts 3 connection, the pressure propeller 5 and the horizontal plate 7 pass through the fixing bolt 6; the pressure propeller 5 is provided with a pressure rod 10, which is driven by the servo motor 2, and the upper end of the servo motor 2 is provided with a rear axle 1, and the pressure rod 10 passes through the horizontal Plate 7 and pressure sensor 9, the lower end is provided with pressure rod base plate 11, and pressure rod base plate 11 is connected with pressure head base 12 through opening four threaded holes in the bottom, and pressure head base 12 lower end is screwed with pressure head connecting rod 13, pressure head A diamon...
Embodiment 2
[0089] Experimental validation of new materials with known elastoplastic parameters:
[0090] Two materials, SUS304 and SK4, were simulated indentation experiments to obtain load-depth curves, see Figure 8a and Figure 8b . Select two maximum indentation depths as h g1 / R=0.04 and h g2 The load-depth data when / R=0.06 is substituted into Example 1 to obtain the corresponding apparent strain. From the coefficients of the corresponding dimensionless functions determined in Example 1, the corresponding two apparent stresses can be obtained, and finally substituted into the mechanical model (5) to calculate the yield strength σ of the material y and strain hardening exponent n, the obtained yield strength and strain hardening exponent results are compared with the real data results of raw materials, see Table 3, and the maximum error is no more than 7%.
[0091] table 3
[0092]
Embodiment 3
[0094] On the basis of Embodiment 1, a V-shaped window is established on the side plate 4, such as Figure 9a and 9b as shown, Figure 9a It is that the side plate has a square window in embodiment 1, Figure 9b Open a V-shaped window. Through the V-shaped window, the object to be inspected with a curved surface such as a pipe can be placed on the V-shaped window on both sides of the plate, so that the object to be inspected can be used as a limit. During the process of pressing the indenter, there will be no move.
PUM
| Property | Measurement | Unit |
|---|---|---|
| Diameter | aaaaa | aaaaa |
Abstract
Description
Claims
Application Information


