Rapid gear measuring method and system based on dual-face engagement
A measurement system and measurement method technology, applied in the direction of measurement devices, instruments, and electrical devices, can solve problems such as slow measurement speed and complex measurement structure, and achieve the effects of convenient operation, compact system structure, and improved measurement speed
- Summary
- Abstract
- Description
- Claims
- Application Information
AI Technical Summary
Problems solved by technology
Method used
Image
Examples
Embodiment 1
[0040] This embodiment provides a fast gear measurement method based on double-sided meshing, which includes the following steps:
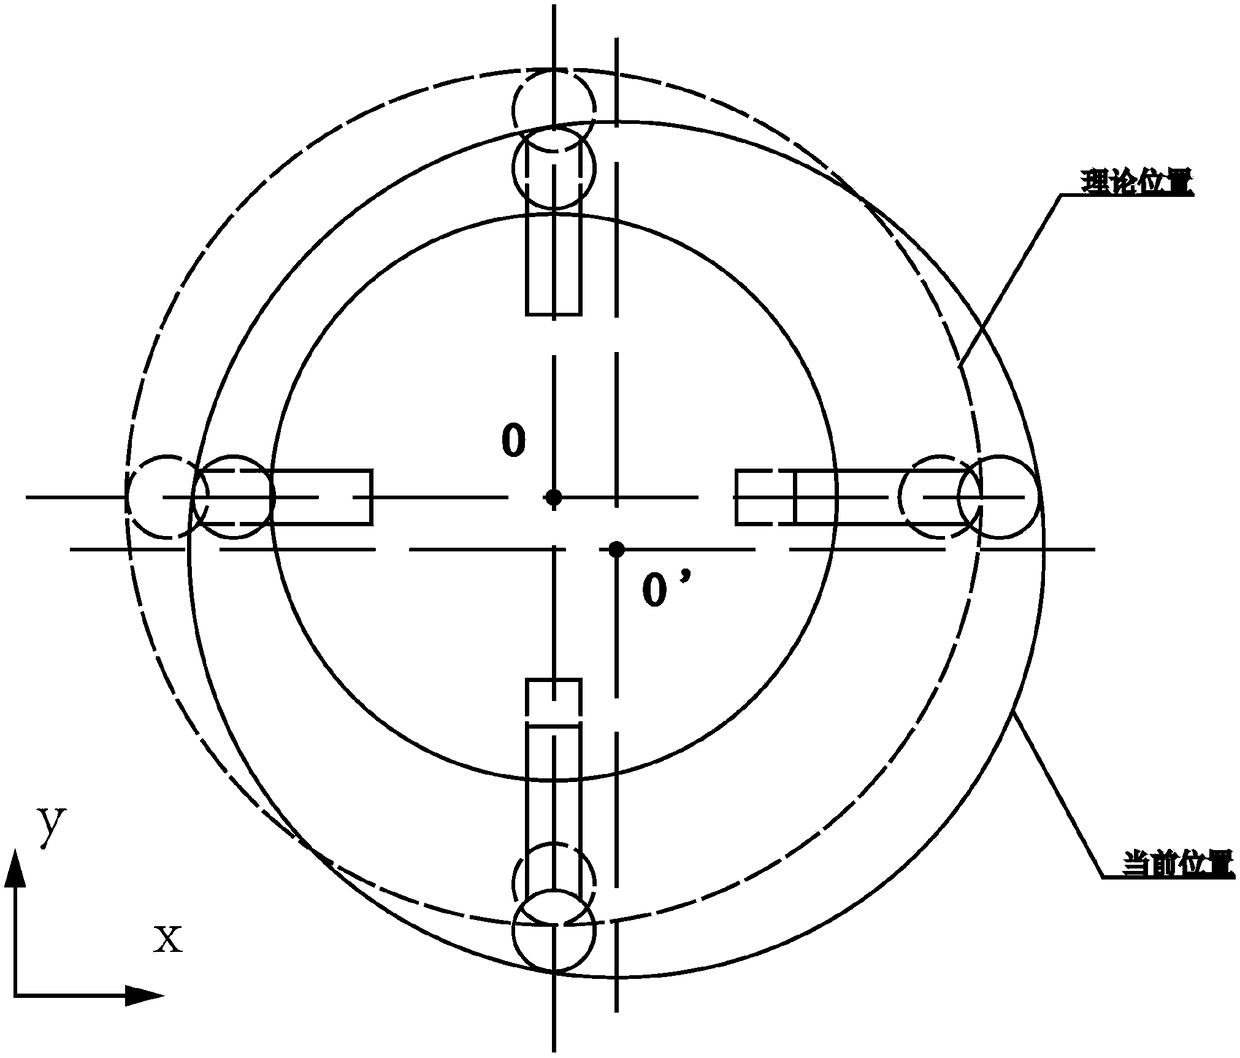
[0041] Step 1). Set three or more displacement sensors in two cross-sections along the axis of the standard gear, and the displacement sensors in the same cross-section are in a circle, and the plane coordinates are established in the two cross-sections. System, determine the coordinate parameters of each displacement sensor, wherein the two cross sections are a first cross section and a second cross section respectively, and the origin of the coordinate system in the first cross section and the second cross section are in the same vertical direction;
[0042] The sensor is used to detect and record the displacement. In this embodiment, the first cross section and the second cross section are located at different heights of the standard gear, and the plane coordinate system on the first cross section is the same as the plane on the second cross section....
Embodiment 2
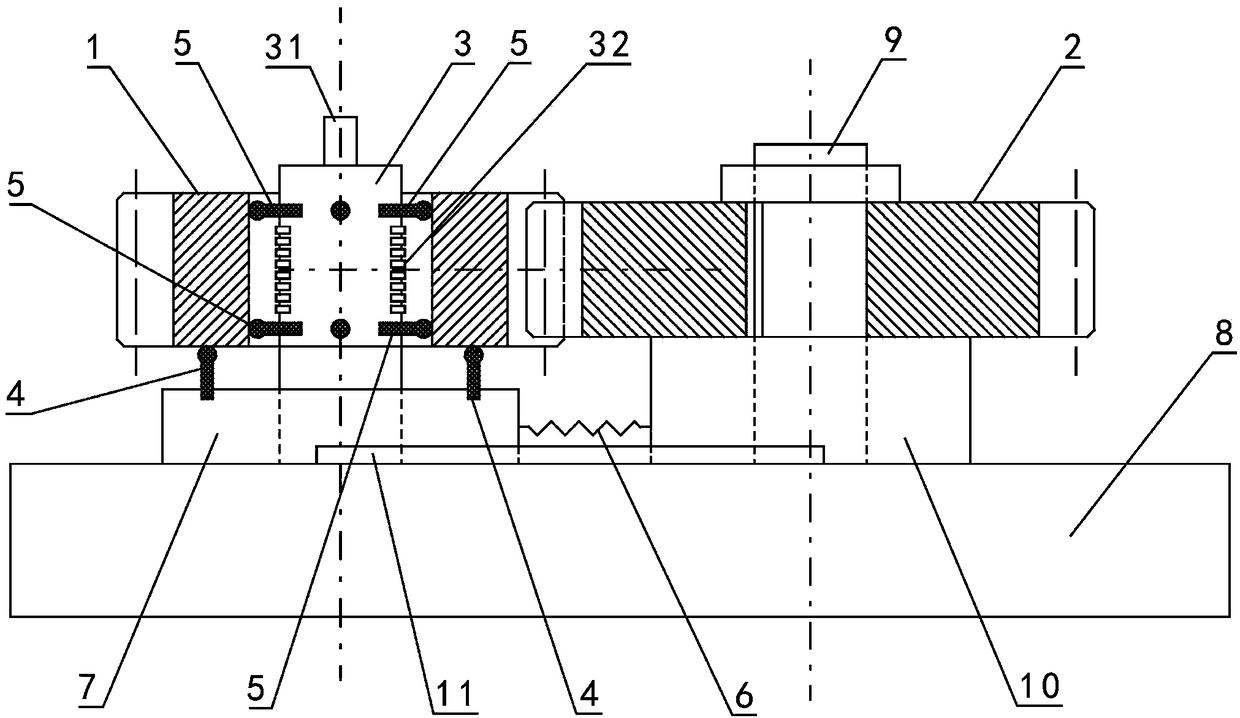
[0051] This embodiment 2 provides a gear rapid measurement system based on double-sided meshing according to the method for rapid measurement of gears based on double-sided meshing provided in embodiment 1, which includes a base 8, a first support base 7, and a second support. Seat 10, mandrel 3 and rotating shaft 9, such as figure 1 As shown, where
[0052] The second support base 10 is fixed to the base 8, the rotating shaft 9 is vertically arranged on the second support base 10, and the rotating shaft 9 is used to fix the tested gear 2 and drive the tested gear 2 to rotate;
[0053] The first support base 7 is arranged on the base 8 and can move relative to the base 8. The first support base 7 is used to axially support the standard gear 1, and a spring 6 is passed between the first support base 7 and the second support base 10 Connected, the spring 6 can be preferentially used as a tension spring 6, through which the distance between the first support seat 7 and the second supp...
Embodiment 3
[0073] The main difference between this embodiment 3 and the foregoing embodiment 2 is that in the rapid gear measurement system provided by this embodiment, the second support base 10 is provided with a number of air holes, and the outlet of the air holes is vertically upward and passes through the air holes. The buoyancy of the output gas axially pushes the measured gear 2 and / or absorbs the measured gear through the negative pressure of the air hole. According to the principle of air flotation, in the process of gear measurement, especially when the measured gear 2 is replaced, the pressure gas (ie, pressurized gas) output from the air hole can be used to push out the measured gear 2, so as to realize the measured gear 2 and the second The quick separation of the two support bases 10 facilitates quick replacement; when installing the tested gear, especially when fixing the tested gear 2, according to the principle of negative pressure adsorption, the negative pressure at the ...
PUM
 Abstract
Description
Claims
Application Information

