Phased array detection method for austenite stainless steel pipeline butt weld joint
A technology for austenitic stainless steel and butt welds, which is applied to the analysis of solids using sound waves/ultrasonic waves/infrasonic waves, measuring devices, and material analysis using sound waves/ultrasonic waves/infrasonic waves. It can solve high risks, long construction periods, and inconsistent sensitivity and other issues to achieve the effect of improving accuracy, reducing detection cost and improving work efficiency
- Summary
- Abstract
- Description
- Claims
- Application Information
AI Technical Summary
Problems solved by technology
Method used
Image
Examples
Embodiment 1
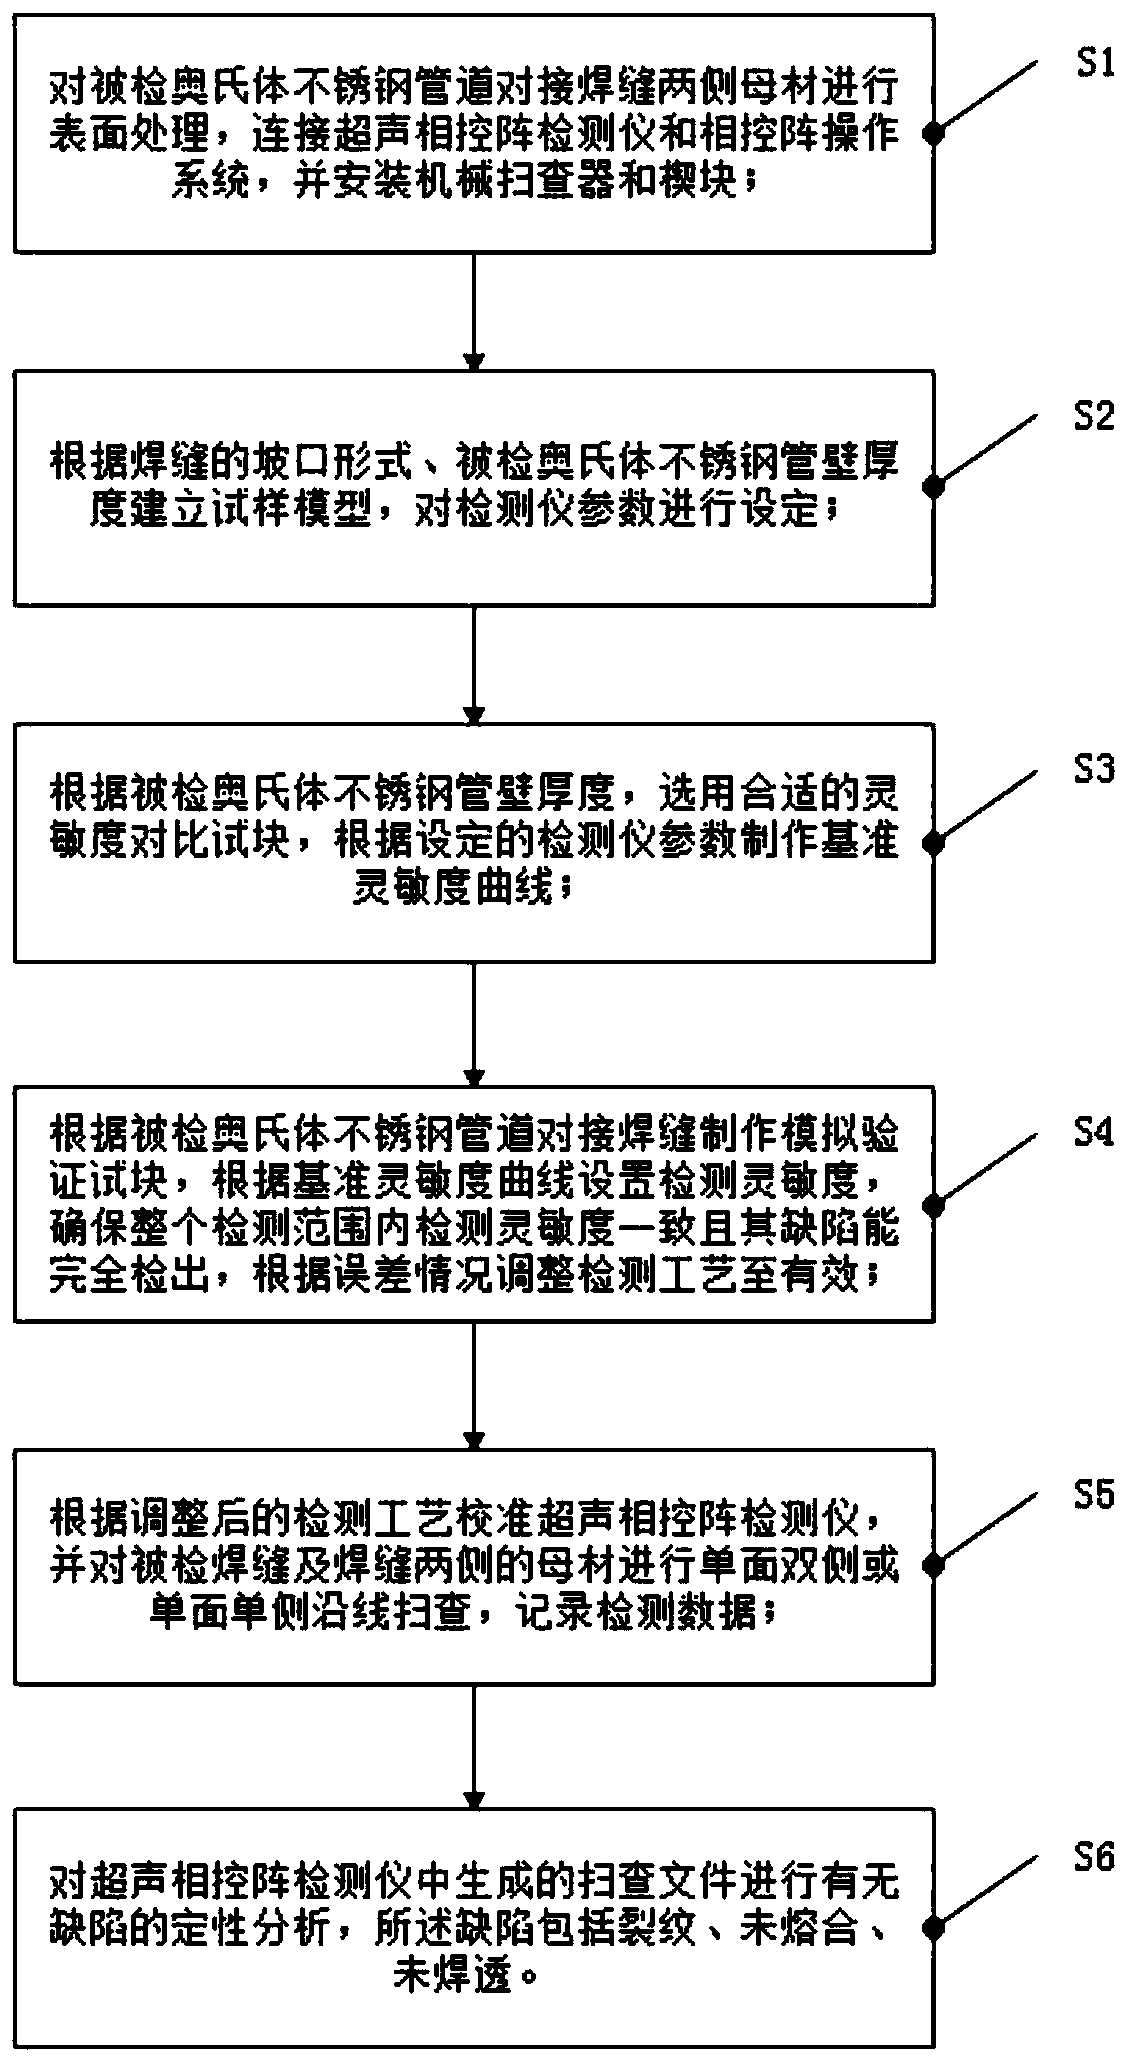
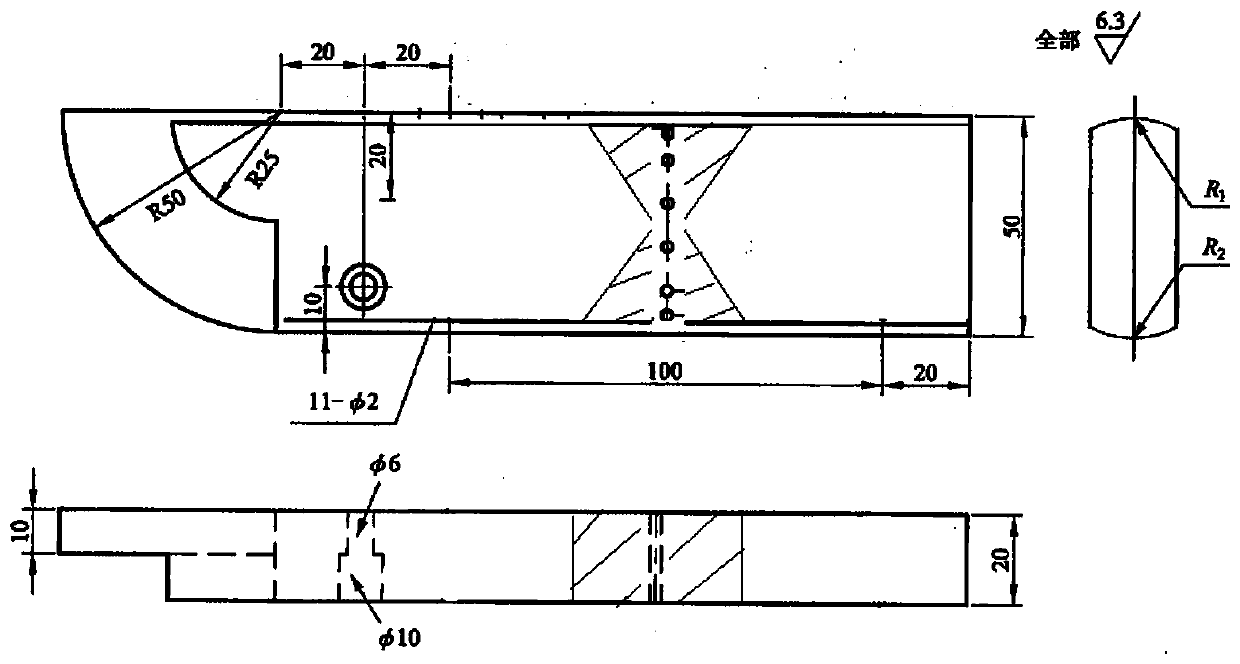
[0077] The butt weld of austenitic stainless steel pipes with a specification of Φ28x4mm is selected as the simulation verification test block. There are a total of 3 pipes, the material is 316L, and a certain number of defects are embedded in them, including cracks, incomplete fusion, incomplete penetration, air holes, strips, etc. There are five types of defects, including all defects that may occur during the welding process, and the detection surface is treated: the smoothness of the scanning surface of the probe movement does not exceed 12.5um, so that the probe is completely coupled and can move freely; for the weld surface, Irregular reinforcement is removed, and the transition with the base material is smooth; the couplant is a special couplant for stainless steel, and the halogen content is strictly controlled.
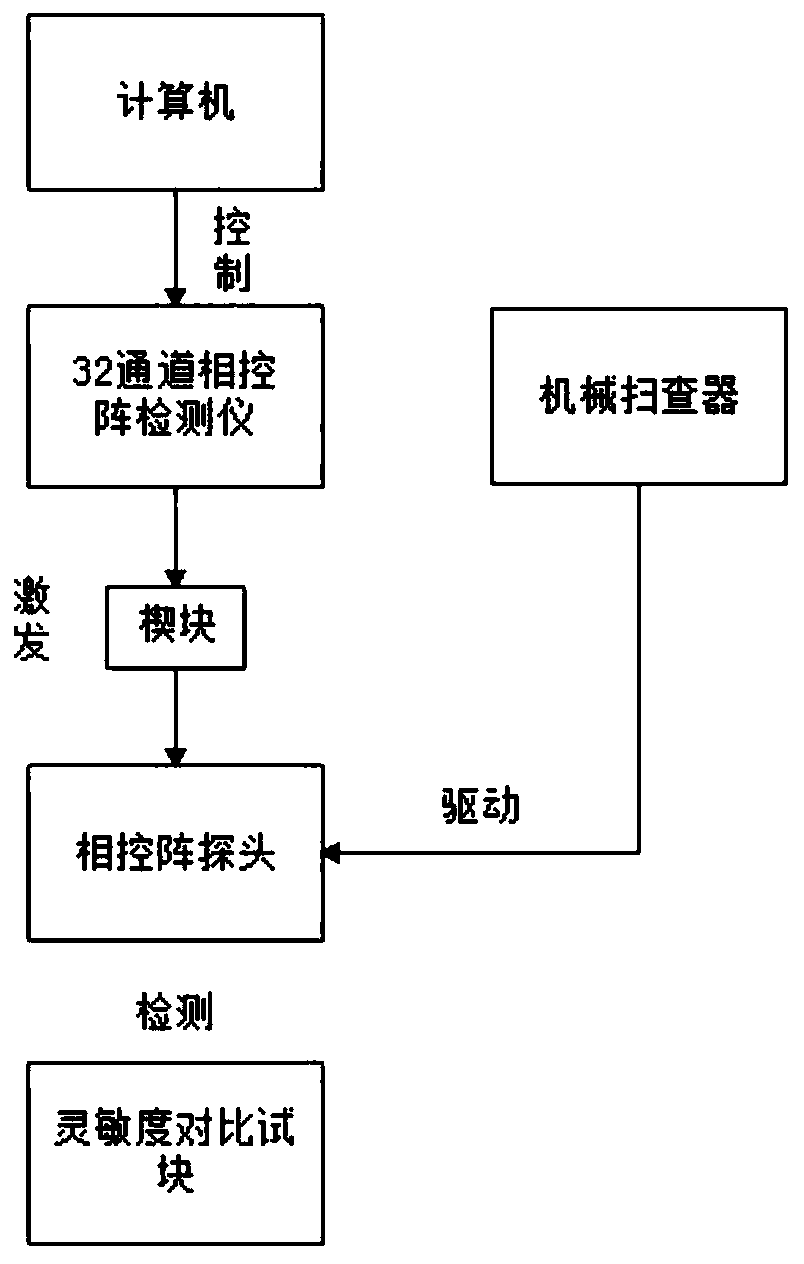
[0078]Choose GEKKO equipment as the phased array detector, and select 7.5S16-0.5*10 self-focusing probe, 5S16-0.5*10 self-focusing probe, 5DL16A25 (double Li...
Embodiment 2
[0083] After the successful process verification of the simulated verification test block through Example 1, the butt weld of the austenitic stainless steel pipe used in the actual nuclear power plant is detected. The detection range is the weld seam and the area of 13mm on both sides of the weld seam. Treatment of the detection surface: the smoothness of the scanning surface of the probe movement does not exceed 12.5um, so that the probe is completely coupled and can move freely; for the weld surface, the irregular reinforcement is removed to make a smooth transition with the base metal; the coupling agent is stainless steel Special couplant, strict control of halogen content.
[0084] Because the diameter of the austenitic stainless steel pipe butt weld to be tested is 25-500mm, and the wall thickness is 3.5mm-10mm, according to the process verified in Example 1, GEKKO equipment is selected as the phased array detector, and 7.5S16-0.5*10 is selected. Self-focusing probe, ...
PUM
| Property | Measurement | Unit |
|---|---|---|
| diameter | aaaaa | aaaaa |
| thickness | aaaaa | aaaaa |
| surface roughness | aaaaa | aaaaa |
Abstract
Description
Claims
Application Information
 - R&D
- Intellectual Property
- Life Sciences
- Materials
- Tech Scout
- Unparalleled Data Quality
- Higher Quality Content
- 60% Fewer Hallucinations
Browse by: Latest US Patents, China's latest patents, Technical Efficacy Thesaurus, Application Domain, Technology Topic, Popular Technical Reports.
© 2025 PatSnap. All rights reserved.Legal|Privacy policy|Modern Slavery Act Transparency Statement|Sitemap|About US| Contact US: help@patsnap.com


