A Correction Method of Absolute Error of Temperature Measuring Instrument
A temperature measuring instrument and absolute error technology, which is applied in the field of correction of the absolute error of the temperature measuring instrument, can solve the problems of reducing the real-time performance of temperature measurement values, slow data processing speed, and measurement wire error, etc., to achieve fast data processing speed and improve measurement Accuracy, effect of controlling hardware cost
- Summary
- Abstract
- Description
- Claims
- Application Information
AI Technical Summary
Problems solved by technology
Method used
Image
Examples
Embodiment 1
[0120] The thermocouple type is T-type (and the cold junction compensation temperature is 0°C), the measuring range is -170°C to 390°C, and the accuracy requirement is ±0.5°C.
[0121] In the factory calibration state of the temperature measuring instrument:
[0122] S1. Set the factory calibration parameters.
[0123] Set the type of thermocouple as T, the lower limit of the range range d L =-170 and upper limit d H =390, precision requirement value ε=0.5.
[0124] S2. Collecting and processing experimental point data.
[0125] Connect and adjust the signal generating device, and take 10 experimental points within the entire range range -170°C to 390°C (corresponding to -5.070mV to 20.255mV).
[0126] S2.1, sequentially and simultaneously collect the voltage true value U and voltage measurement value U of each experimental point X , the results are shown in Table 1.
[0127] S2.2. Calculate the true temperature T and measured temperature T of each experimental point X ...
Embodiment 2
[0175] The thermocouple type is T-type (and the cold junction compensation temperature is 0°C), the measuring range ranges from -170°C to 390°C, and the accuracy requirement is ±0.1°C.
[0176] In the factory calibration state of the temperature measuring instrument:
[0177] S1, try to reselect the threshold constant ΔL=0.4783 (i.e. Δl in Table 2 8 value) to meet the accuracy requirements.
[0178] S2. Calculate the fitting function expression ΔT when ΔL=0.4783 X =F(T).
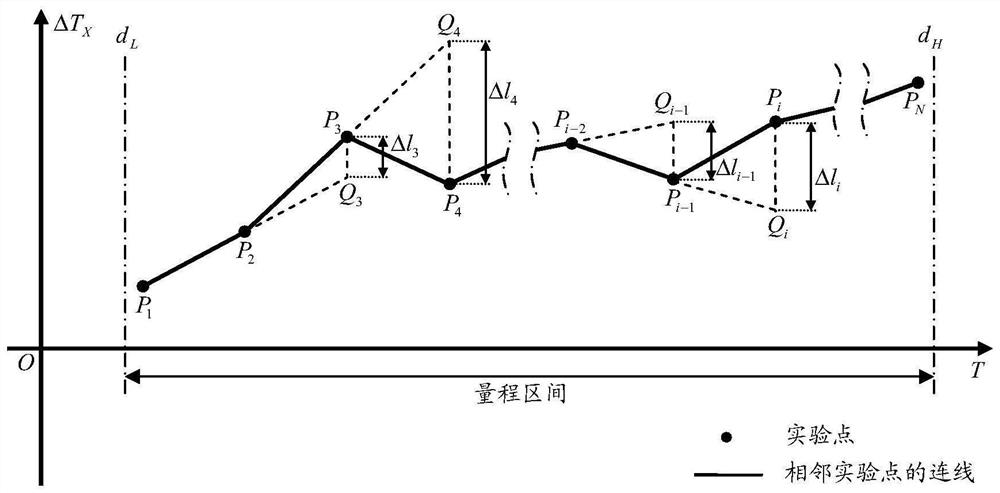
[0179] (1) Combining ΔL=0.4783 and Δl in Table 2 i The value of Δl can be known 3 ,Δl 4 ,Δl 6 ,Δl 7 ,Δl 8 Satisfy Δl i ≥ΔL. Now by [m1]=3, [m2]=4, [m3]=6, [m4]=7, [m5]=8, get [m1]-1=2, [m2]-1=3, [m3]-1=5, [m4]-1=6, [m5]-1=7, so point row P 1 ,P 2 ,P 3 ,P 5 ,P 6 ,P 7 ,P 10 Contains the first and last fit points of all line segments.
[0180] (2) Using the least squares method, from the point P 1 ,P 2 Fit the first piecewise straight line equation, from point P 2 ,P 3 Fit the second piec...
PUM
 Abstract
Description
Claims
Application Information


