Nondestructive testing method for thickness of coating layer of insensitive propellant
A non-destructive testing and cladding technology, applied in the direction of measuring devices, using wave/particle radiation, instruments, etc., to achieve the effect of measuring work efficiency
- Summary
- Abstract
- Description
- Claims
- Application Information
AI Technical Summary
Problems solved by technology
Method used
Image
Examples
Embodiment 1
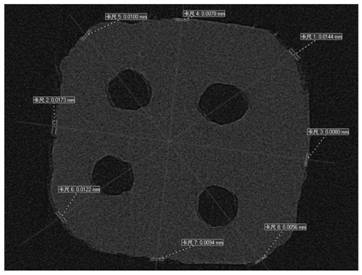
[0074] This embodiment provides a non-destructive testing method for the thickness of the coating layer of four-hole insensitivity coated propellant, the method includes the following steps:
[0075] Sample preparation: Take a four-hole insensitive coated propellant, fix it on the foam block with double-sided adhesive tape, and then place the foam block in the center of the sample stage in the microfocus X-ray computer tomography scanner;
[0076] Sample scanning: The micro-focus CT model used in this example is FF20 produced by Yikeshilang Company, using the micro-focus mode, setting the X-ray tube voltage to 70kV, the X-ray target power to 4.2W, and the ratio of FDD to FOD to 25 , the frame number of the detector is 1.0Hz, the rotation angle is 360°, and 720 samples of data are sampled, and then the surface vibration detector is used to receive the X-ray signal to obtain the two-dimensional DR data of the four-hole insensitivity-coated propellant;
[0077] Data reconstructio...
Embodiment 2
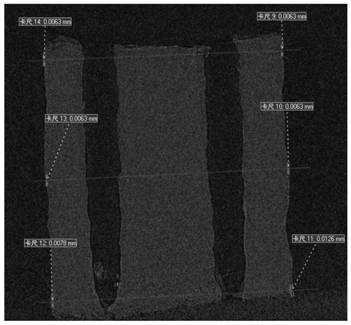
[0084] This embodiment provides a non-destructive testing method for the thickness of the coating layer of a seven-hole insensitive coated propellant, which includes the following steps:
[0085] Sample preparation: Take a seven-hole insensitive coated propellant, fix it on the foam block with double-sided adhesive tape, and then place the foam block in the center of the sample stage in the microfocus X-ray computer tomography scanner;
[0086] Sample scanning: The model of micro-focus CT used in this example is FF20 produced by Yikeshilang Company, using micro-focus mode, setting the X-ray tube voltage to 80kV, the X-ray target power to 4.8W, and the ratio of FDD to FOD to 10 , the frame number of the detector is 1.0Hz, the rotation angle is 360°, and 720 samples of data are sampled, and then the surface vibration detector is used to receive the X-ray signal to obtain the two-dimensional DR data of the seven-hole insensitivity coated propellant;
[0087] Data reconstruction a...
Embodiment 3
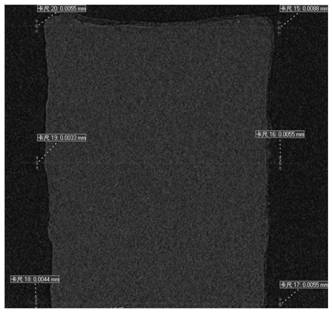
[0095] This embodiment provides a non-destructive testing method for the thickness of the coating layer of the 19-hole insensitivity coated propellant, which includes the following steps:
[0096] Sample preparation: Take a 19-hole insensitive coated propellant, fix it on the foam block with double-sided adhesive tape, and then place the foam block in the center of the sample stage in the micro-focus X-ray computer tomography scanner;
[0097] Sample scanning: The micro-focus CT model used in this example is FF20 produced by Yikeshilang Company, using the micro-focus mode, setting the X-ray tube voltage to 90kV, the X-ray target power to 6.3W, and the ratio of FDD to FOD to 5 , the frame rate of the detector is 1.5Hz, the rotation angle is 360°, and the sampling data is 720 pieces, and then the surface vibration detector is used to receive the X-ray signal to obtain the two-dimensional DR data of the 19-hole insensitivity-coated propellant;
[0098] Data reconstruction and ana...
PUM
| Property | Measurement | Unit |
|---|---|---|
| Thickness | aaaaa | aaaaa |
| Thickness | aaaaa | aaaaa |
| Thickness | aaaaa | aaaaa |
Abstract
Description
Claims
Application Information


