A two-step tempering process for improving the impact toughness of large nuclear power forgings
A technology of impact toughness and large forgings, which is applied in the field of two-step tempering process, can solve the problems that the impact absorption energy cannot be achieved and the impact performance is not enough to achieve the effect of improving impact toughness
- Summary
- Abstract
- Description
- Claims
- Application Information
AI Technical Summary
Problems solved by technology
Method used
Image
Examples
Embodiment 1
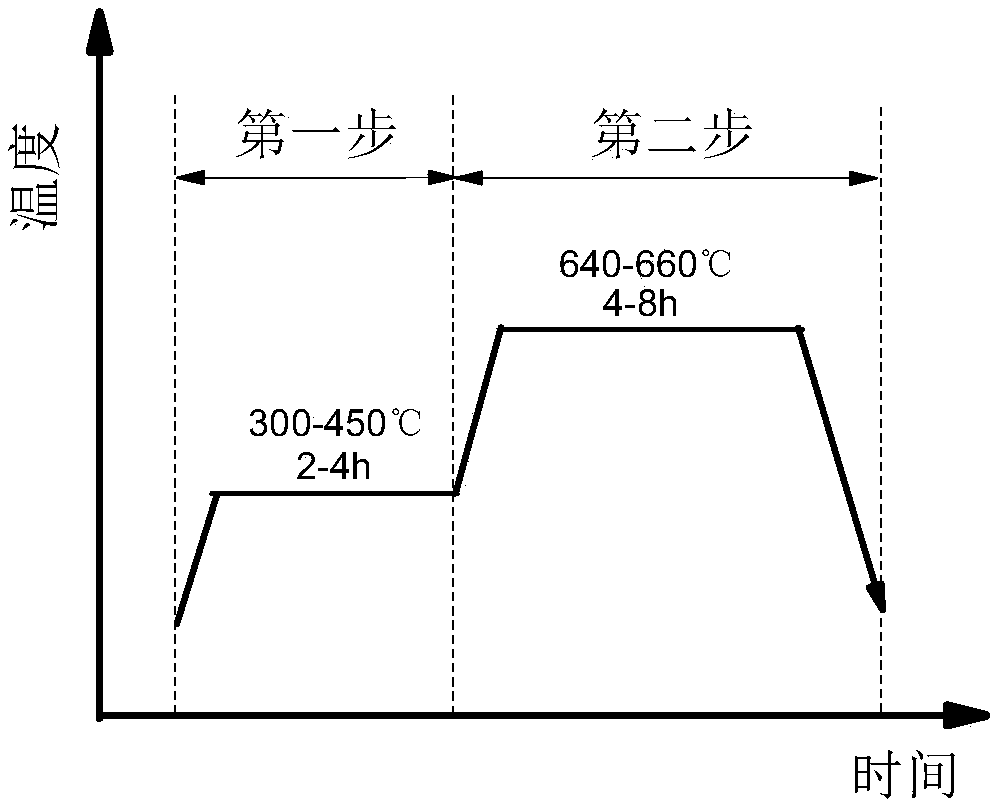
[0021] use as figure 1 The two-step tempering process shown treats large nuclear power forgings. The specific steps are:
[0022] The forging of the lower cylinder has an outer circle of φ4417mm, a wall thickness of 113mm, and a length of 4267mm. It is required that the hardness after tempering heat treatment should be higher than HB180, and the impact absorption energy at -21°C should be greater than 48J. After the workpiece is austenitized and kept at 890°C, it is water-cooled and quenched; tempering adopts a two-step tempering process: first hold at 400°C for 2 hours, then raise the temperature to 650°C for 4 hours, and cool to room temperature with the furnace. Samples were taken at the specified position to test its hardness and impact toughness. The measured hardness was HB202, the impact absorption energy was 79, 95, and 118J respectively, and the average value was 97.33J, meeting the technical requirements.
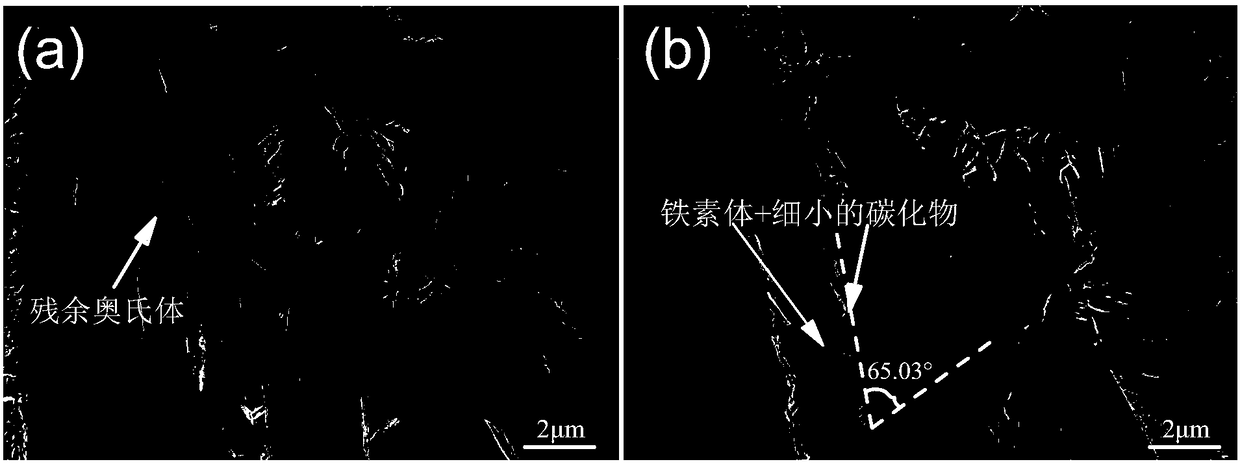
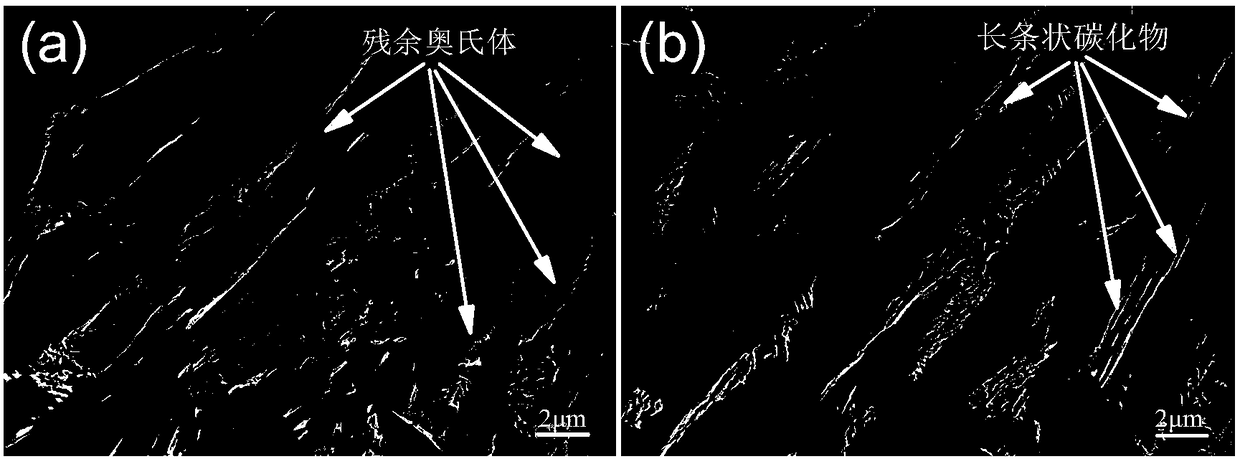
[0023] The structure of the forging before and after tempe...
Embodiment 2
[0028] The forging of the lower cylinder has an outer circle of φ4417mm, a wall thickness of 113mm, and a length of 4267mm. After tempering and heat treatment, the hardness is higher than HB180, and the impact absorption energy at -21°C is greater than 48J. After the workpiece is austenitized and kept at 890°C, it is water-cooled and quenched; tempering adopts a two-step tempering process: first hold at 350°C for 2 hours, then raise the temperature to 650°C for 4 hours, and cool to room temperature with the furnace. Samples were taken at the specified position to test its hardness and impact toughness. The measured hardness was HB200, the impact energy absorbed was 72, 90, and 128J respectively, and the average value was 96.67J, meeting the technical requirements.
Embodiment 3
[0030] For the cone forging, the outer circle at one end is φ5626mm, the outer circle at the other end is φ4467mm, the wall thickness is 168mm, and the length is 3187mm. After the workpiece is austenitized and kept at 890°C, it is water-cooled and quenched; tempering adopts a two-step tempering process: first hold at 450°C for 2 hours, then raise the temperature to 660°C for 6 hours, and cool to room temperature with the furnace. Samples were taken at the specified position to test its hardness and impact toughness. The measured hardness was HB193, the impact absorption energy was 97, 105, and 86J respectively, and the average value was 96J, which met the technical requirements.
PUM
| Property | Measurement | Unit |
|---|---|---|
| hardness | aaaaa | aaaaa |
| hardness | aaaaa | aaaaa |
| impact absorption energy | aaaaa | aaaaa |
Abstract
Description
Claims
Application Information


