Method for measuring impurity elements arsenic, tin antimony in ferromolybdenum
A technology of ferromolybdenum and elements, applied in the direction of material excitation analysis, thermal excitation analysis, etc., can solve the problems of result influence, long cycle, product scrapping, etc., and achieve the effect of simple pretreatment process
- Summary
- Abstract
- Description
- Claims
- Application Information
AI Technical Summary
Problems solved by technology
Method used
Image
Examples
preparation example Construction
[0024] Preparation of standard series solutions: Accurately weigh 5 parts of pure iron 30.0mg~50.0mg and pure molybdenum 50.0mg~70.0mg, so that the sum of the two is close to 100mg, and iron and molybdenum have appropriate content gradients. Add 0.0500ml-1.600ml of arsenic diluted standard solution, 0.010ml-1.000ml of tin diluted standard solution, and 0.010ml-1.000ml of antimony diluted standard solution to make arsenic, tin, and antimony have appropriate content gradients. Add 20ml of hydrochloric acid-nitric acid mixed acid, heat at a temperature not higher than 120°C, and blow water at the right time to replenish the lost water. After the sample is completely dissolved, cool down, dilute with water to 100ml, and shake well.
[0025] Preparation of ferromolybdenum control sample solution: When the content of one or more elements in the sample obviously exceeds the content of the standard series solution, prepare a control sample solution with an appropriate composition acco...
Embodiment 1
[0028] Embodiment 1: the situation that individual sample detection finds inferior molybdenum iron:
[0029] The upper limit of the calibration curve for arsenic is 0.16% and detections in production clearly outside that range: shows about 1% arsenic, is the direct read reliable? For this extreme situation, according to the sample display results, a control sample solution of 40% iron, 58% molybdenum, and 1.00% arsenic can be prepared for quality control. , the monitoring solution for measuring arsenic 1.00% shows a value of 0.95%, which is already low, so the sample showing 1.02% arsenic in the sample should actually be reported as the calibration result of 1.07%:
[0030] 1.00%÷0.95%×1.02%=1.07%
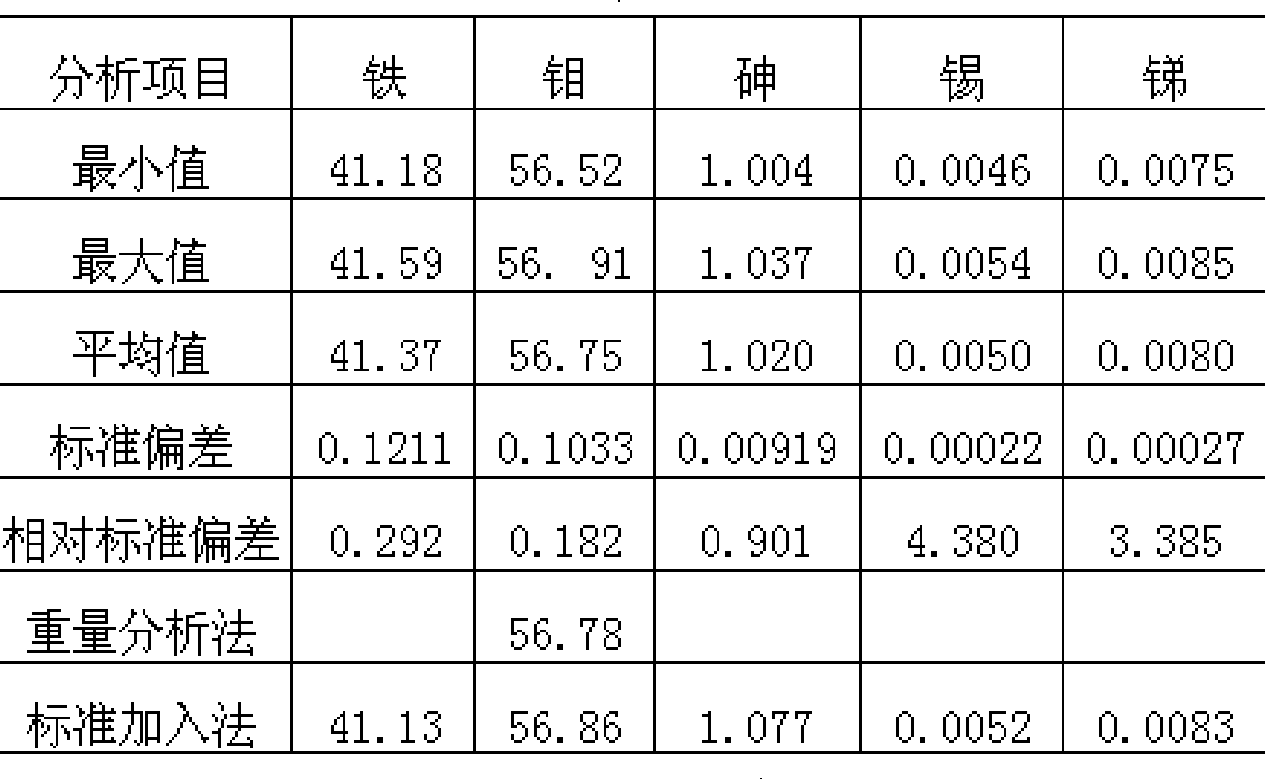
[0031] Table 1 Reproducibility and accuracy of analysis of low-quality ferromolybdenum samples (w%, n=10)
[0032]
Embodiment 2
[0033] Embodiment 2: The situation that batches of samples detect and find inferior molybdenum ferromolybdenum:
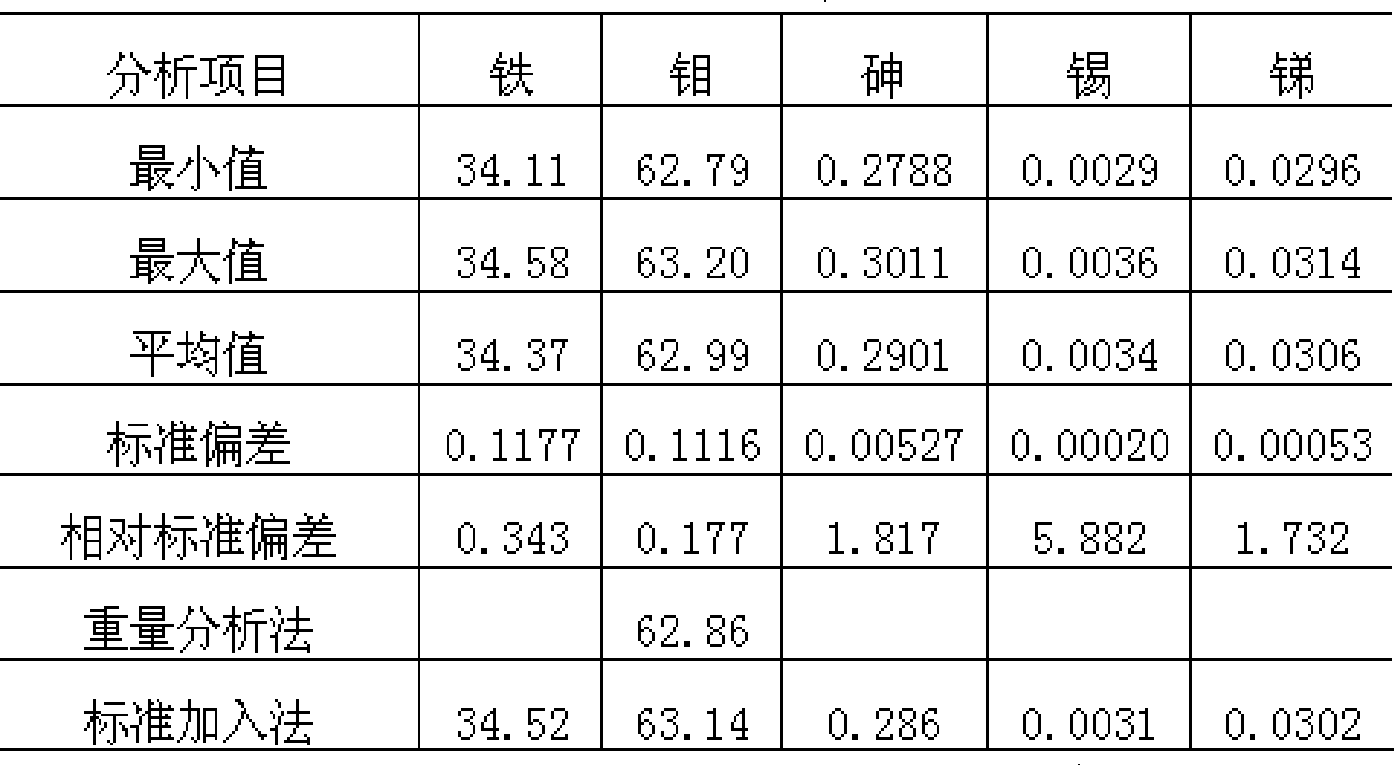
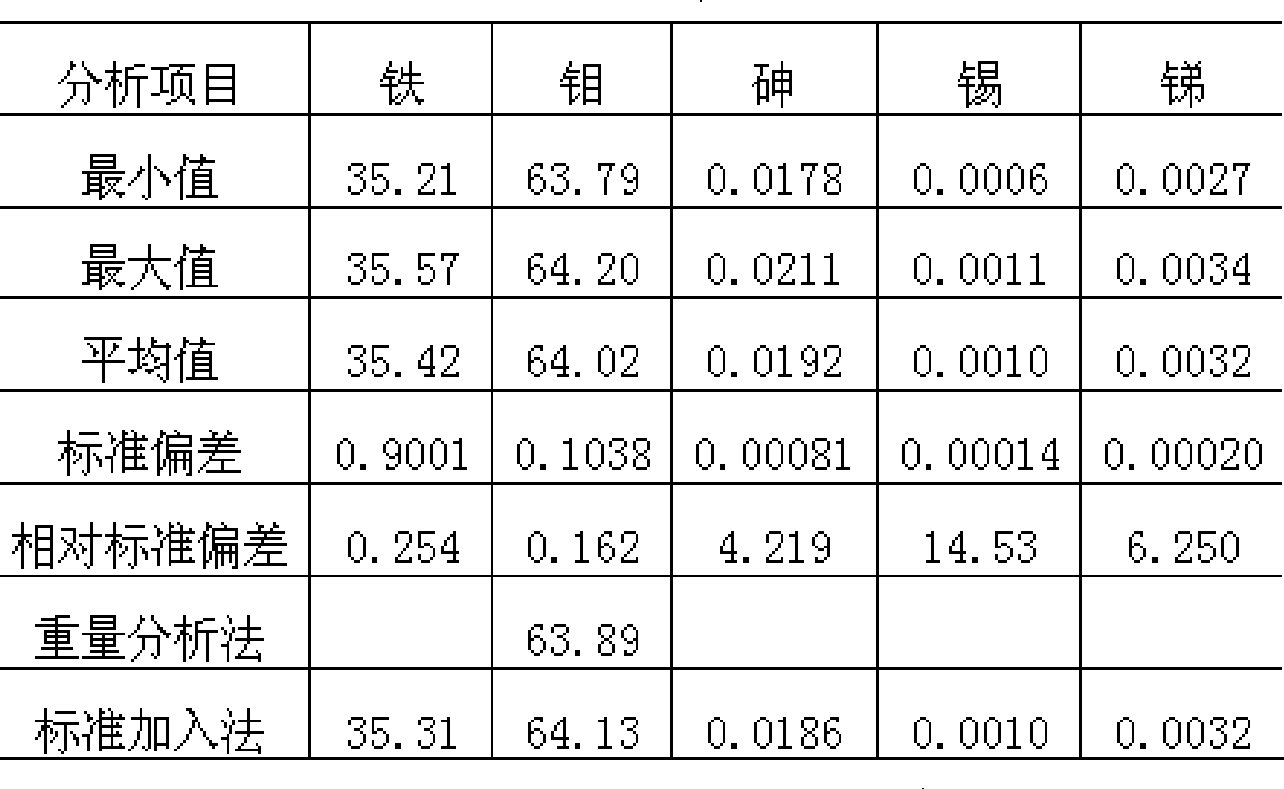
[0034] The upper limit of the calibration curve for arsenic is 0.16%, but the batch test results in production obviously exceed this range: inferior ferromolybdenum shows arsenic 1.02%, 0.28%, etc., is the result of direct reading reliable? When this extreme situation occurs, according to the sample display results such as iron 41.30%, molybdenum 56.70%, arsenic 1.02%, tin 0.005%, antimony 0.008%, and iron 34.38%, molybdenum 62.97%, arsenic 0.28%, tin 0.003% , antimony 0.030%, etc., add a standard solution of 40% iron, 58% molybdenum, and 1.00% arsenic, and calibrate the instrument together with the original standard solution. For samples with data such as 0.27%, the arsenic display value after adding a standard solution to recalibrate is 1.07%, 0.28%, etc., and the analysis results can be read directly.
[0035] Table 2 The reproducibility and accuracy of random ...
PUM
 Abstract
Description
Claims
Application Information


