Glass photoelastic constant measuring device and measuring method
A measuring device and glass technology, applied in the measuring device, using a stable bending force to test the strength of the material, and using a stable tension/pressure to test the strength of the material, etc. Measurement, large thickness range, and the effect of improving measurement accuracy
- Summary
- Abstract
- Description
- Claims
- Application Information
AI Technical Summary
Problems solved by technology
Method used
Image
Examples
example 1
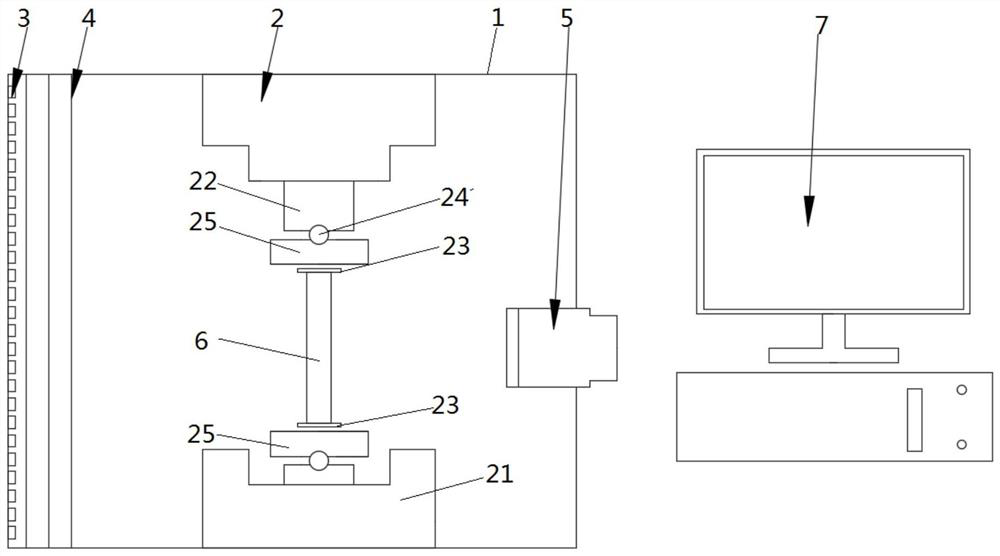
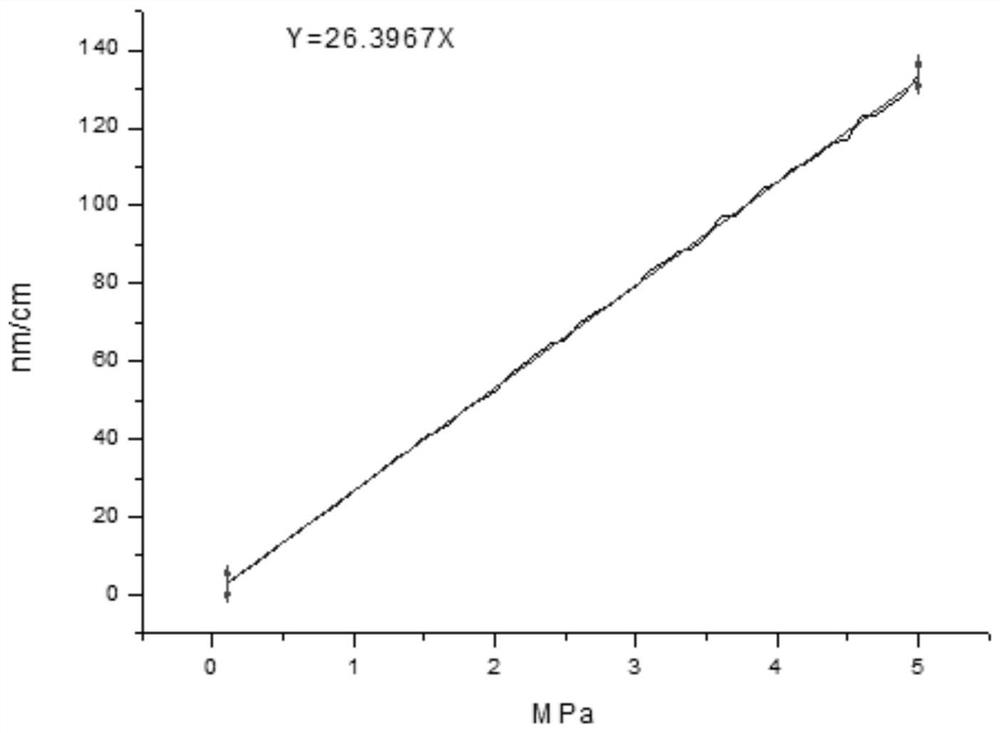
[0061] Take soda-lime transparent glass without bubbles, streaks, and obvious stress defects, prepare the glass into a glass sample with a size of 10mm*10mm*30mm, polish each side, and then anneal the glass sample at 550°C deal with. After annealing, the glass sample is placed on the pressure loading system of the glass photoelastic constant measuring device, and the Shore hardness of the buffer gasket is selected as 60HRC. Start the computer software, set the light source parameter to 450nm, and set the pressure loading range to 0-600N; the software automatically controls the pressure loading and phase difference image capture, and fits the phase difference and pressure curve as figure 2 As shown, after data processing, the photoelastic constant of the glass material is 26.40nm / cm / MPa.
example 2
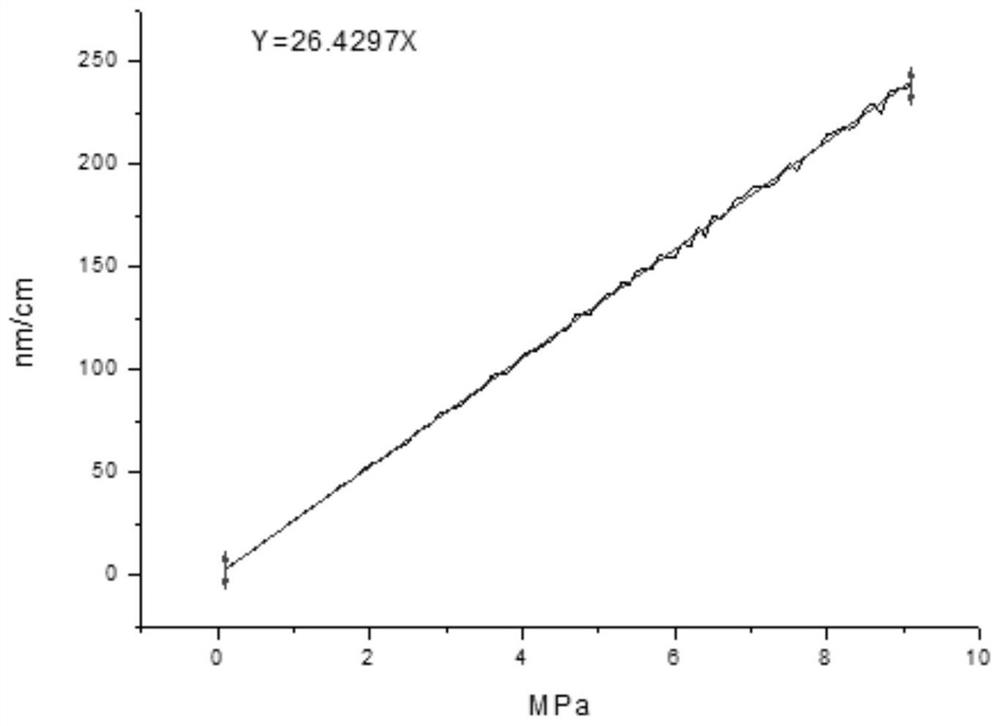
[0063] Take the soda-lime transparent glass with the same material as Example 1 without air bubbles, streaks, and obvious stress defects, and prepare the glass into a glass sample with a size of 5mm*5mm*30mm. The samples were annealed at 550°C. After annealing, the glass sample is placed on the pressure loading system of the glass photoelastic constant measuring device, and the Shore hardness of the buffer gasket is selected as 100HRC. Start the computer software, set the light source parameter to 630nm, set the pressure loading range to 0-250N, the software automatically controls the pressure loading and phase difference image capture, and fits the phase difference and pressure curve as image 3 As shown, after data processing, the photoelastic constant of the glass material is 26.43nm / cm / MPa.
example 3
[0065] Take the soda-lime transparent glass with the same material as Example 1 without air bubbles, streaks, and obvious stress defects, and prepare the glass into a glass sample with a size of 10mm*1.1mm*20mm. The samples were annealed at 550°C. After annealing, the glass sample is placed on the pressure loading system of the glass photoelastic constant measuring device, and the Shore hardness of the buffer gasket is selected as 80HRC. Start the computer software, set the light source parameter to 590nm, set the pressure loading range to 0-45N, the software automatically controls the pressure loading and phase difference image capture, and fits the optical path difference and pressure curve as Figure 4 As shown, after data processing, the photoelastic constant of the glass material is 26.41nm / cm / MPa.
PUM
| Property | Measurement | Unit |
|---|---|---|
| Wavelength | aaaaa | aaaaa |
| Shore hardness | aaaaa | aaaaa |
| Shore hardness | aaaaa | aaaaa |
Abstract
Description
Claims
Application Information


