Inspection apparatus and quality control system for surface mounting line, and record medium
An inspection device, surface-mounted technology, applied to auxiliary devices, measuring devices, general control systems, etc., to achieve the effect of improving straight-line rate, preventing the omission of unqualified, and improving the judgment accuracy
- Summary
- Abstract
- Description
- Claims
- Application Information
AI Technical Summary
Problems solved by technology
Method used
Image
Examples
no. 1 approach >
[0045]
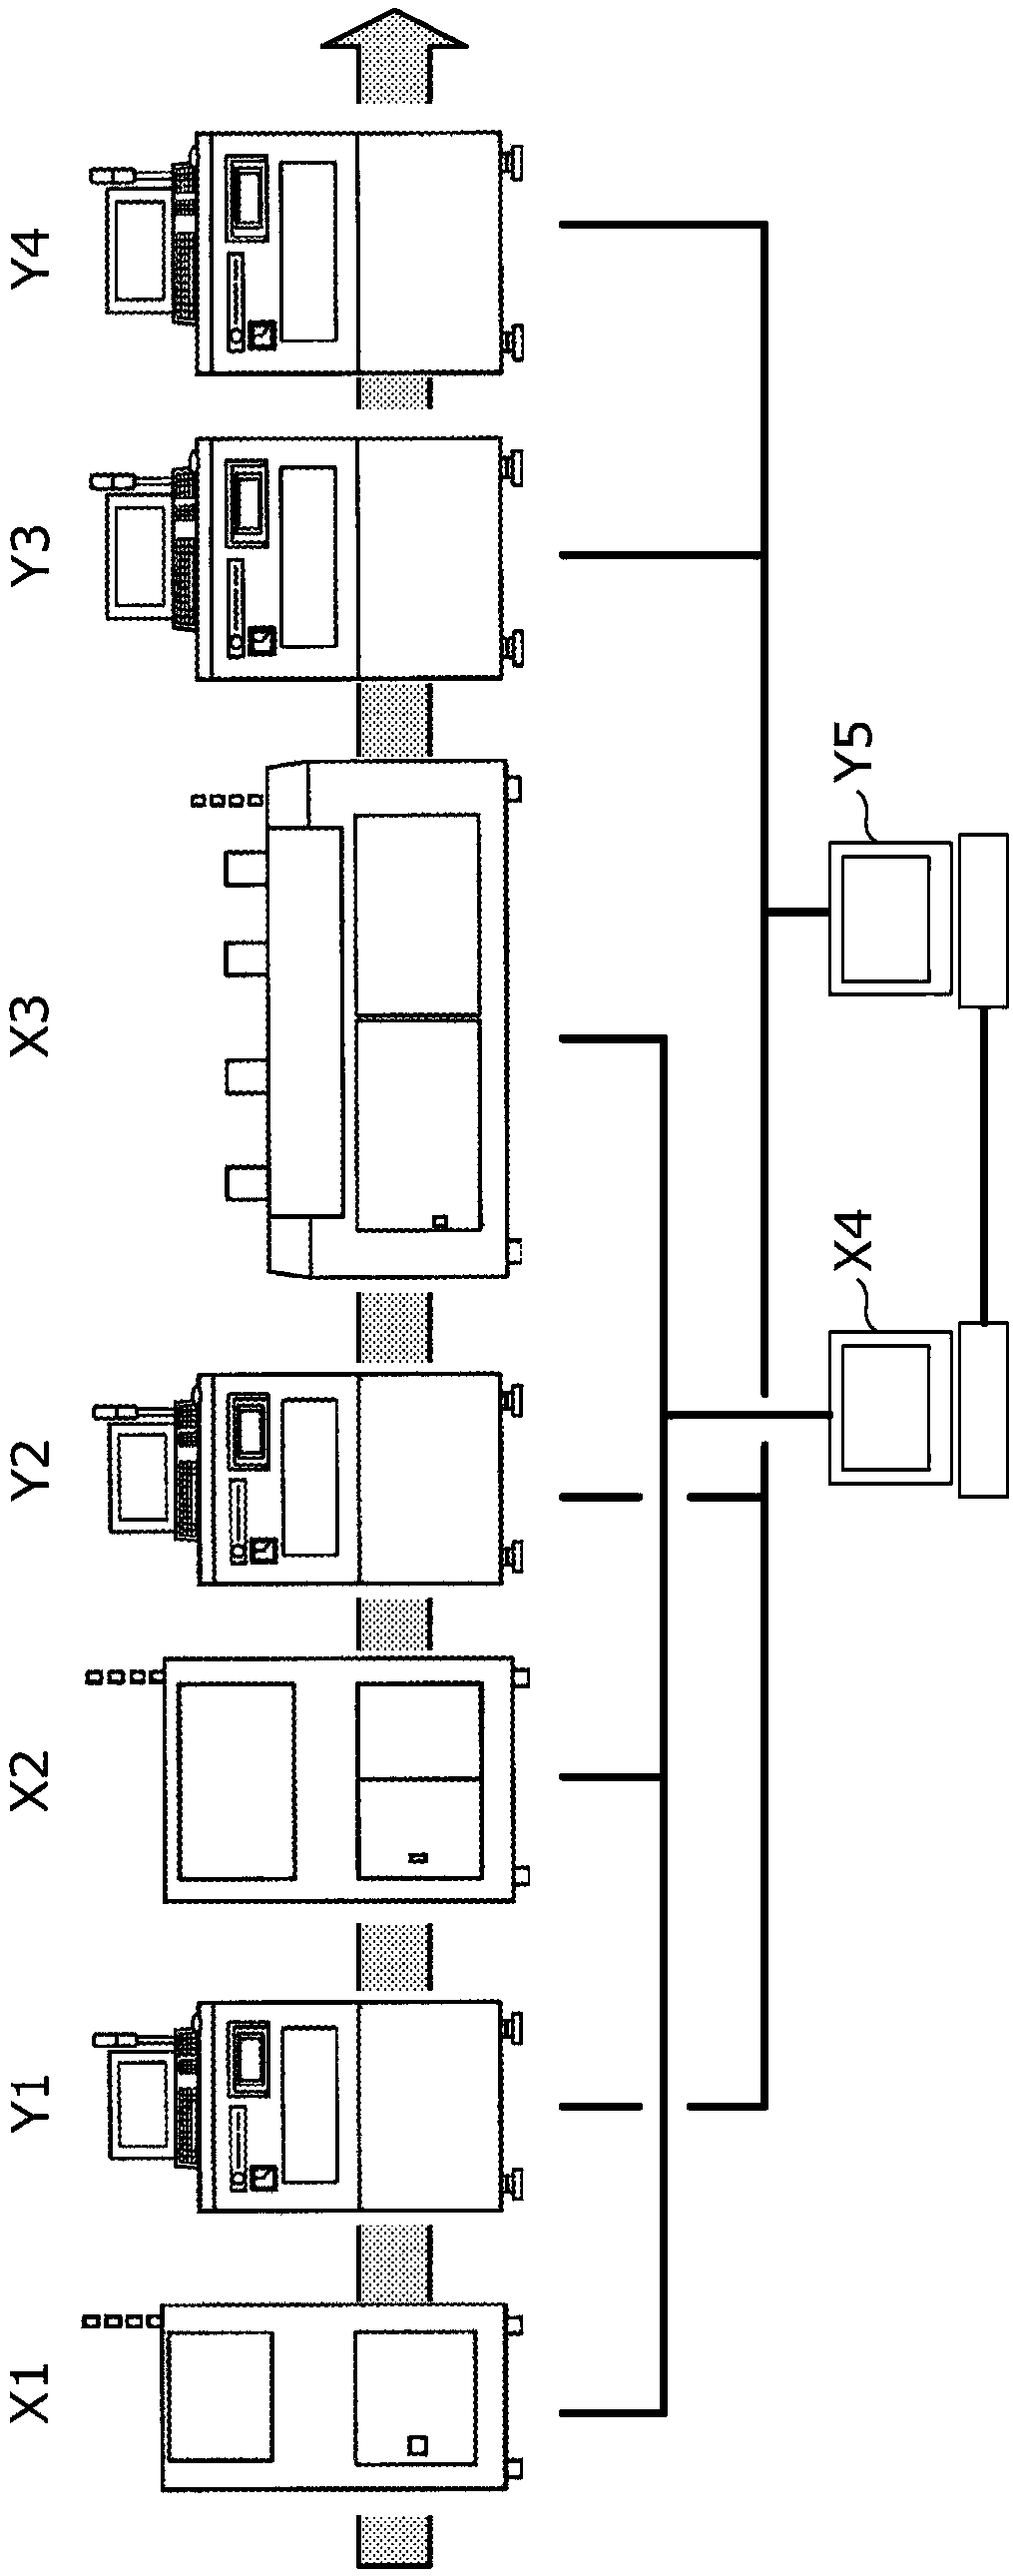
[0046] figure 1 A configuration example of a production system of a surface mount line for printed circuit boards is schematically shown. Surface Mount Technology (SMT) is a technology for soldering electronic components to the surface of a printed circuit board. The surface mount line is mainly composed of three processes: solder printing, component placement, and reflow (solder deposition).
[0047] Such as figure 1 As shown, in the surface mount line, a solder printing device X1 as a manufacturing device, a chip mounter X2, and a reflow furnace X3 are installed in this order from the upstream side. The solder printing apparatus X1 is an apparatus for printing paste-like solder on electrode portions (referred to as pads) on a printed circuit board by screen printing. The mounter X2 is a device for picking up an electronic component to be mounted on a board and placing the component on the solder paste there, and is also called a chip mounter. The reflow furna...
no. 2 approach >
[0108] In the process improvement process of the above-mentioned first embodiment, the analysis device Y5 infers the cause of the low quality based on the inspection data, and directly or indirectly corrects the control parameters of the manufacturing device. However, detailed information on the structure and state of the manufacturing equipment is required to identify where the problem exists in the manufacturing equipment, so it may be difficult to identify failures only on the side of the quality control system (inspection equipment Y1 to Y4 and analysis equipment Y5) and the real cause of low quality, or to determine the control parameters of the manufacturing unit. In particular, when the supplier of the manufacturing equipment and the supplier of the quality control system are different, it is often unrealistic for the quality management system to acquire detailed internal information from the manufacturing equipment or write control parameters into the manufacturing equi...
no. 3 approach >
[0149] In the first and second embodiments described above, the process in which the analysis device Y5 performs process improvement on each manufacturing device based on the inspection data has been described. In the third embodiment, a process in which the analysis device Y5 optimizes the inspection criteria used in each inspection device based on the inspection data will be described. The inspection standard is a judgment standard (for example, a threshold value) for judging whether a good product or a non-satisfactory product is used in each inspection item. If the inspection standard is set too loosely, there will be more unqualified omissions. Conversely, if the inspection standard is set too strictly, the straight line rate will decrease. Therefore, it is preferable to set the inspection standard appropriately.
[0150] Inspection criteria used in post-solder printing inspection or post-installation inspection are usually determined for each process. However, for examp...
PUM
 Abstract
Description
Claims
Application Information


