Structural component for automobile, two-wheeled vehicle or railcar excellent in impact-absorption property, shape fixability and flange cuttability, and method for producing the same
a technology for structural components and automobiles, applied in the direction of roofs, magnetic bodies, buses, etc., can solve the problems of reducing material thickness alone, affecting the safety performance of collisions, and affecting the fuel economy of passenger cars, etc., and achieves shape fixability and flange cuttability, and excellent impact absorption properties.
- Summary
- Abstract
- Description
- Claims
- Application Information
AI Technical Summary
Benefits of technology
Problems solved by technology
Method used
Image
Examples
example 1
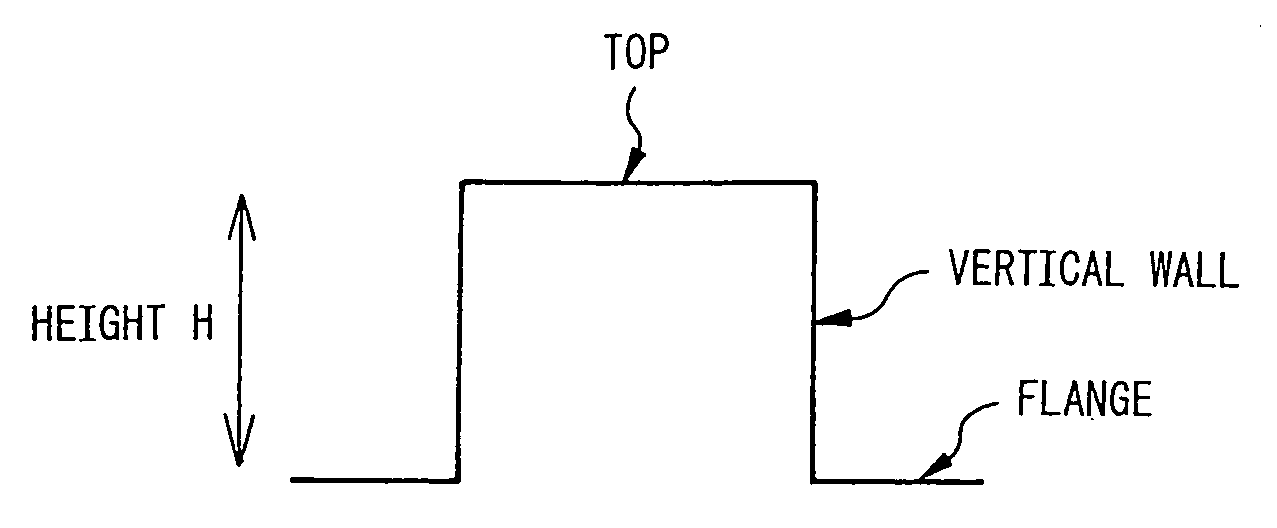
[0060]The invention is concretely explained with reference to examples in the following. Steel sheets (2.0 mm thickness) of the chemical compositions shown in Table 1 were shaped into hat-shapes at room temperature under various shaping conditions. A forming test was conducted under the following conditions:
[0061]Sample size: 50 mm×260 mm
[0062]Punch: Angular, Width=80 mm, Chamfer (R)=5 mm
[0063]Die: Angular, Width=85 mm, Chamfer (R)=5 mm
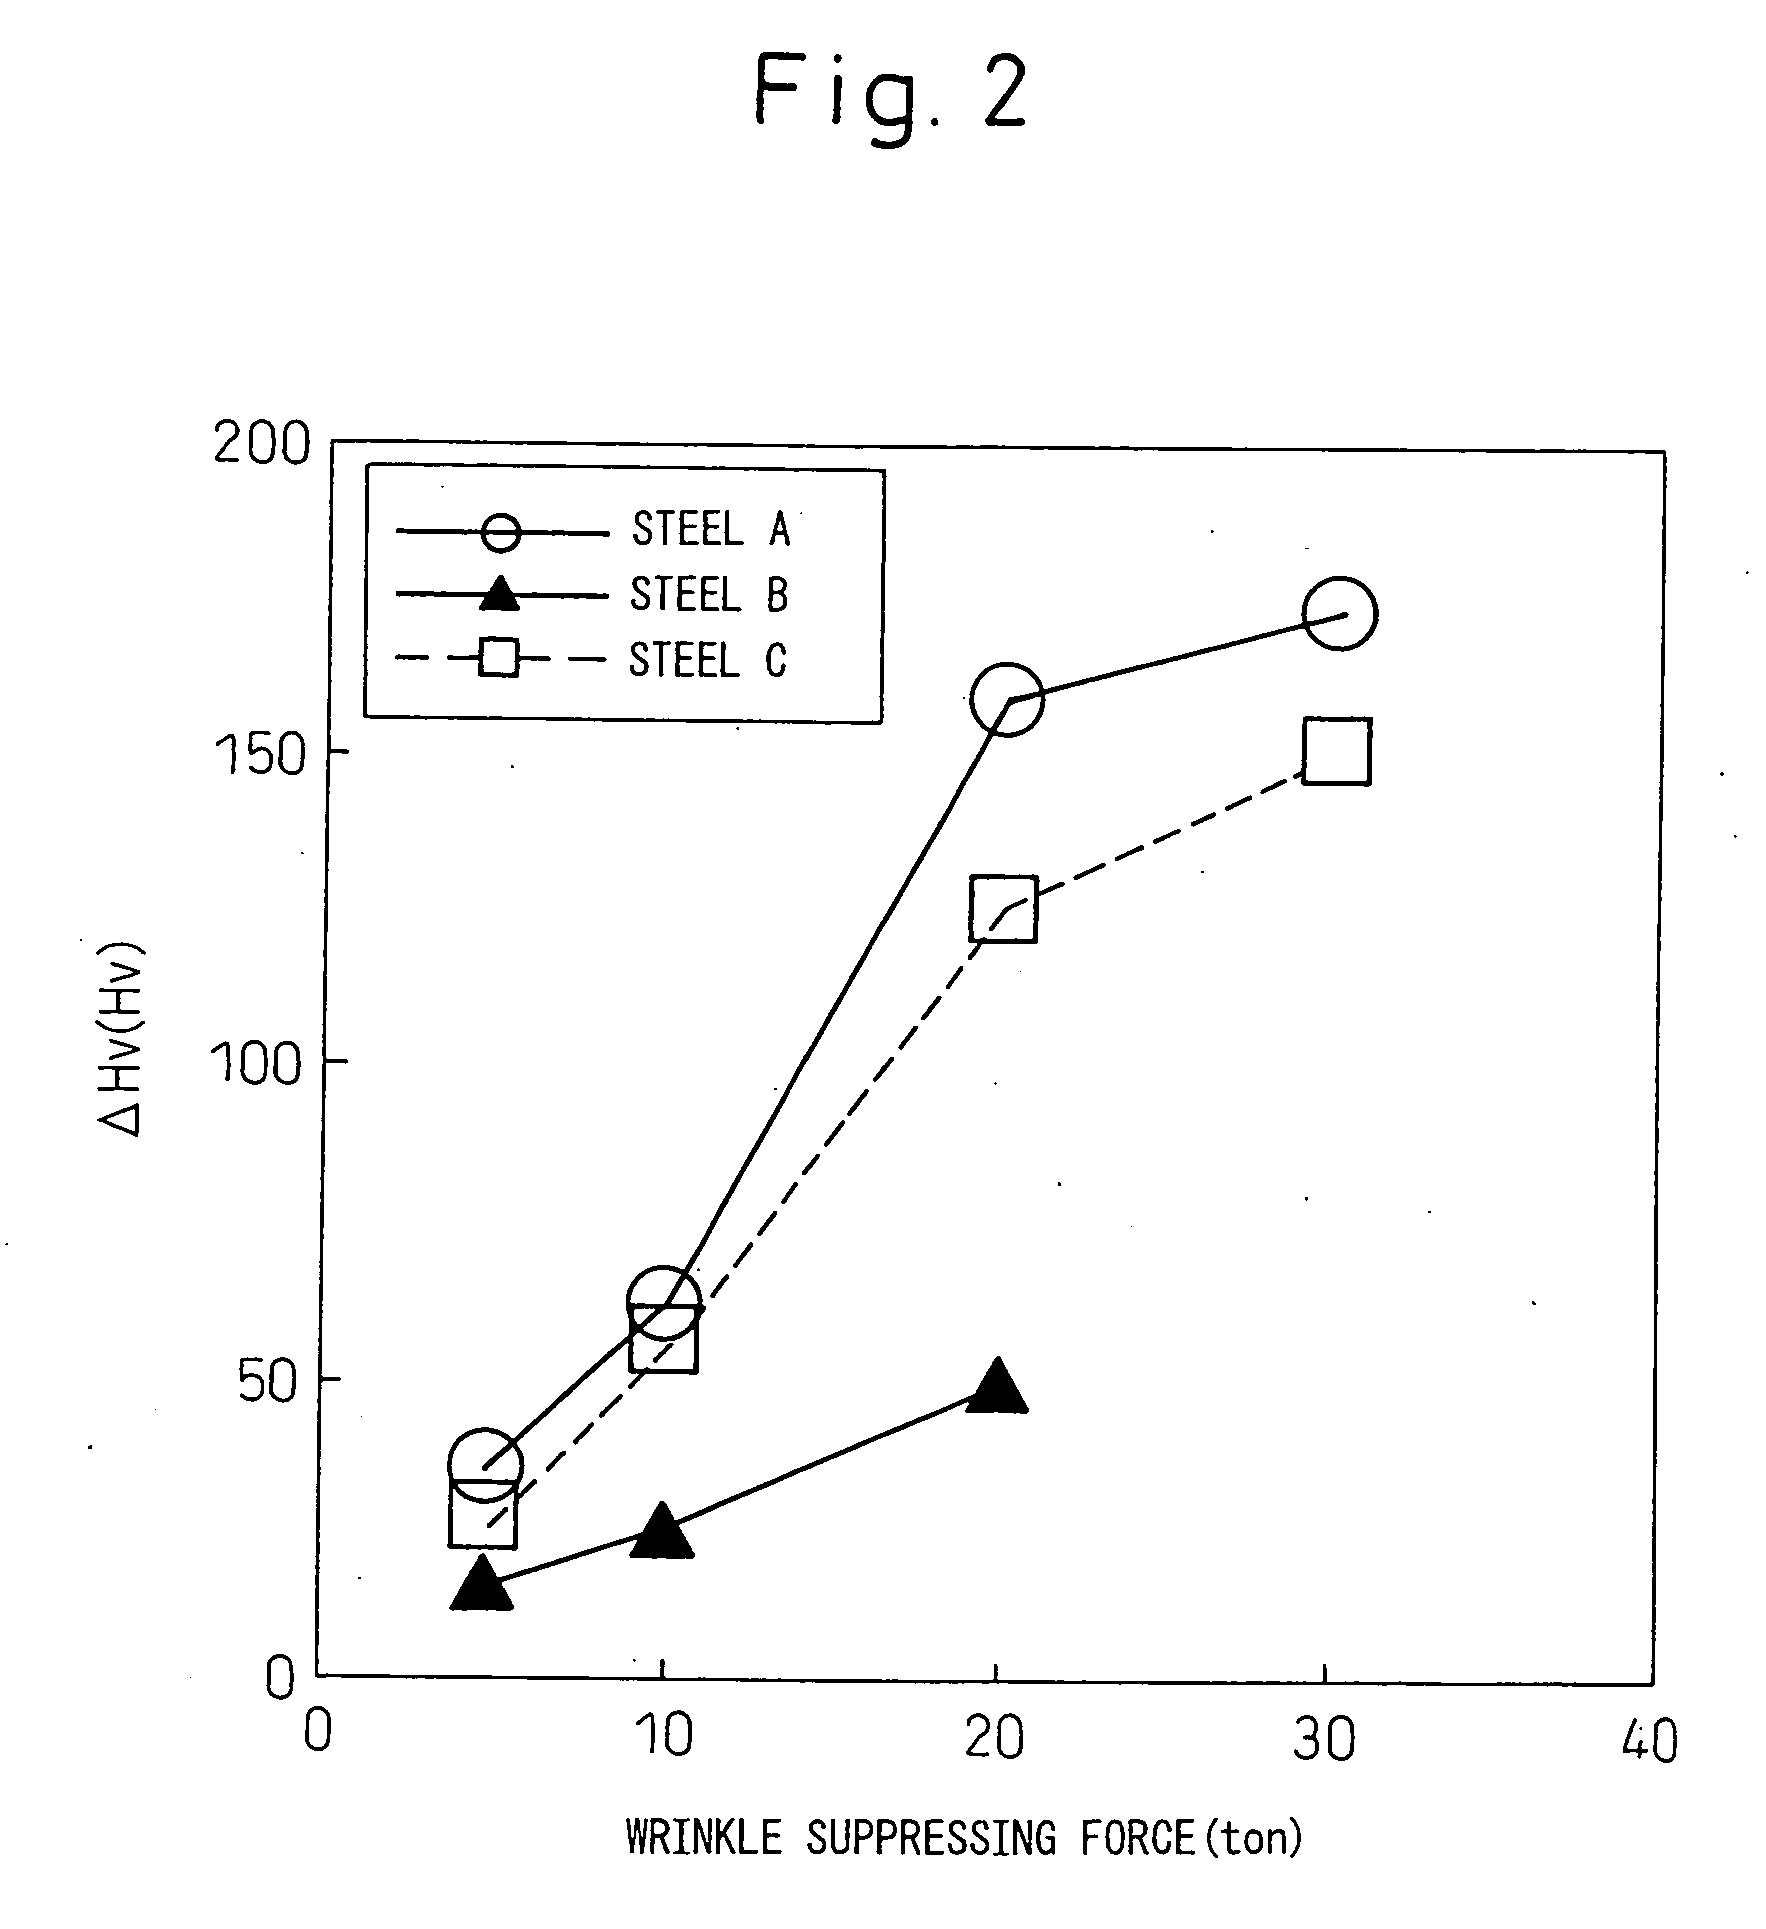
[0064]Wrinkle suppressing force: Varied as necessary
[0065]Forming height: 40 mm
[0066]Lubricant: Petroleum lubricant producing coefficient of dynamic friction of about 0.15 applied to both sides of steel sheet
[0067]The difference ΔHv between the hardnesses of the vertical wall center regions and the distal ends of the flanges of each formed sample was examined. The difference ΔHv in cross-section hardness was measured by the method explained earlier. Shape fixability was determined by measuring the shape of the obtained hat-shape sample with a 3-dimens...
example 2
[0072]The foregoing forming test was carried out on Steel H and Steel K of Table 1 under various forming temperatures. The difference ΔHv between the hardnesses of the vertical wall center regions and the distal ends of the flanges of each sample was examined. The shape fixability was also investigated.
[0073]The results are shown in Table 3. In all of Steels H, K and M, it was found that the hardness difference ΔHv between the center regions of the vertical walls and the distal ends of the flanges increased with increasing difference ΔT between the punch temperature Tp and the die temperature Td (ΔT=Td−Tp), and that when the punch temperature was lower than the die temperature by 10° C. or greater, the hardness difference was ΔHv≧50.
TABLE 3FlangeVertical wallFlangeferrite +ferrite +Vertical wallPunchDieTempHardnessWallaustenitemartensitemartensitecenter regiontemptemp.differencedifferencewarpphase ratiophase ratiophase ratiostrainTpTdΔTΔHv1 / ρSteel(%)(%)(%)(%)(° C.)(° C.)(° C.)(Hv)(1...
PUM
| Property | Measurement | Unit |
|---|---|---|
| temperature | aaaaa | aaaaa |
| lengths | aaaaa | aaaaa |
| lengths | aaaaa | aaaaa |
Abstract
Description
Claims
Application Information


